Using Meeting Types
Builder Prime streamlines your meetings with customizable types, automated tasks, and accurate reports.
Builder Prime allows you to create custom meeting types for better organization, meeting-specific automations, and accurate reports. The information below explains how to create a new meeting type and how the available settings affect reports, results, and the calendar.
Add Meeting Types
To set up different meeting types, navigate to Admin > Configure > Meetings. Click + New Meeting Type to create a custom meeting option that can be selected when scheduling appointments. If there is a meeting type that will be used most often, you can make this the default type.
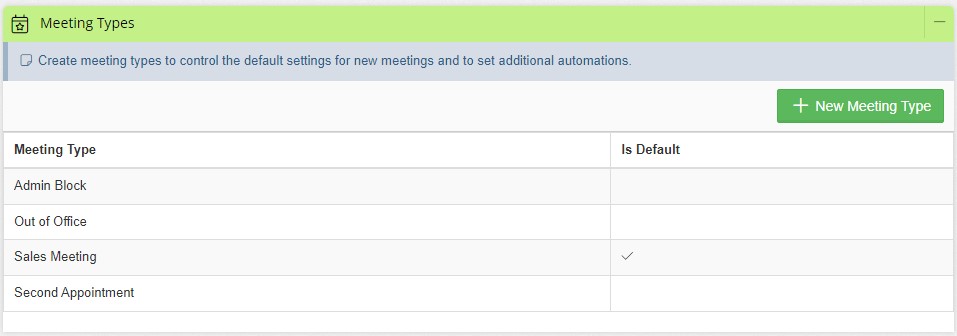
Meeting Type Settings
Clicking into a meeting type will allow you to update the default settings for this event.
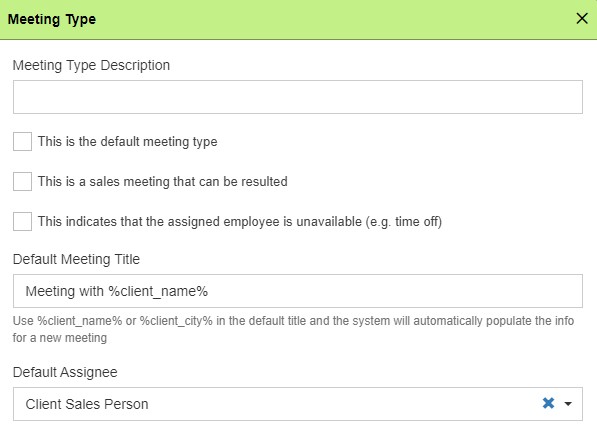
- Meeting Type Description: The description will show up in the meeting notes.
- This is the default meeting type: Check this box if you'll be using this as the primary type for meetings and want this to automatically populate when scheduling meetings.
- This is a sales meeting that can be resulted: This will allow the sales team to result their meetings, and results can be reviewed in various reports. For more on setting results, check HERE.
- This indicates that the assigned employee is unavailable: If an employee is out of office or unavailable for meetings, you can create a meeting type to block the calendar.
- Default Meeting Title: Insert variables to include the client's name and/or city in the meeting title. Variables included are %client_name% and %client_city%
- Default Assignee: You can select the default employee for the meeting. Options include the assigned sales person, the currently logged-in user setting the appointment, or a specific employee.
The middle portion of the meeting type settings allow you to control what data is included on the calendar event. This data will show in Builder Prime as well as any integrated calendar. Click HERE for information on connecting a Google or Outlook calendar.
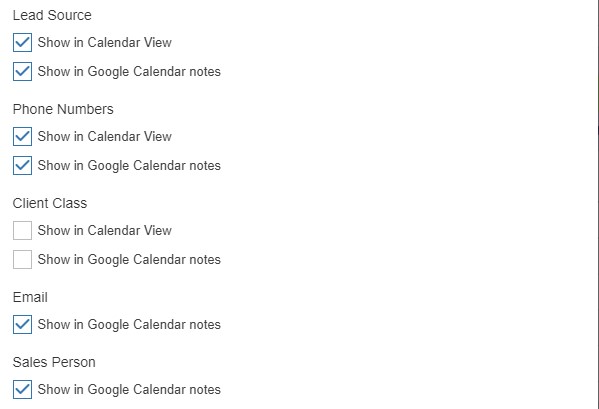
- Lead Source: Includes where the Lead is coming from.
- Phone Numbers: This will add the client's phone number to the meeting information.
- Client Class: If using classes, you can also include the class information. For more information on classes, check out this article HERE.
- Email: Includes the client's email address in the meeting notes.
- Sales Person: Adds the sales person's name in the Google calendar notes.
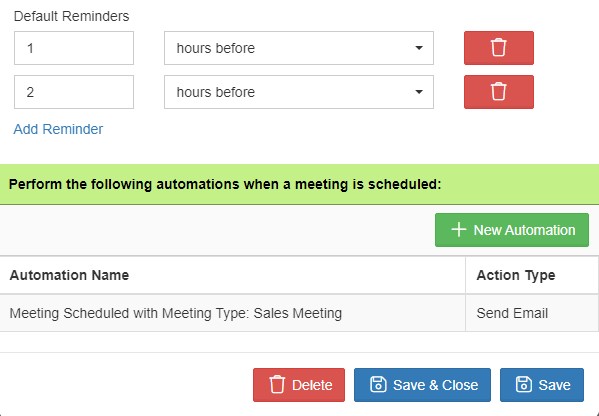
You can set up default reminders for the assigned employee and automated email/SMS reminders for the client. Variables are available to include meeting information and create multiple reminders before the meeting. After saving the meeting type, you can add new automations. You can also set up automations to send a thank you message after the appointment.
Select Meeting Type When Scheduling
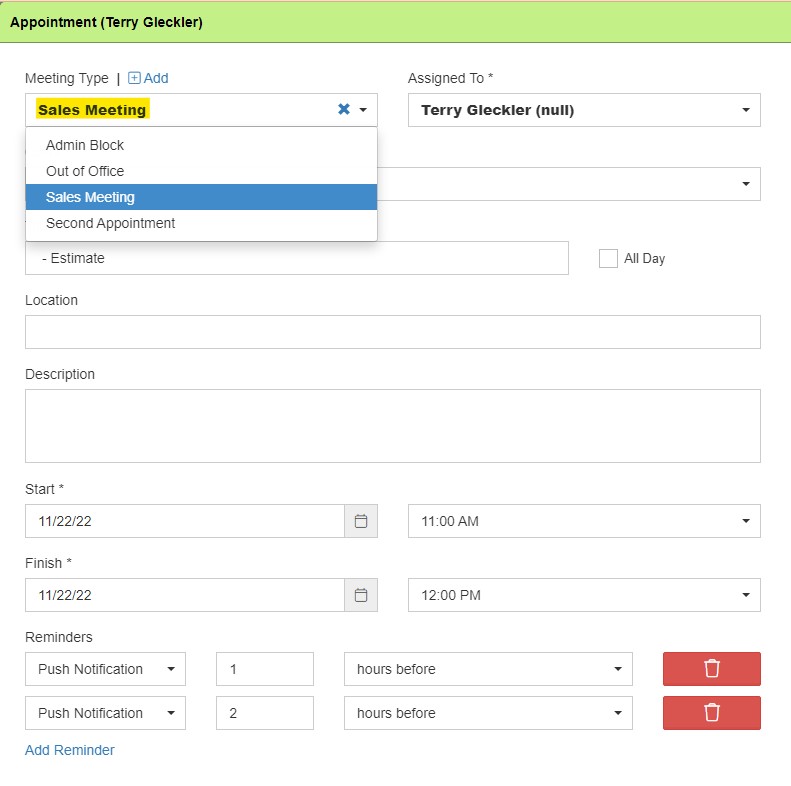
After setting up the meeting types, you can easily access them when scheduling a meeting from the "Meeting Type" dropdown menu. All you need to do is select the desired meeting type, and the corresponding settings will be activated.
-1.png?width=100&height=75&name=original-tar-ruler%20(1)-1.png)