SMS Messages
Use SMS to communicate with your leads and customers. Send personalized texts, automated text messages, and manage all client conversations in one easy to use Dashboard.
SMS Notifications:
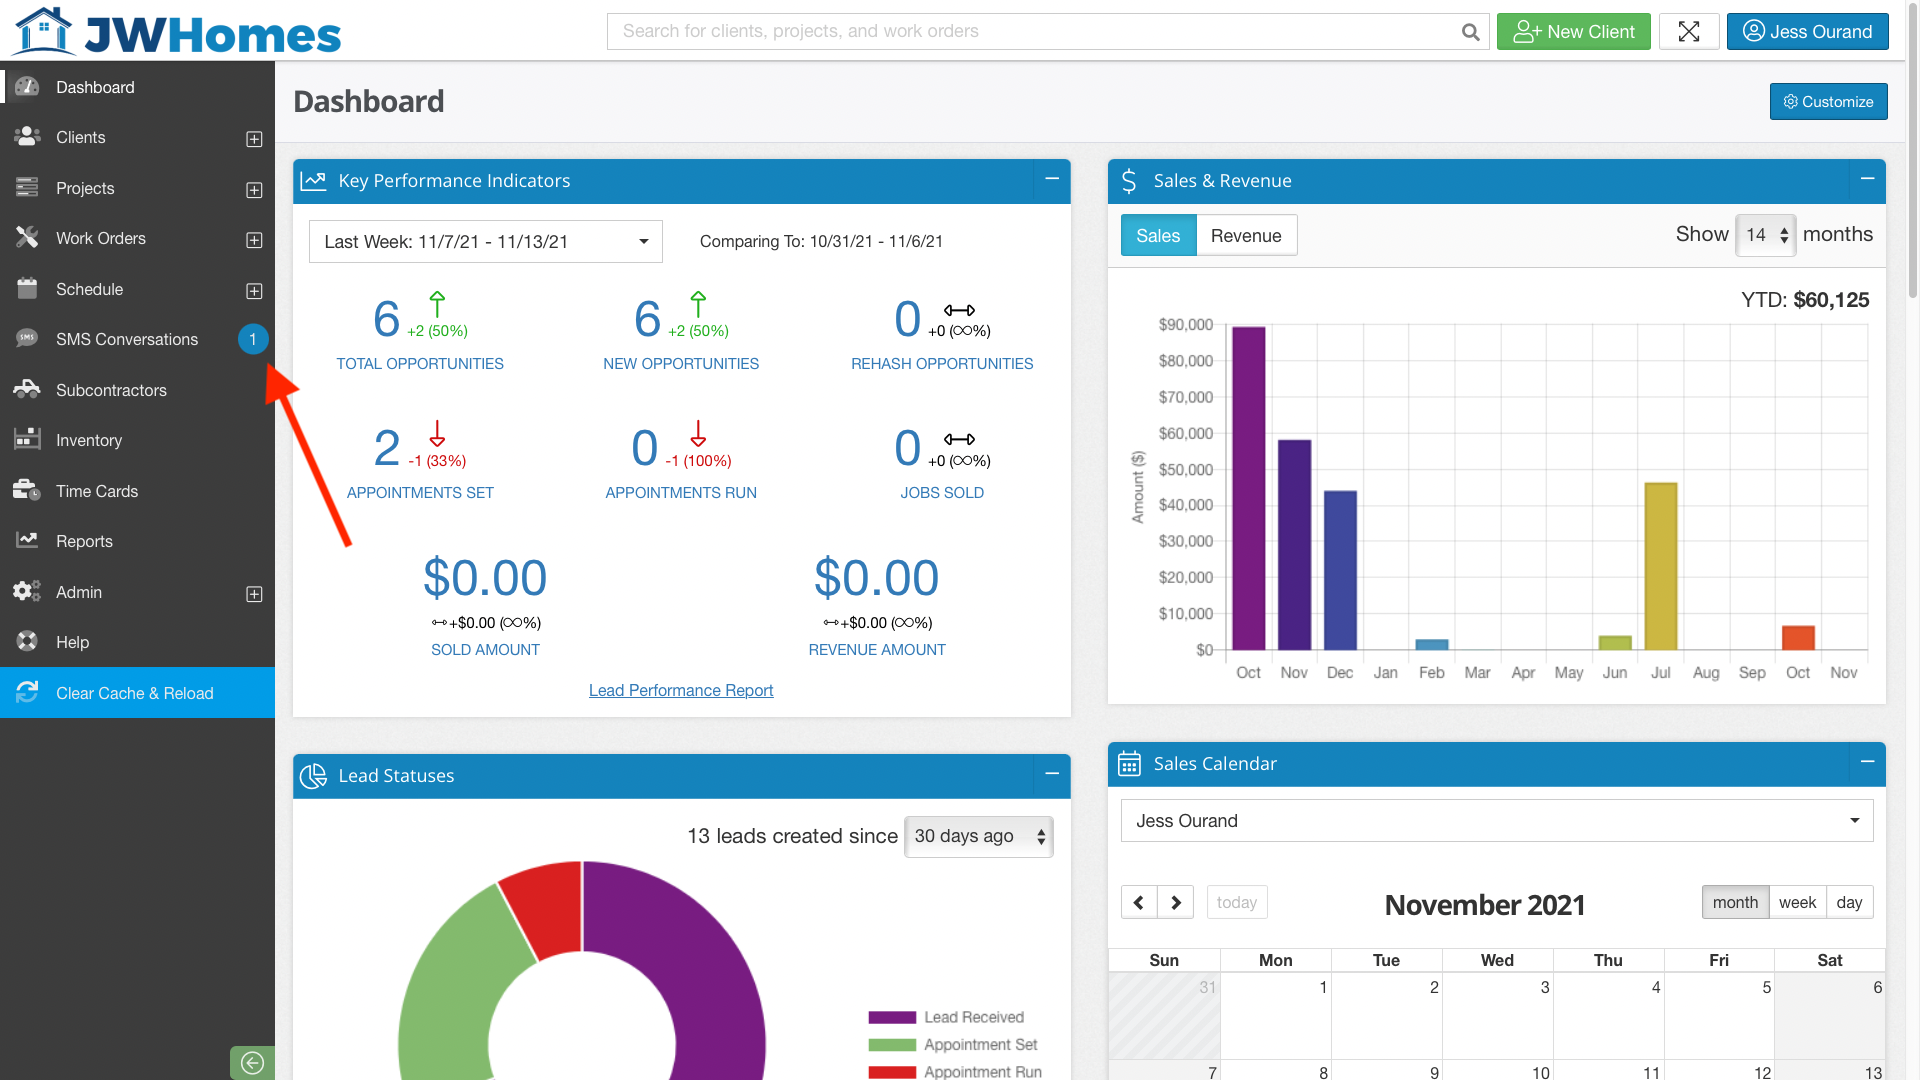
When you receive an incoming SMS message, you'll see the banner appear over the SMS Conversations section of the main toolbar. Above, we can see we have 1 unread message. Click SMS Conversations to view the SMS Dashboard
SMS Dashboard:
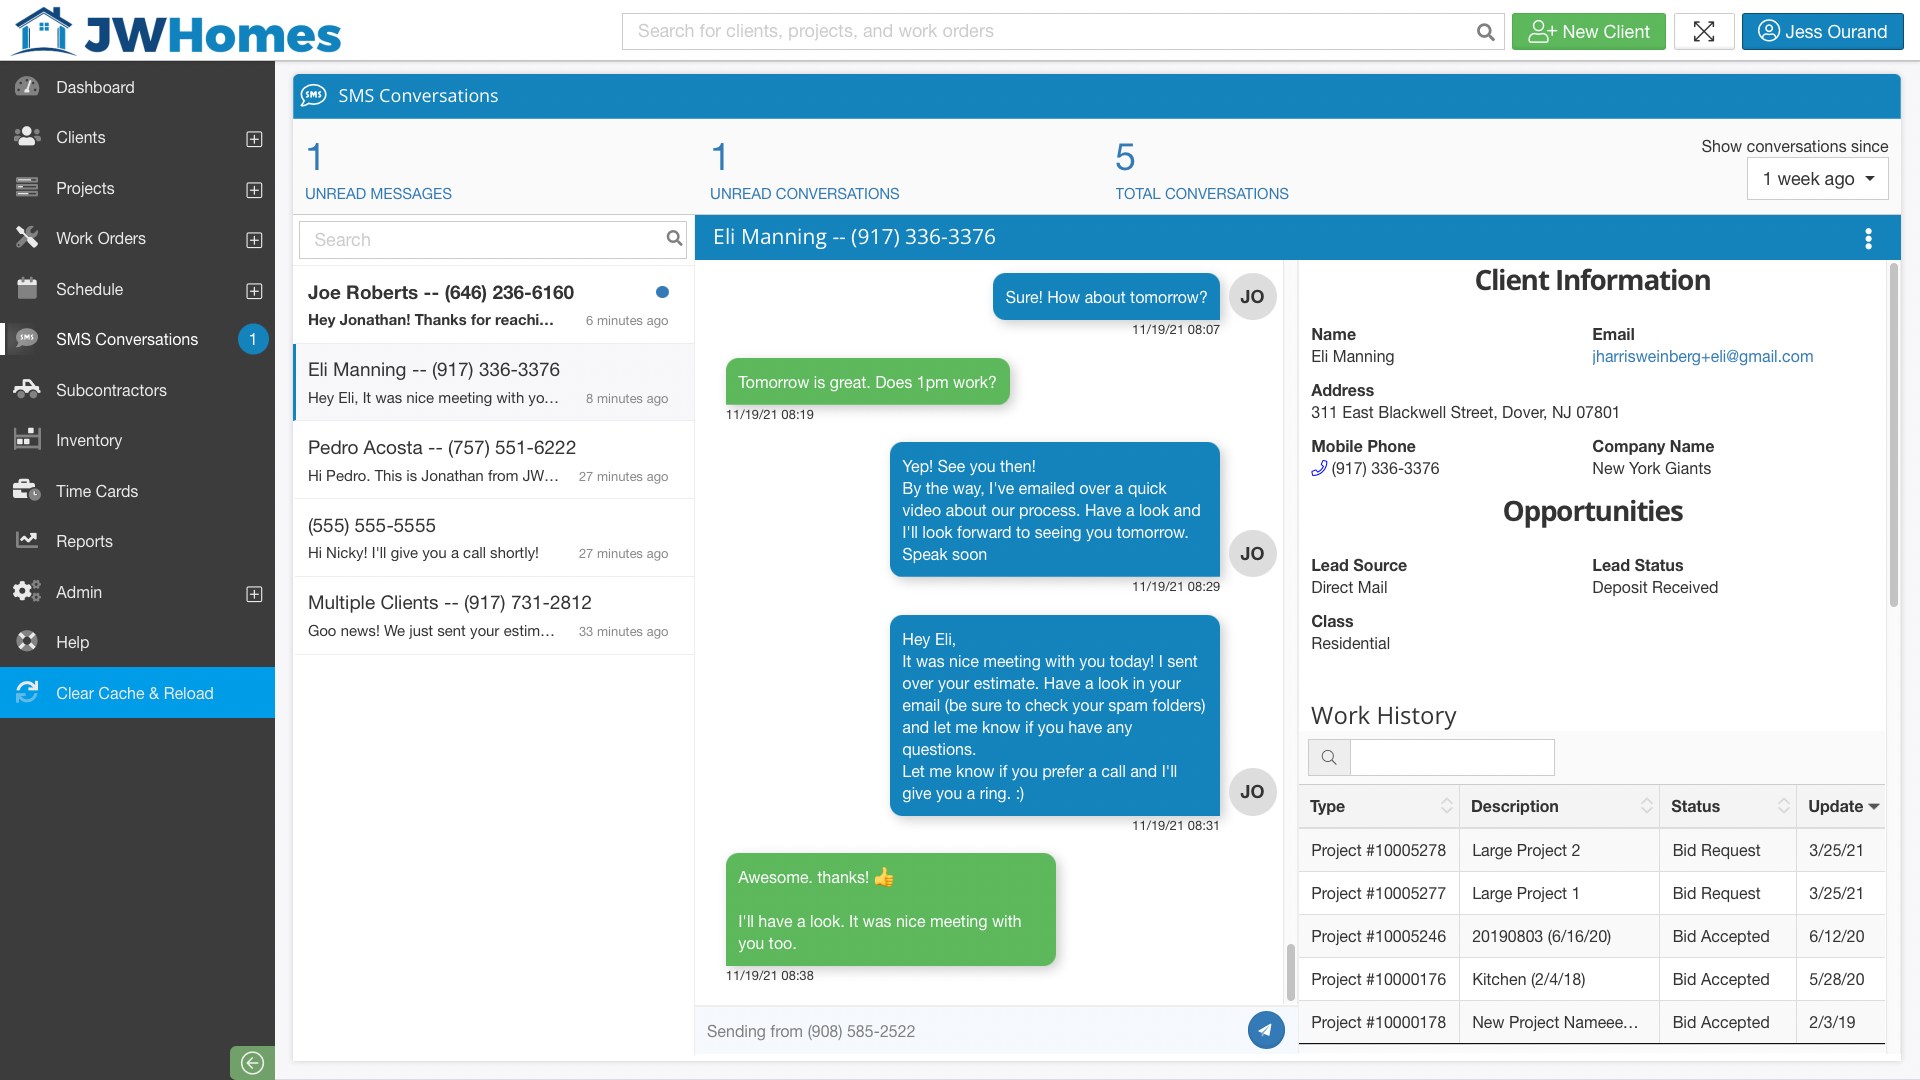
Maintain all client conversations from one, easy to use Dashboard.
Automations:
Set up a custom SMS Template
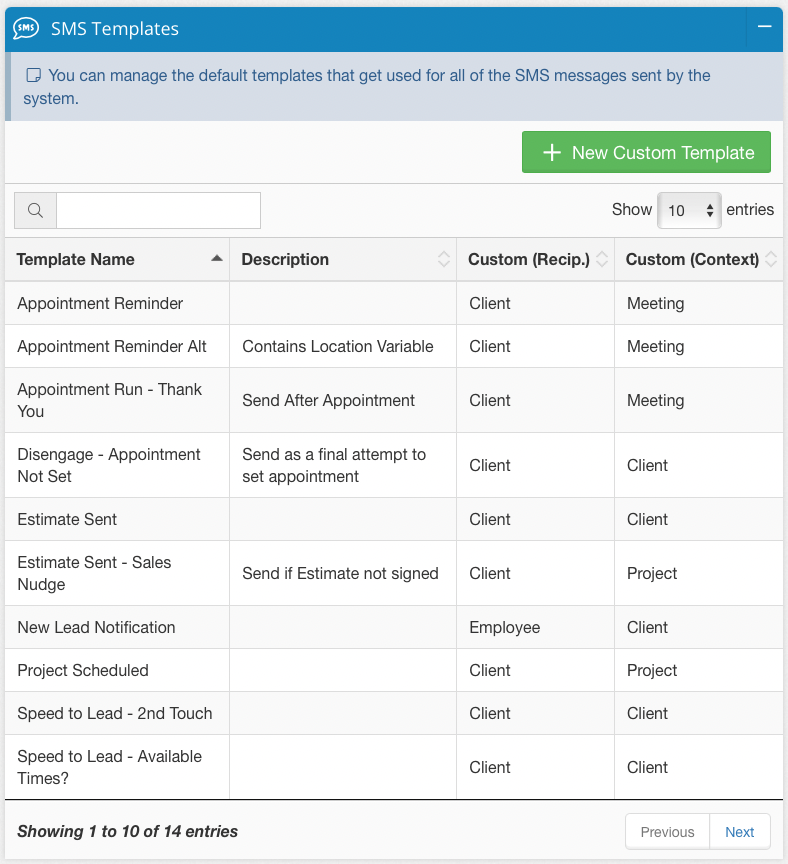
Step 1: Within the Configure screen (Admin > Configure), the first step to setting up an automated SMS message is to create your SMS Template Message. We've pre-seeded your account with several common templates as a starting point. Feel free to use one that's been provided, use them as a starting point, or make your own from scratch.
*Important - the Context of a SMS template is important for controlling which variables are available to use (for example, client's first name, project number, meeting date/time, etc can all be automatically populated).
- A Client context template can be used for automated messages when a Lead Status is updated.
- A Project context template can be used for automated messages when a Project Status is updated.
- A Meeting context template can be used for automated messages prior to and after a scheduled meeting
Example: Creating an automation to send an SMS Message to all new clients.
From the Configure screen, click into the Lead Status where we want to create the automation. In this example, we're going to send one to all of our new clients that enter the Lead Received status.
Step 2: Click New Automation to create the automation.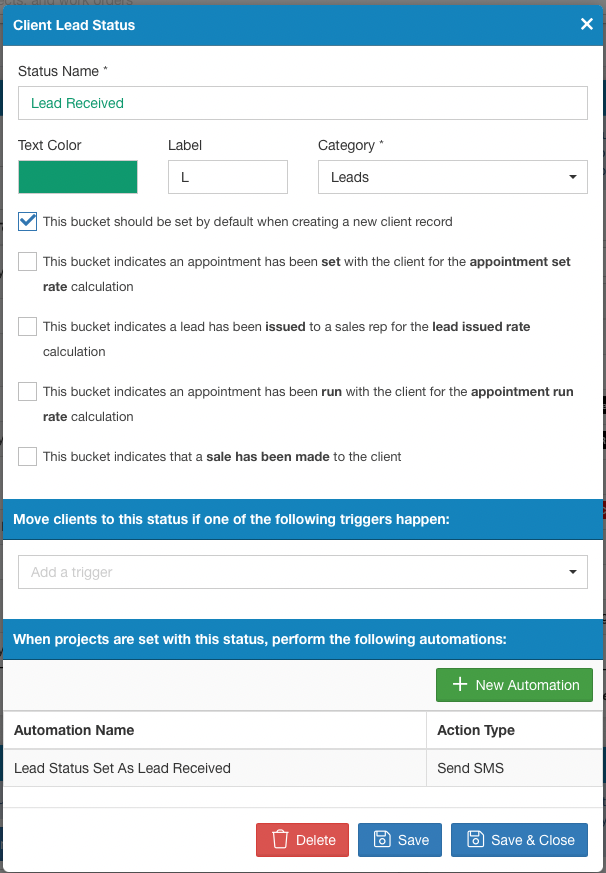
Step 3: Choose the action type. In this case, we're going to send a SMS Message. Then click Save.
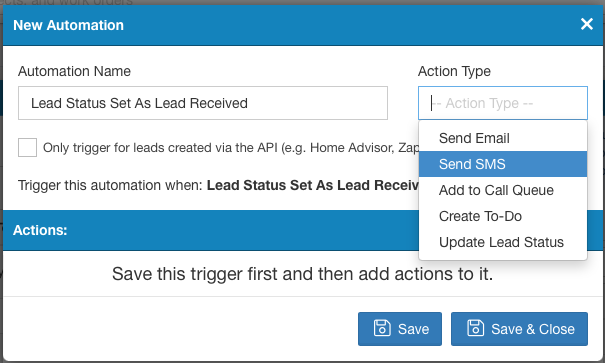
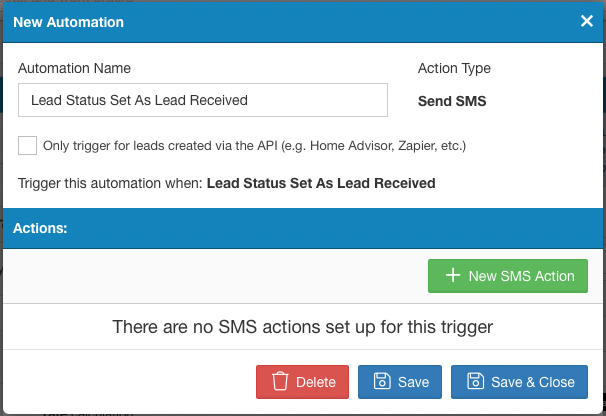
Step 4: Now that we've created the automation, let's add an SMS action. Click "New SMS Action" to add the message and define when we want it to be sent.
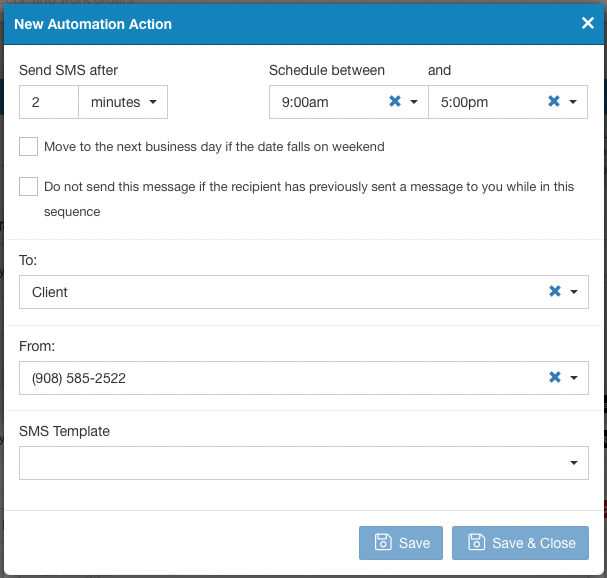
Step 5: We will define when this message will be sent. This message is going to send 2 minutes after a new lead is recorded as Lead Received. We have a delay such that the automated messages will hold until the following day if the trigger happens outside of business hours. We'll send the message to the client, from our company phone number, and finally we will simply select the SMS template we made in Step 1 of this walkthrough.
Automations Dashboard:
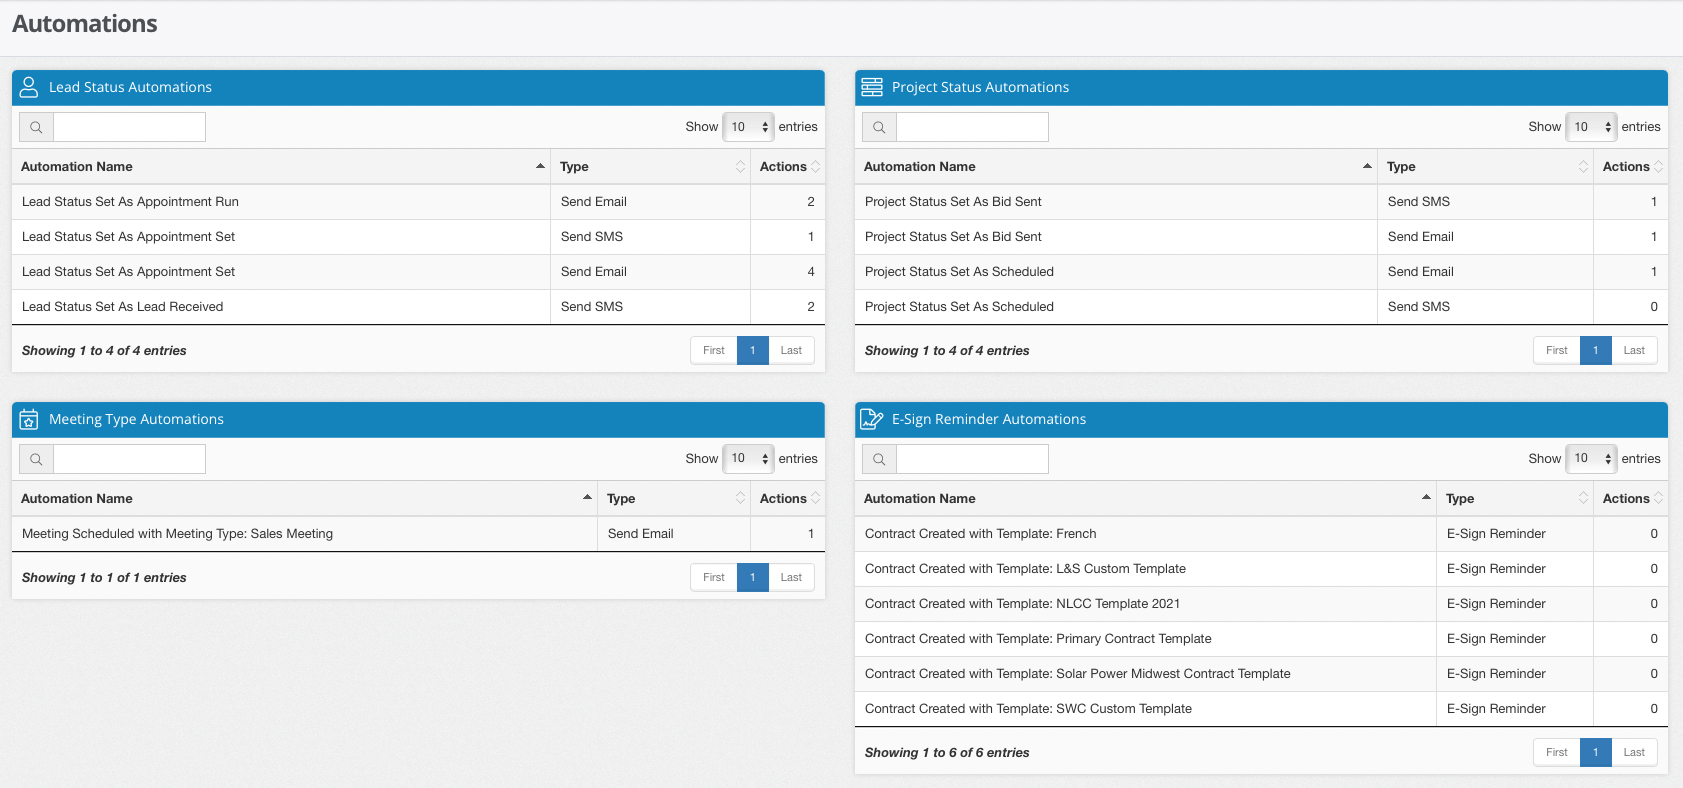
This Automations Dashboard (Admin > Automations) is where we can see all active, upcoming, and executed automations. They're broken out by type (Lead Status, Project Status, Meeting), and we can see the action type in the table (Email vs SMS).
You'll also be able to see upcoming automated messages and even cancel them from being executed.
*Staff Tip: It's recommended to delay any "immediate" automation 1 or 2 minutes (as opposed to 0 minutes). This way, if you make a mistake, you can head to the Automations Dashboard and simply cancel the automated message from sending from the 'upcoming automations' area.
SMS is available starting with the Growth plan. If you're interested in upgrading your current subscription, click HERE to learn how to upgrade your account.
-1.png?width=100&height=75&name=original-tar-ruler%20(1)-1.png)