-1.png?width=100&height=75&name=original-tar-ruler%20(1)-1.png)
Keeping track of your leads is critical to managing your sales pipeline and ensuring nothing falls through the cracks. In Builder Prime, lead statuses are more than labels—they power your automations, reporting, and overall workflow.
Start Here: Don’t Overthink It
👉 Use the default lead flow.
It’s built to:
-
Keep your pipeline clean
-
Power automations correctly
-
Make your reports accurate
How Lead Statuses Actually Work
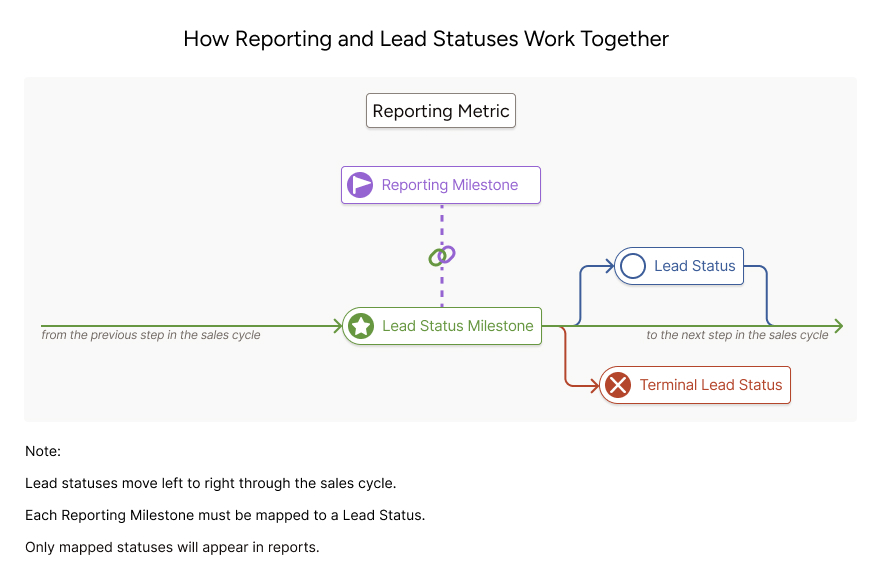
The simple version:
- Lead Status = where the lead is
- Milestone = what happened
- Triggers = what moves it forward
If these aren’t aligned → your reporting breaks
.jpg?hsLang=en)
The Default Lead Flow (Use This)
Lead Received → Appointment Not Set → Appointment Set → Appointment Cancelled → Appointment Confirmed → Lead Issued → No Demo → Demo → Demo No Sale → Job Sold → Job In Progress → Job Sold & Cancelled → Customer
💡 Why This Flow Works
1. Accurate Reporting
- Tracks true conversion rates (lead → appointment → demo → sale)
- Prevents inflated or misleading metrics
- Aligns with Builder Prime’s reporting (especially Lead Performance)
2. Reliable Automations
- Automations depend on forward movement
- Each stage acts as a trigger point (texts, emails, reminders, alerts)
- Skipping or reordering statuses can break automation logic
3. Clear Team Accountability
- Sales knows exactly where each lead stands
- Eliminates confusion like “Is this lead still active?”
- Makes follow-up expectations obvious
4. Scalable Process
- Works for both small teams and multi-location companies
- Prevents “tribal knowledge” workflows that break as you grow
The One Rule You Can’t Break
Lead statuses must always move forward (left → right).
Never:
- ❌ Move a lead backward
- ❌ Reorder statuses randomly
- ❌ Skip key stages
If you do, you will:
- Break automations
- Mess up reports
- Lose visibility into your pipeline
Before You Customize Anything
Most issues we see come from changing this flow.
Only customize if:
- You fully understand how triggers + milestones work
- You keep the same general progression (Lead → Appointment → Demo → Sale)
If You Do Need to Make Changes
Step 1. Go to Lead Statuses under Admin > Configure > Lead Statuses
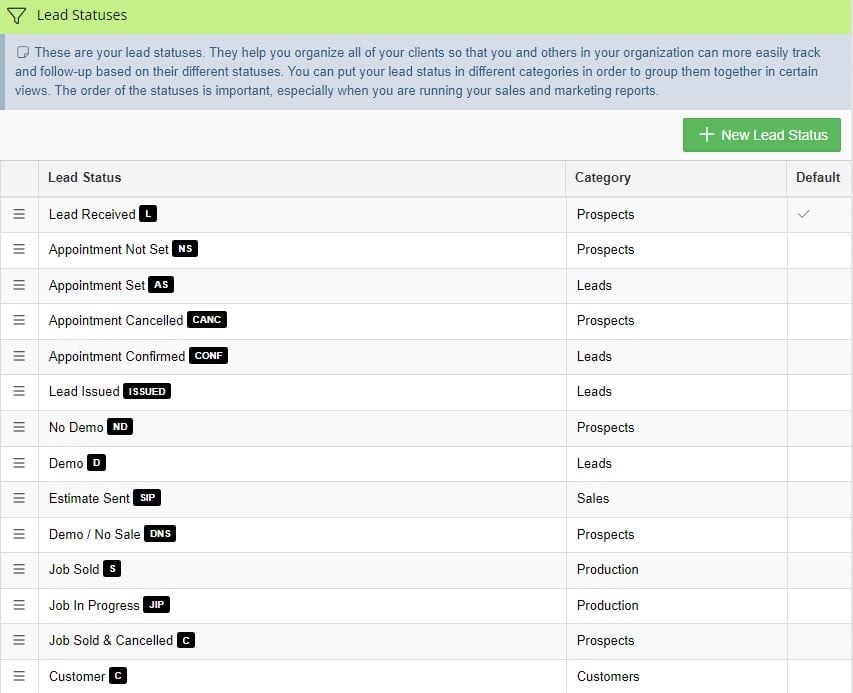
Above is the set of default lead statuses.
Step 2. Create or Edit a Status by clicking into an existing status or clicking "+ New Lead Status"
Here’s an example of a lead status (Lead Received). The required entries are the Status Name and the Category. The category is used within reporting and permissions. For reporting, certain categories will display in the sales pipeline view. For permissions, you can control which category of clients a user will have access to through permissions under Admin > Roles.
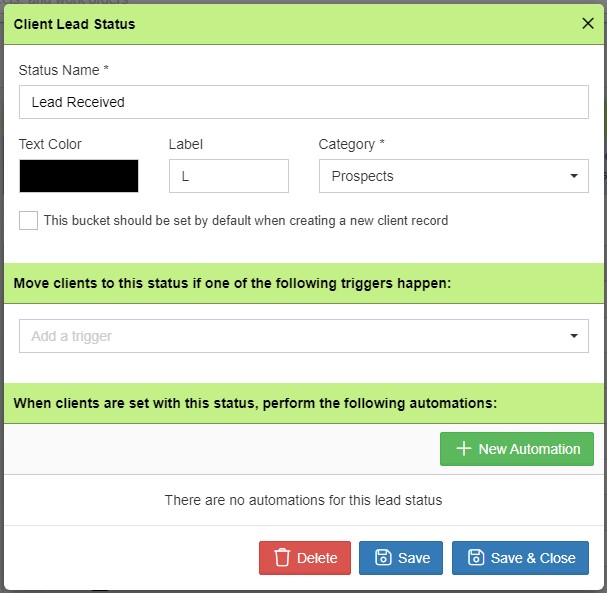
This image shows the layout of a lead status.
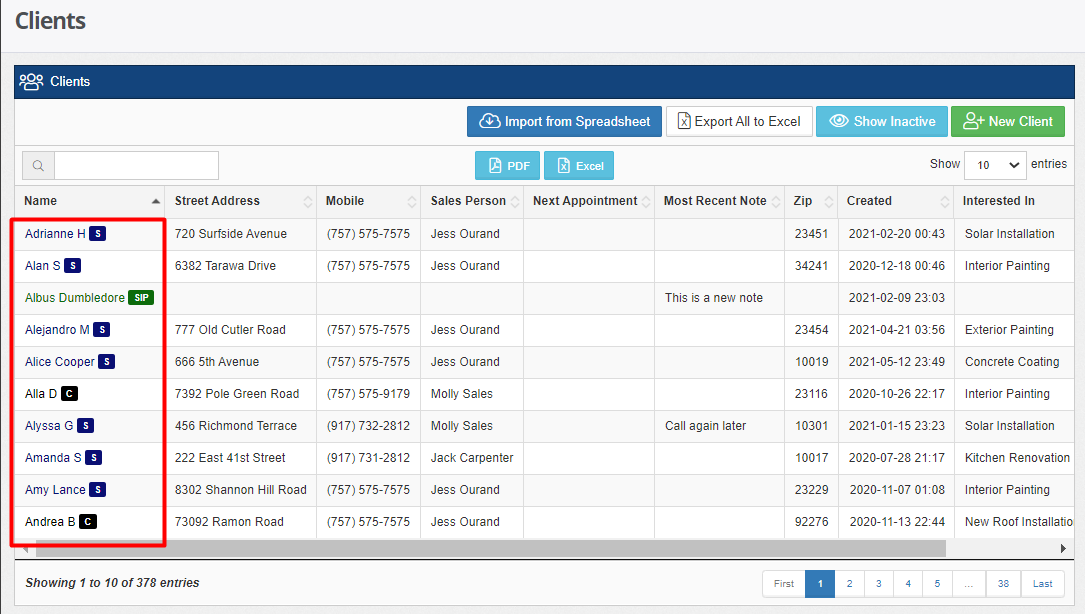 This image shows the labels when viewing all clients.
Step 3. Add a Trigger
Triggers play an important role in running the lead statuses. They work as magnets that pull the lead from one status to another. In this example, we have used the “An appointment has been set for the client” trigger. This way, the trigger will pull the lead into the “Appointment Set” status if the said action has occurred within the platform.
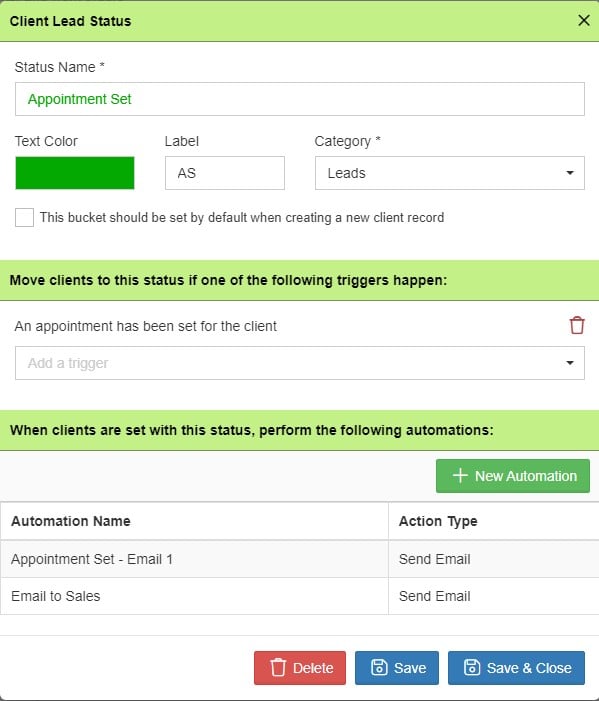
Click on the drop down to select a trigger for your lead status.
Common Mistakes
- Changing the order of statuses
- Creating too many statuses
- Not mapping statuses to milestones
- Letting leads move backward
Need Help?
If you're interested in changing any of the default workflow, it is highly recommend to consult with your Account Manager. They will be able to help you modify the stages without impacting reporting or existing workflows.