How to Delete a Project
At some point, you might need to delete a project that has been recorded in the app. Typically you will only do this when testing or if a mistake was made. Follow along this guide to learn how to delete a project in Builder Prime.
It’s important to note that you can’t delete a client that has an existing project against it. So, you need to delete all of the projects first to be able to do that. Once that is done, a delete button will appear at the bottom of your client record.
To delete a project, you just need to work backward from how you created it. Go to the farthest thing that was completed in the project record and start deleting everything working backward.
For example, start deleting any payments against the invoices, then working backward to mark a contract unsold, then deleting the contract, then removing the tasks, and so forth. Once everything is removed, you’ll see a delete button on the Project Info Tab.
Example:
Head to Projects then select a record you want to delete. In this example, the project only reached the drafting of the contract, and the eSignature status is still “Not Sent”. Click on the red Delete Proposal button.

IMPORTANT: A project with a contract that has been signed by both parties will not be deleted from the system for security reasons. All of the details of a project can be deleted except for a legally binding contract that is completed in the system. If you need to delete a contract with signatures, please contact support.
Proceed to the Pricing tab then click on all the tasks to see the delete button at the top right portion of the window. If your prices were generated directly by your tasks, the checkboxes will be grayed out and you can skip this deletion step.

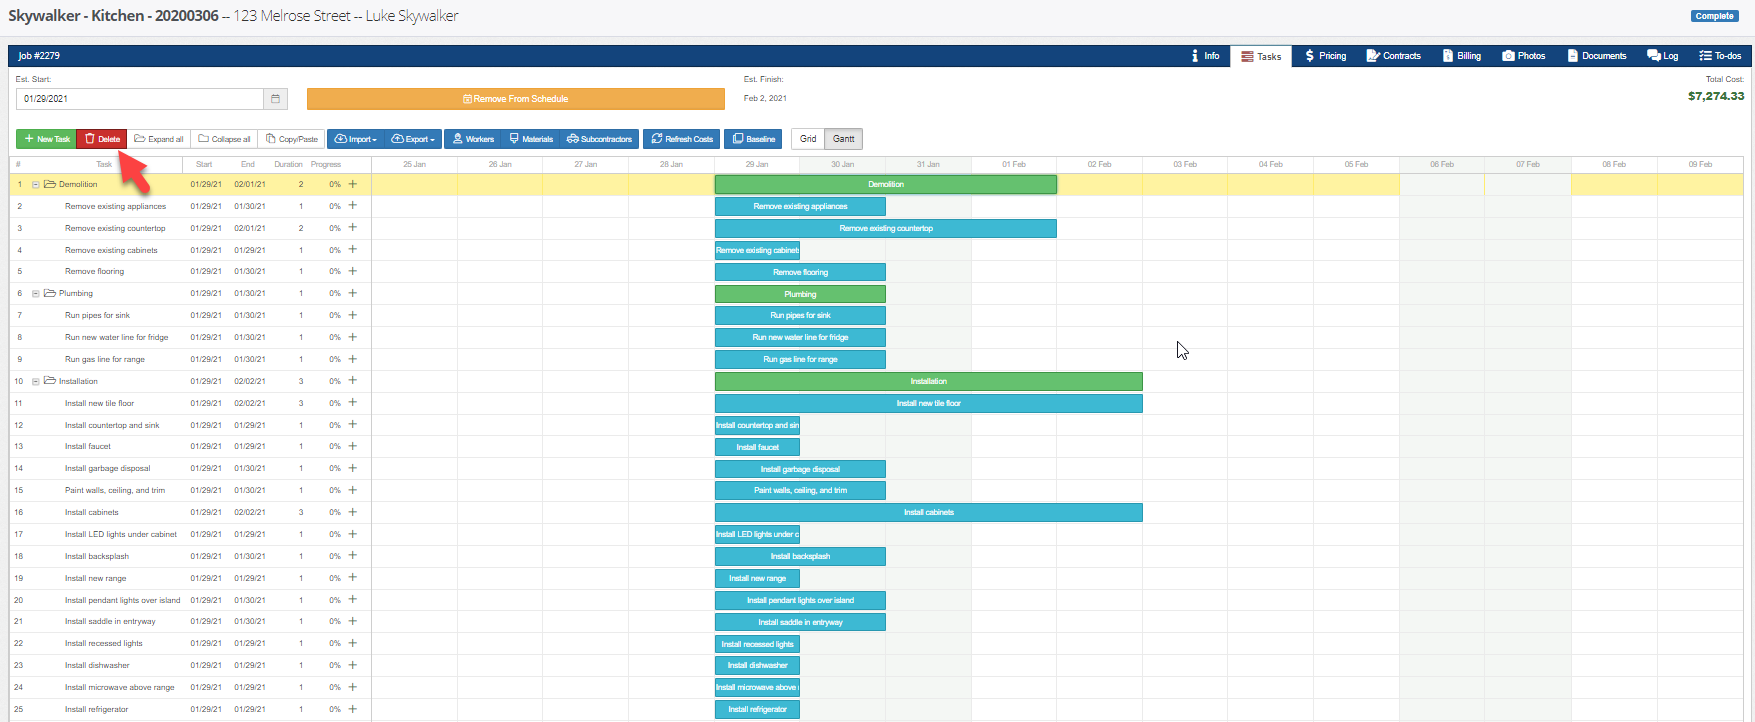
Continue to delete the items under the Tasks tab by selecting them all and then hitting the delete button at the top of the list. If you are in the Gantt view like the screenshot below, you can shift+click to highlight several at once, or ctrl+click to highlight one by one. If you are in the Grid view, you can just click the checkbox at the top left to select all and then hit the delete button.

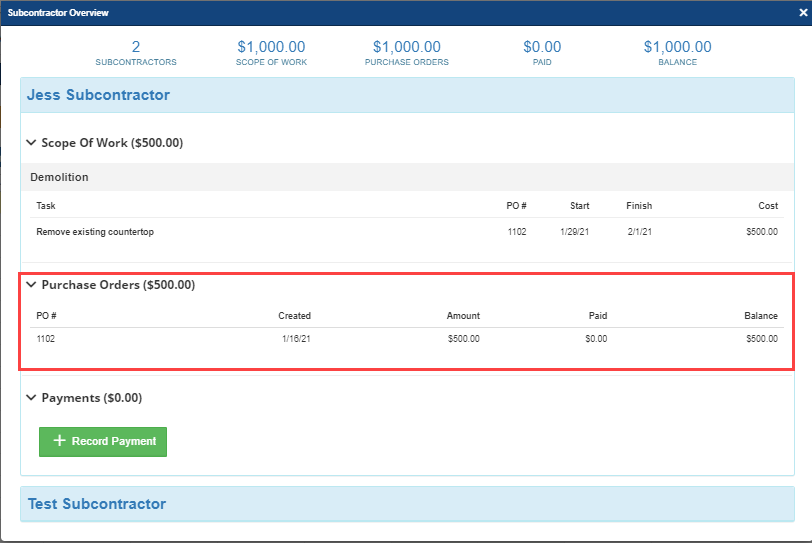
Note: Some tasks may not be deleted when they are included in a subcontractor purchase order. An error message will appear at the bottom of the screen indicating this information. If this error occurs, click the “Subcontractors” tab under the Tasks window to delete the existing purchase orders.
This example project has two subcontractors with purchase orders. Click on the highlighted line item to see the option to delete.

Notice that a red Delete button appeared at the bottom of the Project Info Tab. This means that all of the necessary information has been removed from the project, and it can now be completely deleted.

-1.png?width=100&height=75&name=original-tar-ruler%20(1)-1.png)