-1.png?width=100&height=75&name=original-tar-ruler%20(1)-1.png)
Builder Prime allows you to manage and create task-based project templates to streamline estimating and production scheduling. This way, you're not having to create an estimate from scratch for every customer. You can simply import your project template, update a few key fields for price/cost, and have an estimate ready to send to your customer. The video shows you the basics, and there is more detailed information in the article below. If you are looking for information on setting up Price Book, click here.
1. Step-by-Step How To: Click on Admin
2. Click on Configure
3. Click on Project Settings
4. Scroll down to Project Templates
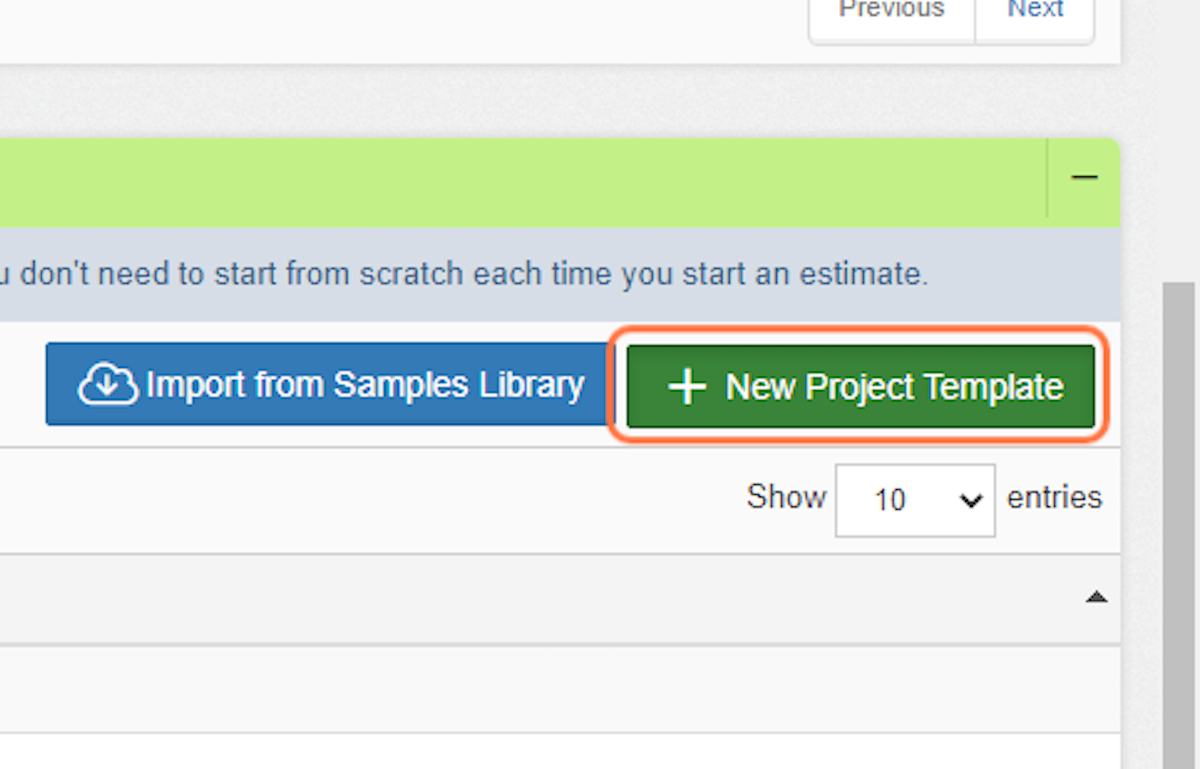
To get started with Project Templates, you may Import from Samples Library or create a New Custom Template.

*The Samples Library is a list of example project templates that we've created. Feel free to grab one of these as a starting point. You can customize it further to make it your own.
Option 1: New Custom Template
Create a new custom template by navigating to Admin > Configure > Project Templates. Click the green “New Custom Template” button to get started.
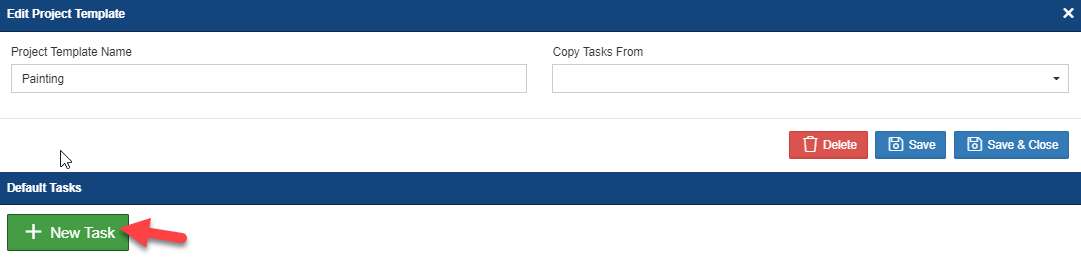
Input a Project Template Name (e.g. Painting) to appear in the drop down fields of a project record screen, then Save to proceed. You’ll want to customize the template as much as is necessary for your project, but you can also copy tasks from other available project templates in the CRM by clicking the “Copy Tasks From” field.
Once you click “Save”, the “New Task” button appears below.
Once you create this project template, it will be available to import into future projects.
Option 2: Import from Samples Library
Here’s another option for you to create a project template. You can make use of the default project templates for reference and easier customization. Click on the “Import from Samples Library” button on the Project Templates widget, then look for a project template to import into your list.

In this example, we have selected the “Concrete Coating” project template. Click “Import Into My Templates” at the bottom. You can then take this template as a starting point and customize it to suit your needs.
5. Click on + New Project Template
6. Add a Template Name and press Save
7. Optional: Copy Tasks from Other Templates or Start from Scratch
Copying tasks from other templates can be used if the scopes are similar but need modifications. It's a great way to give you a base to work with.
One example would be if you have different packages where the scope of the work is the same, but the pricing, materials, and labor need to be adjusted.

8. Click on New Task
9. Type "Task Group"
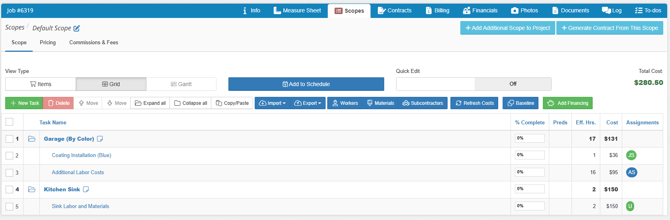
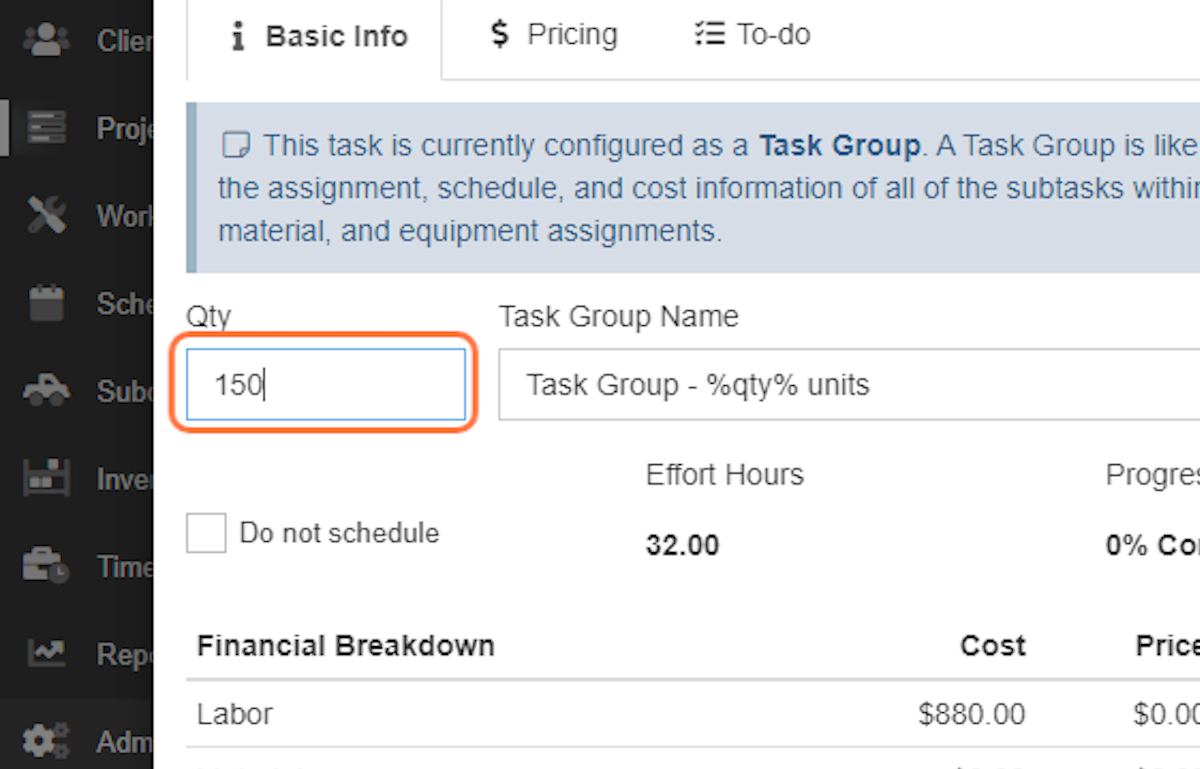
Task Groups, or Line Items, are where the project is priced.
10. Click on Set Qty
If your project is measurement-based, such as priced per square footage, you'll need to click the Set Qty button next to the Task Group Name.

11. Type "0" as a placeholder for the quantity
12. Optional: Add %qty% to the task group name
Adding the variable for quantity, %qty%, will populate the quantity of the project in the Task Group itself.
13. Click on Pricing
14. Select your Pricing Option
Price per Quantity - Multiplies quantity/measurement by the price set by you.
Markup on Total Cost - Adds a percentage to your costs to price the project.
Manually Set Price for This Task - Set a custom price for the project regardless of measurement or costs.
15. Add Price
16. Toggle if this is taxable and/or discountable, and make adjustments to how the price is rounded
Tax rates are set up under Admin > Configure > Sales Tax Rates
17. Click on + New Subtask
The subtask is where you will assign costs, including labor, materials, and equipment. This also determines how the project is scheduled on the production calendar.
Utilize Predecessors to schedule each subtask separately if needed.
For example, if your project had three phases that needed to be scheduled on three different days, you can set them up to be scheduled one after the other rather than stacked on the same day.
18. Name the Subtask
Confirm that the subtask being created is nested under the appropriate Task Group.
19. Click on Assignments
This is where employees or subcontractors are assigned. You can insert placeholders or actual employees with the option to swap them out when creating the estimate using the template.
20. Choose an Employee or Subcontractor from the dropdown, or insert a Placeholder.
21. Insert Est. Effort Hours and assign
The estimated effort hours will determine how many days the Subtask will be scheduled on the production calendar. Every 8 hours = 1 day.
22. Click on Materials
Preassign materials to the project to easily estimate the amount needed and costs.
23. Select Material or Add New Material
24. Assign to Subtask
If the material is linked to the quantity or measurement unit, check the box before assigning.
25. Click on Save & Close
26. Review the Template
From this screen, you can review the template and make sure it's organized per your preferences. If you need to adjust the organization, you can check the box next to the Task Group and use the buttons to move it up or down in the template.

27. Click on Save & Close
28. Set Template as Default for a Project Type
Above Project Templates is a section for Project Type. You can add the new template as the default to automatically populate anytime the project type is selected.
29. Check Active (Uncheck to hide in selection lists)
Select this if creating a new Project Type that you want to show up in the dropdown menu when creating the project.
32. Save and Close
33. See it in Action: Select Project Type
When creating your estimate, select the project type from the dropdown on the Info tab and press save.
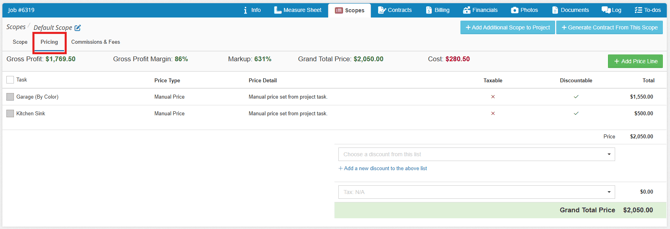
34. Click on Scope
35. Update the Template
The new default template will automatically pull into the project scope. Now all you have to do is update with the measurement number.

36. Enter Quantity
37. Swap out employee placeholders

38. Click on Swap Out
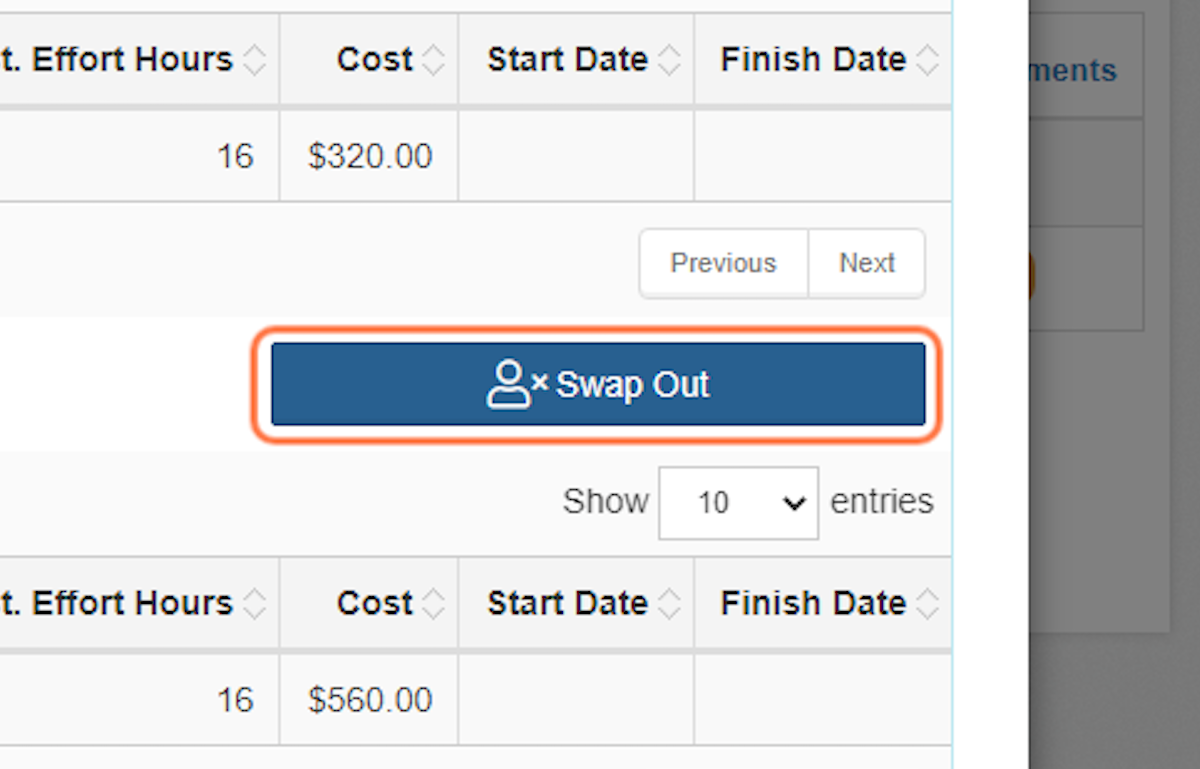
39. Assign an Employee or Subcontractor and Click Swap

40. Continue Working from Left to Right
The template made it easy to create an estimate. All that's left to do is check the pricing tab, create a contract, and send an invoice!
For information about setting up projects using Price Book click HERE