-1.png?width=100&height=75&name=original-tar-ruler%20(1)-1.png)
Check out Getting Started with Lead Management for recording a new lead before we start a new project. Once a lead is recorded in Builder Prime, we can manage the sales and production processes by managing sales appointments, maintaining easy communication, generating estimates and invoices, and scheduling for production.
Creating a Project Estimate:
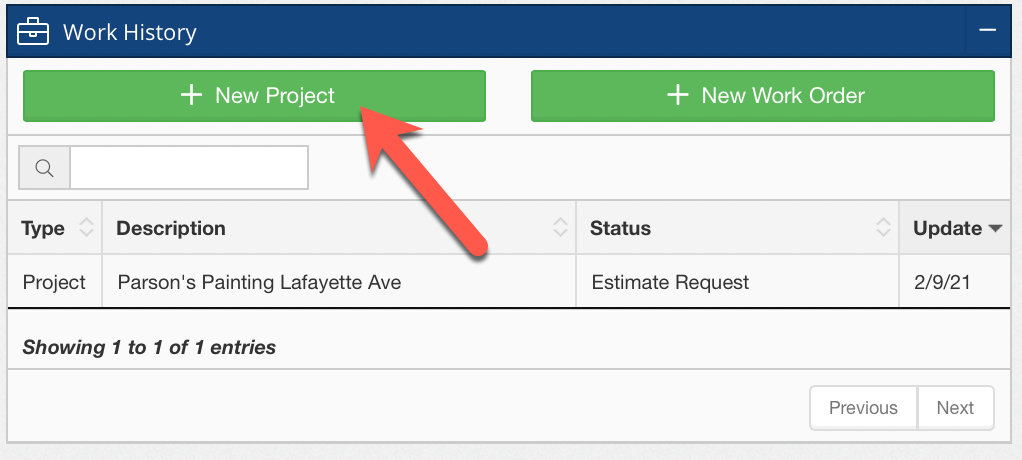
In a Client's Work History, click New Project to start the process of creating a project estimate for this client.
Project Info Tab:

When creating a new Project, simply type a Project Name and record any other pertinent information. Your team will be able to easily communicate with the customer without having to navigate back to the client record by using the email and SMS buttons next to the client's name. We'll look more into that later in this walkthrough once we schedule this project for production. Click HERE to learn how to add custom fields for project information.
Once this project is saved, we’ll work on generating the estimate. We will start with the Tasks tab to define our scope of work, set a price on the Pricing tab, create a Contract, and finally invoice on the Billing tab. Let's get started.
Check out the article, How to Create a Project Estimate, for a full walkthrough on managing Task Groups and Subtasks to create project estimates, account for job costs and manage subcontractor and employee assignments.
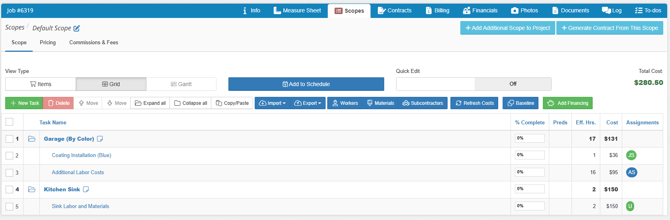
Scope Tab:
There are two available options for building an estimate.

Pricing Tab:
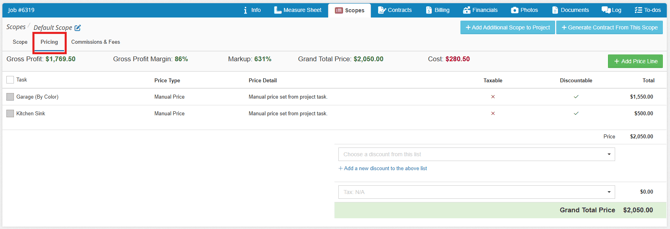
We can price our job from each of the task groups, or we can apply a price to each line item here from the Pricing tab.
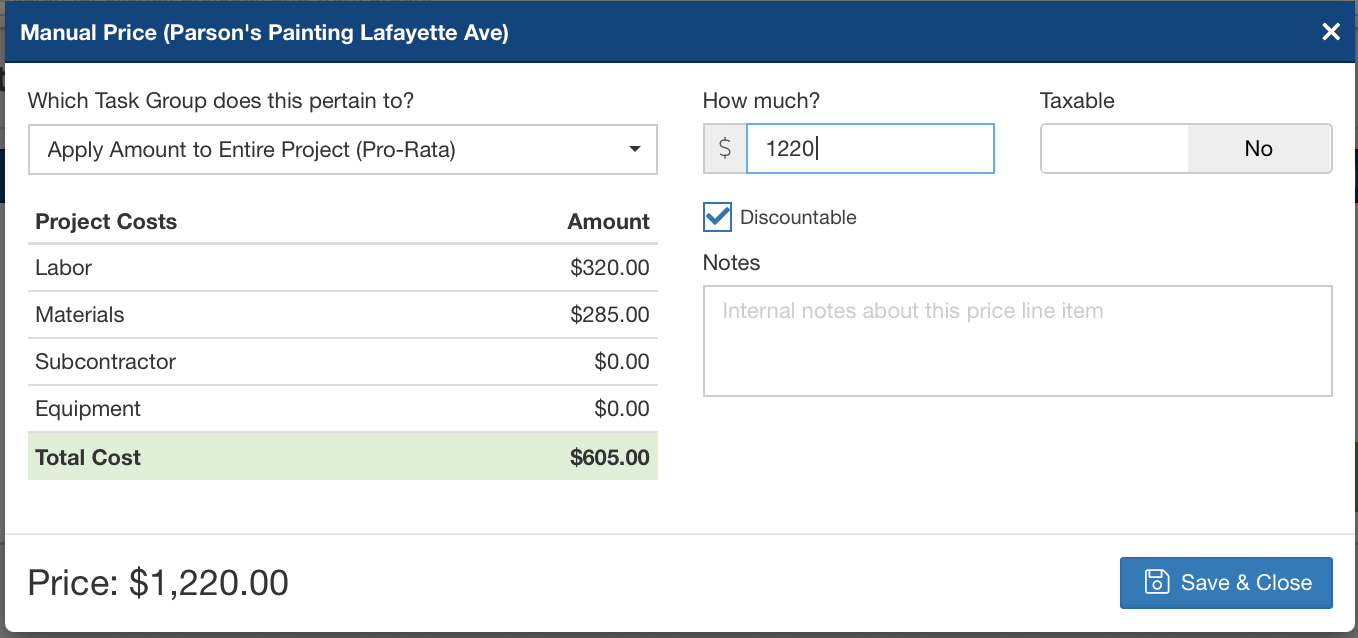
For this project, we're setting a manual price of $1220 overall. You can also price each price line from this module, or apply a markup price for the overall project or individually for each line item.
Contracts Tab:
Click Generate Contract.
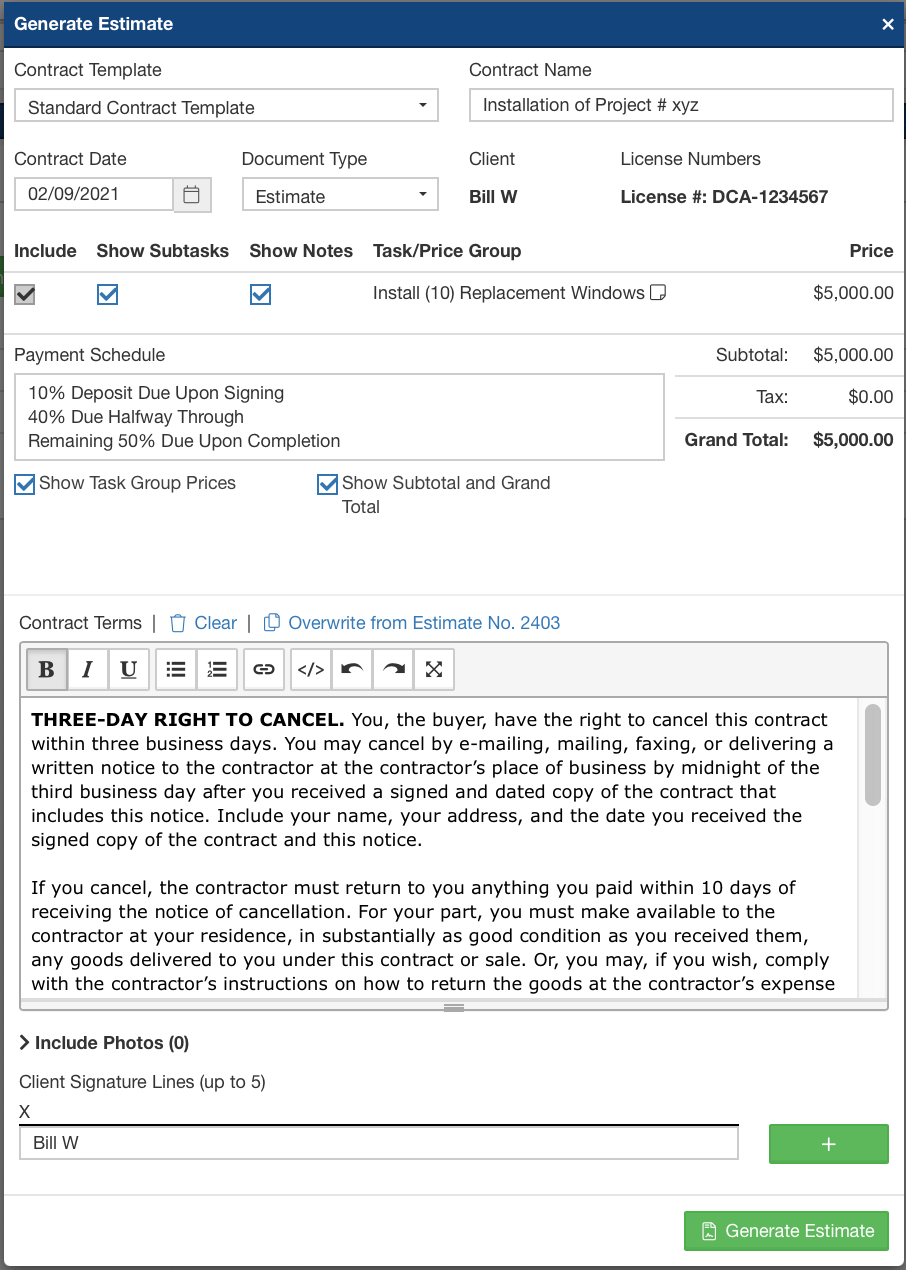
When generating a contract, you have many options for how you want the information displayed. For example, you can choose to toggle off the Notes from the Task Group, decide to display only a grand total price rather than itemized pricing, optionally tweak your default Terms and Conditions, display a payment schedule included, etc.
Billing Tab:
Click Create Invoice:
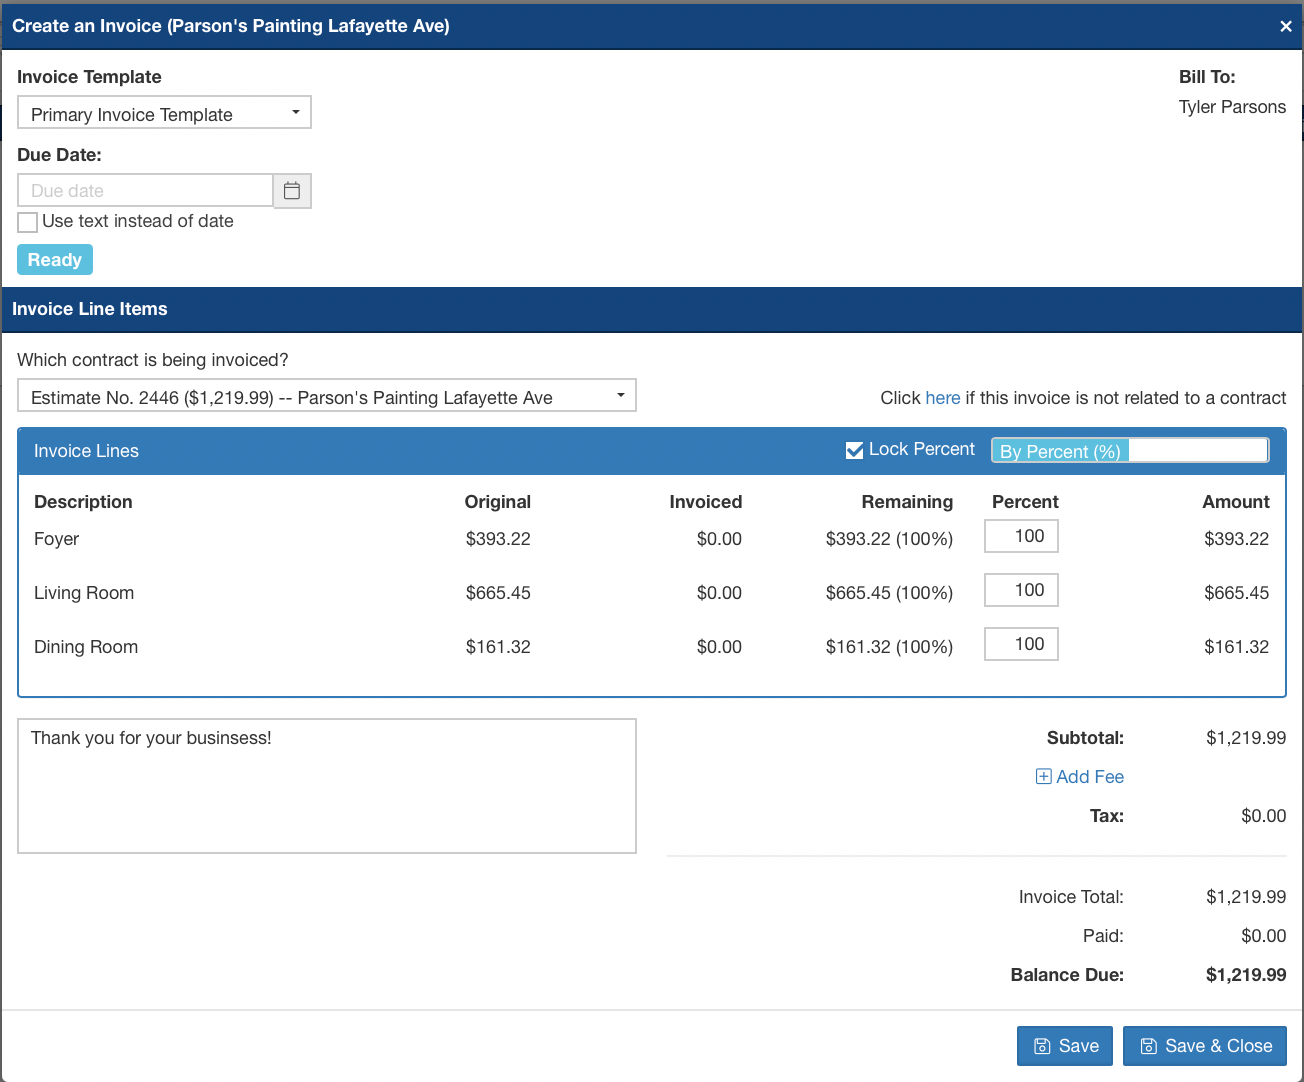
When creating an Invoice, you're able to choose to invoice for the full amount, or any percentage thereof if you'd prefer to create multiple invoices to record partial payments. Click HERE for more info on creating an invoice.
Builder Prime offers online payment processing directly within the platform. To sign up for a merchant account and start receiving electronic payments, click Admin > Integrations.
Scheduling for Production:
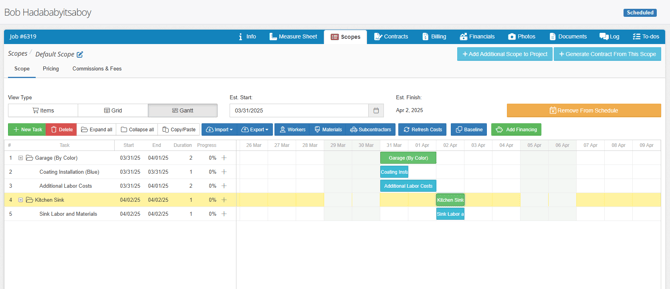
From the project's Tasks tab, click "Add to Schedule", and select a start date. Selecting a start date will create a Gantt chart for our project. You can click and drag each subtask and draw in dependencies to build the project critical path.
Production Calendar:
View by Project:
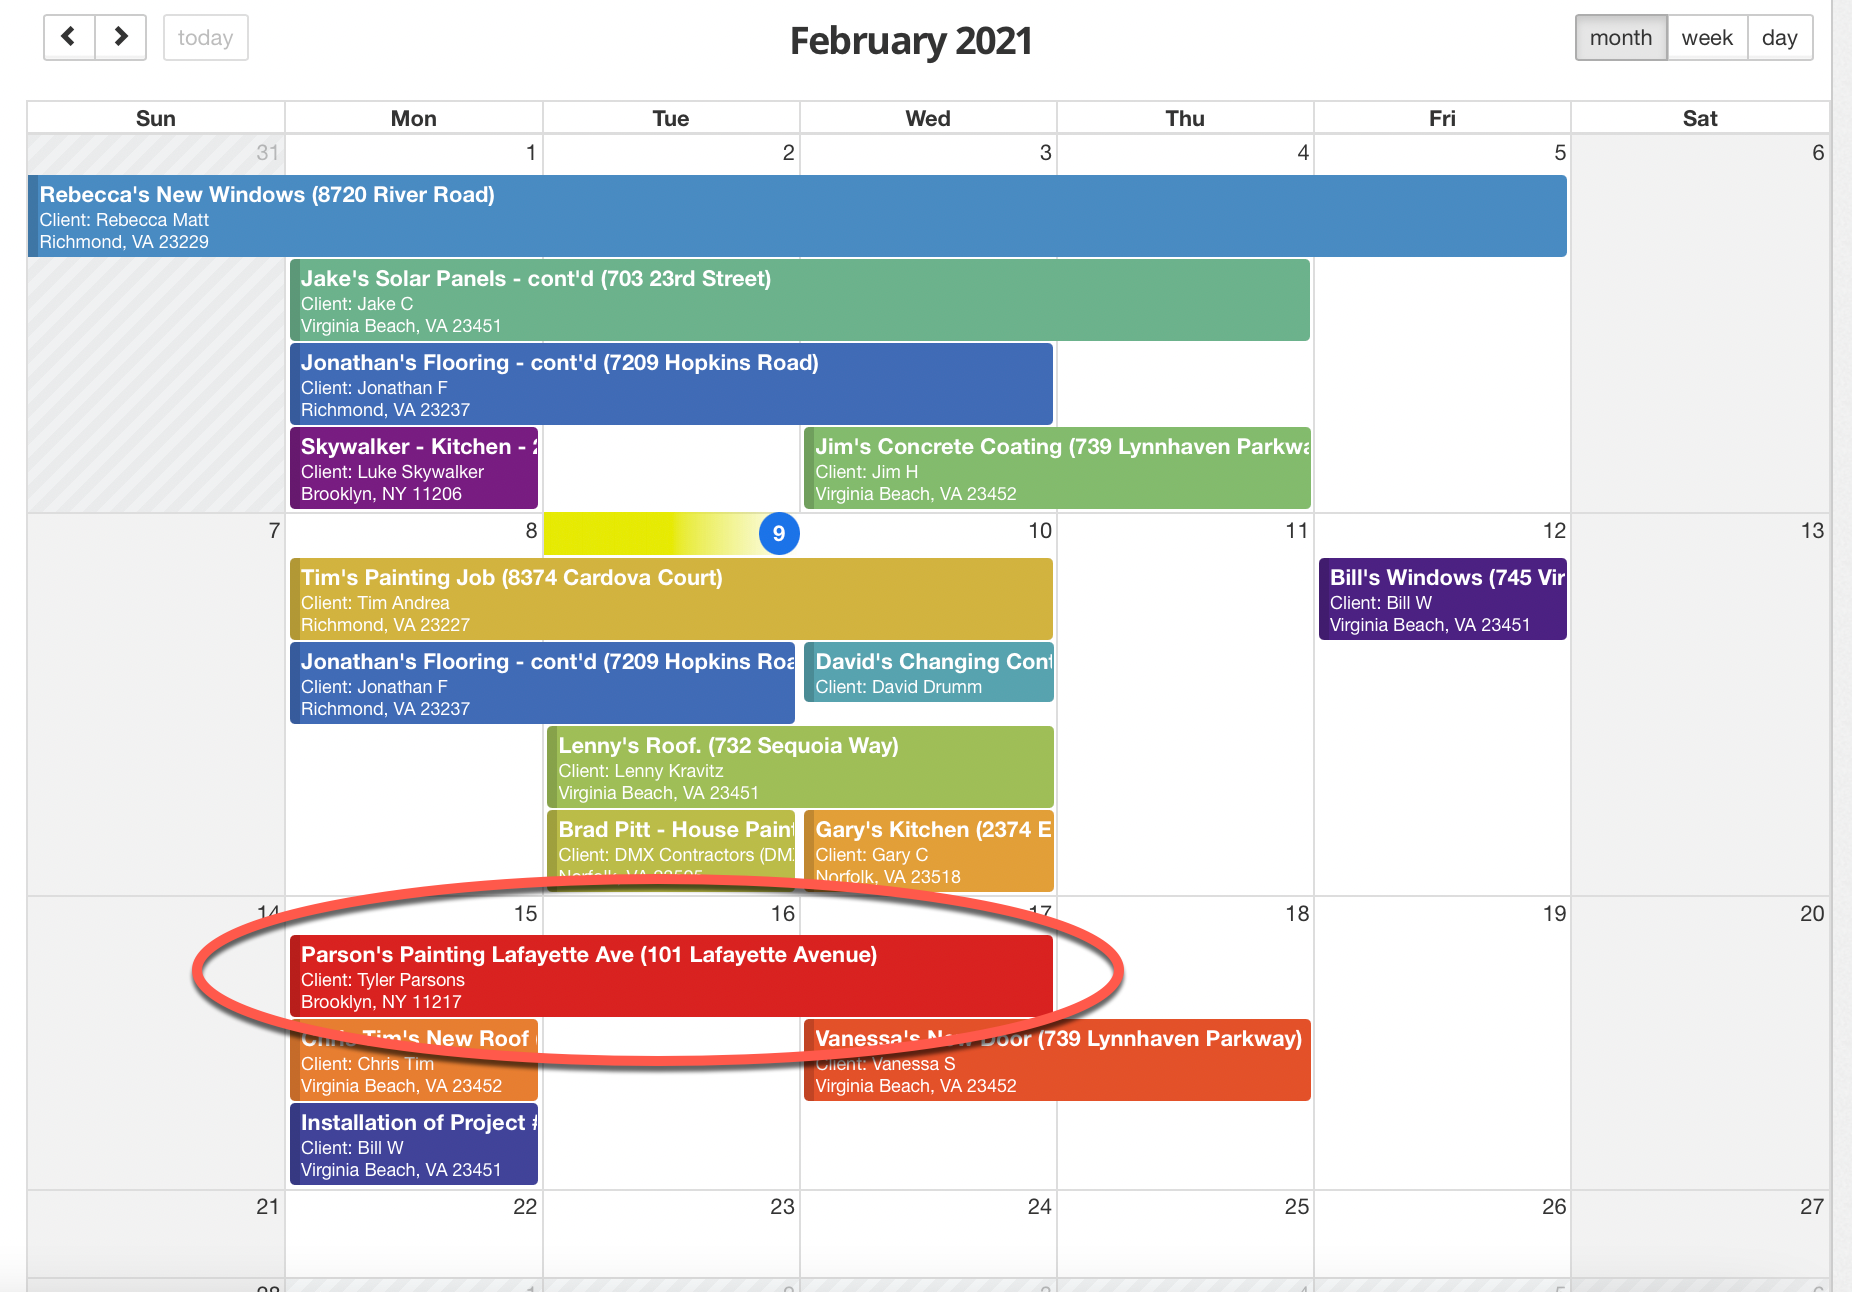
The standard Project view on the production calendar will show all of the projects currently scheduled for production, each assigned a unique color. We can see our example project in red above.
View by Project Manager:
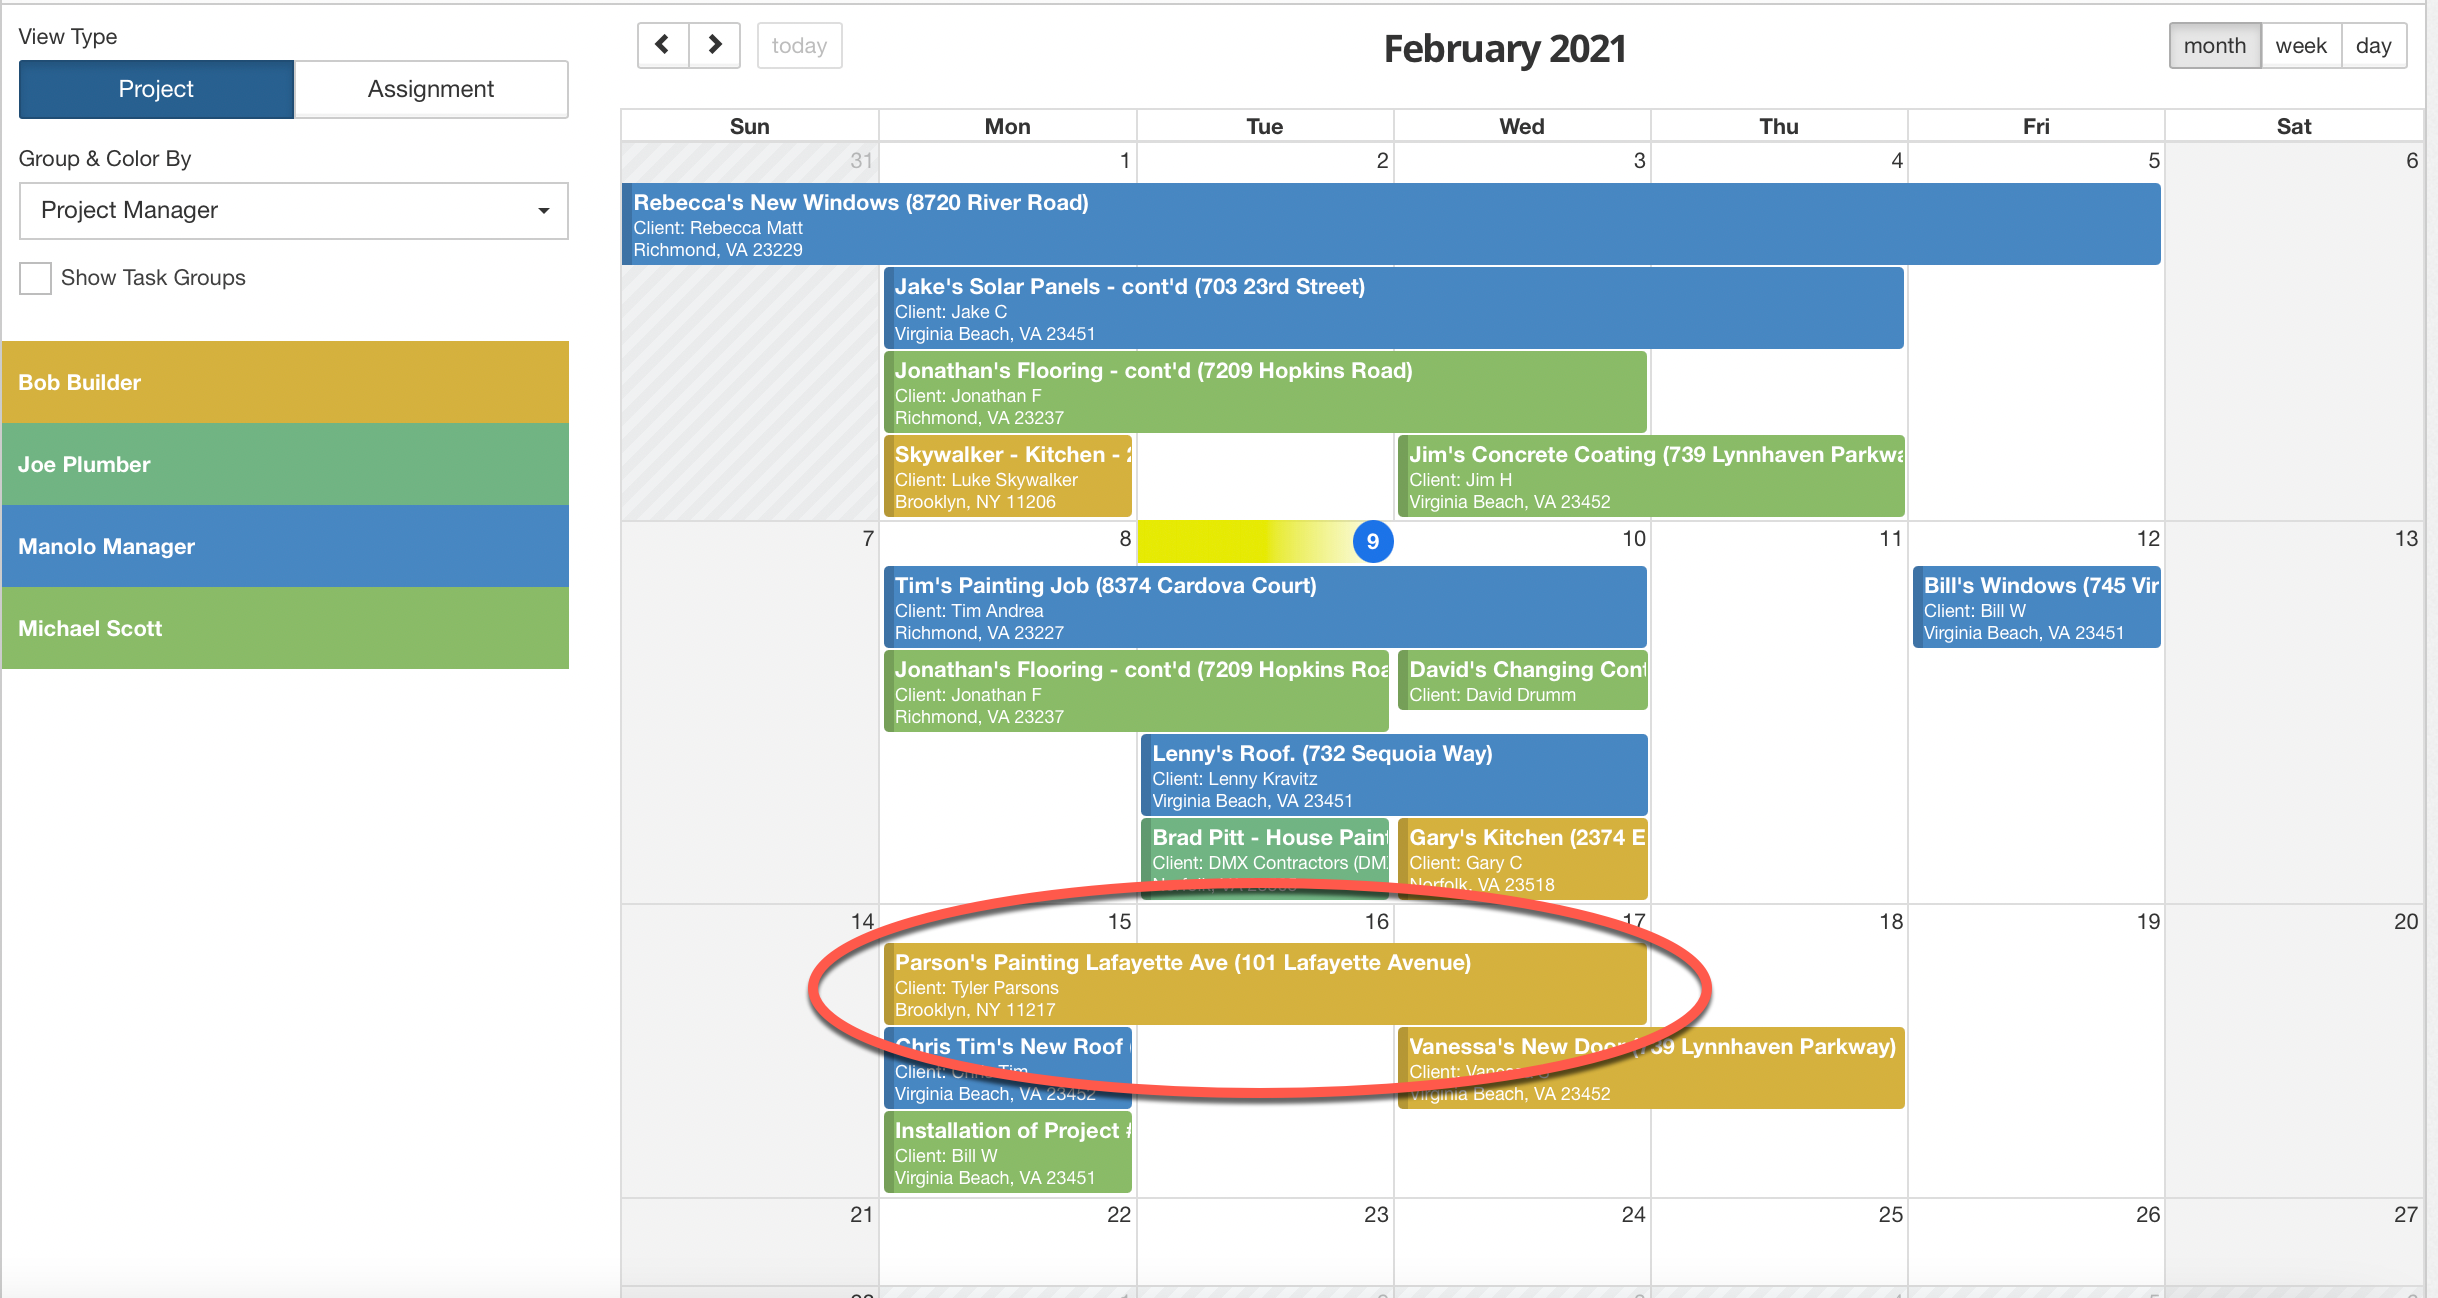
We can also view the production calendar by the assigned Project Manager that we assigned previously. You're able to set the color for each Project Manager on the calendar for easy scheduling.
View by Assignment:
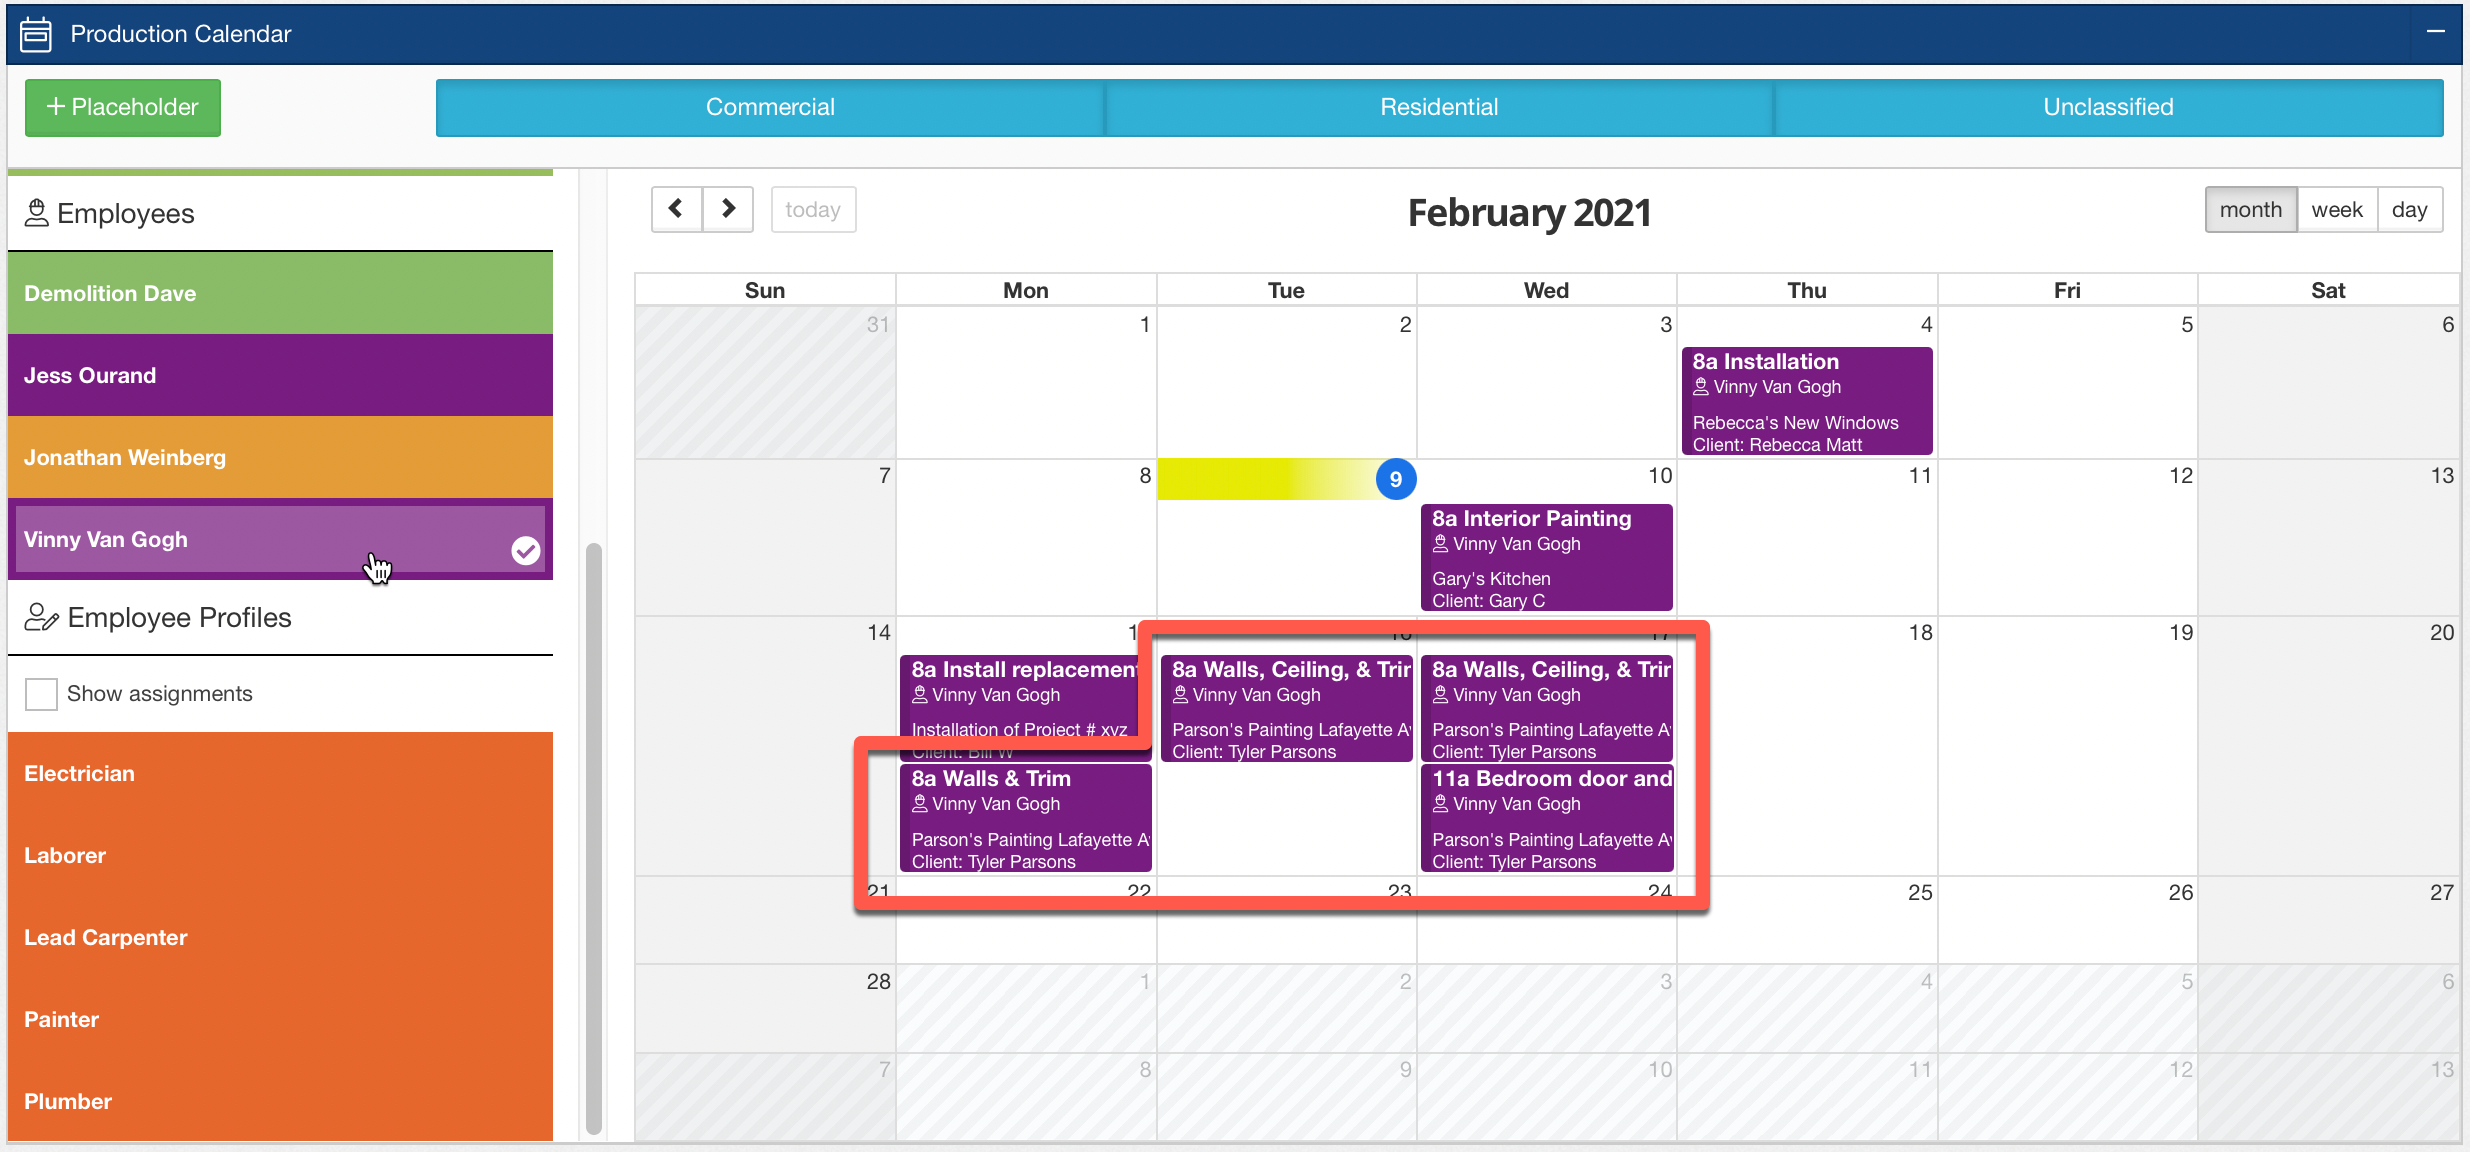
You can even view the production calendar based on the employee or subcontractor assignments on each project. We assigned Vinny Van Gogh for each of the painting subtasks and can view Vinny's calendar to see every job he's assigned to by clicking his name in the Assignments view of the Production Calendar.