Creating an Estimate with Price Book
Creating estimates with Price Book is quick and easy. It allows for on-the-spot estimates that can help clients sign faster
Using Price Book during sales calls is a piece of 🍰!
1. Enter the project information on the Info tab and press Save. 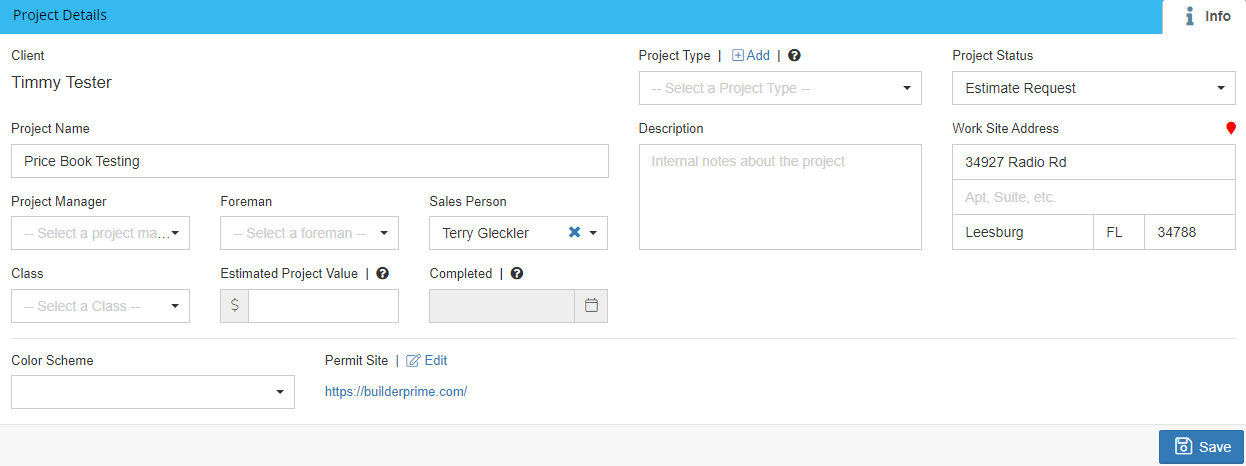
2. Click + Add Item to open the Price Book and start making your selections. 
3. Once in the Price Book, choose your first Category. In this example, the option selected is New Category. 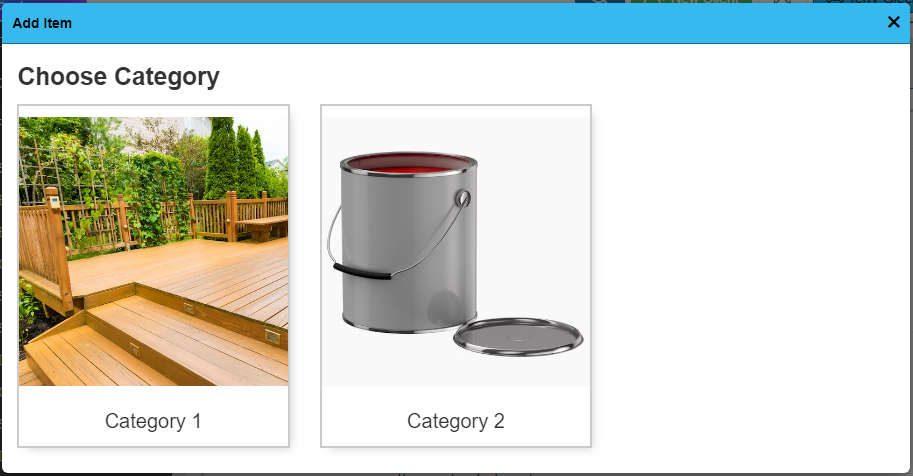
4. After selecting New Category, we have multiple Subcategory options to choose from. 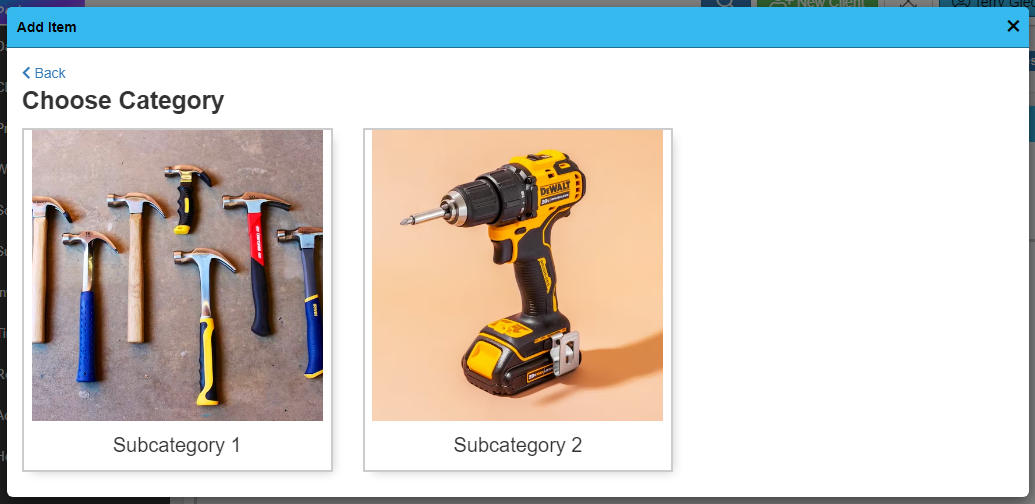
5. Next, select the Item, which is where pricing and job costing information is entered. 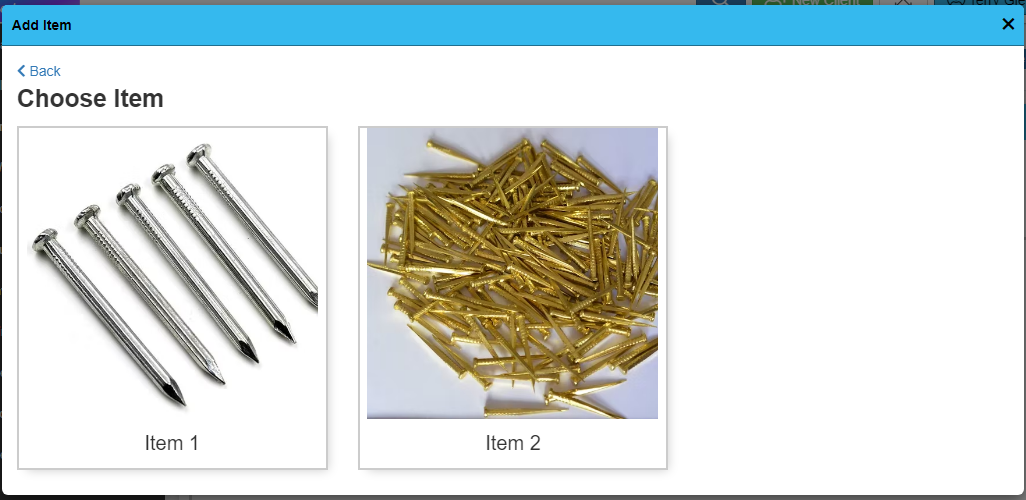
6. Fill in quantity or measurement to calculate the price. Add any notes if different from the default notes. Fill out any Property information if needed. 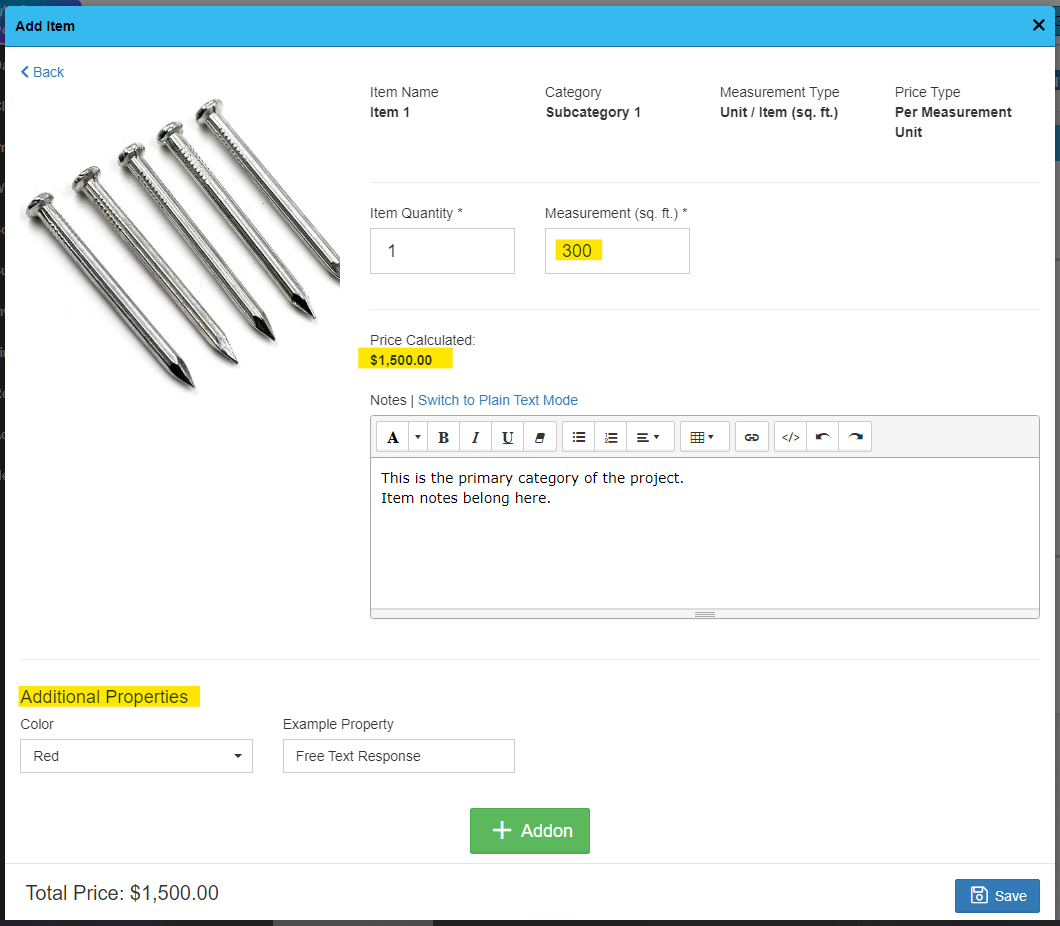
7. If there are any Addons, select + Addon and choose which Addon to include in the project. 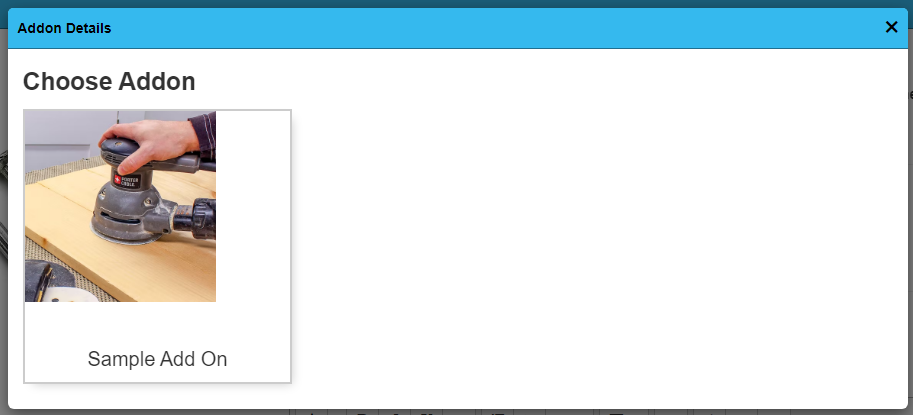
8. If the Addon is linked to parent quantity/measurement, it will automatically fill in. If the Addon measurement/quantity is separate from the parent Item, you will fill in the information. Click Save to review the project scope. 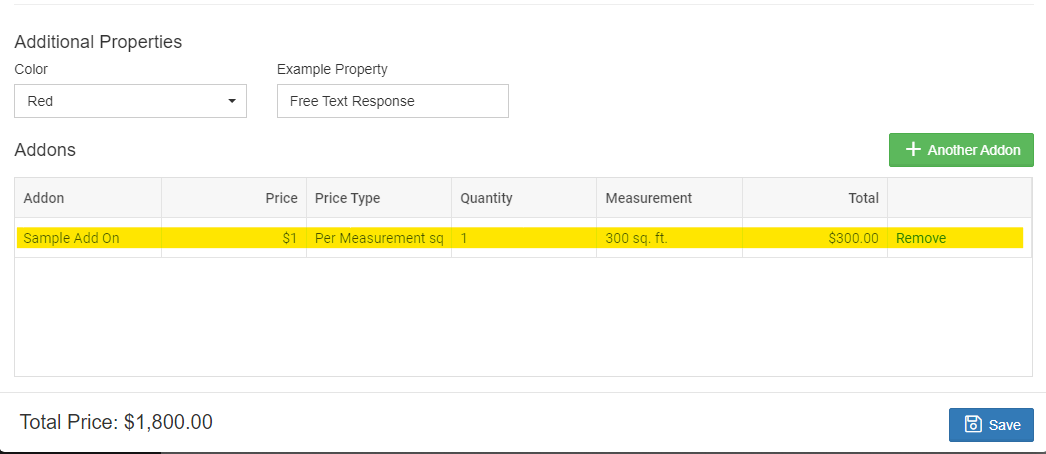
9. Once saved, view the Scope and review that the details are correct. 
10. From the Scope tab, Workers or Subcontractors can be swapped out for scheduling by clicking Workers and Subcontractors. 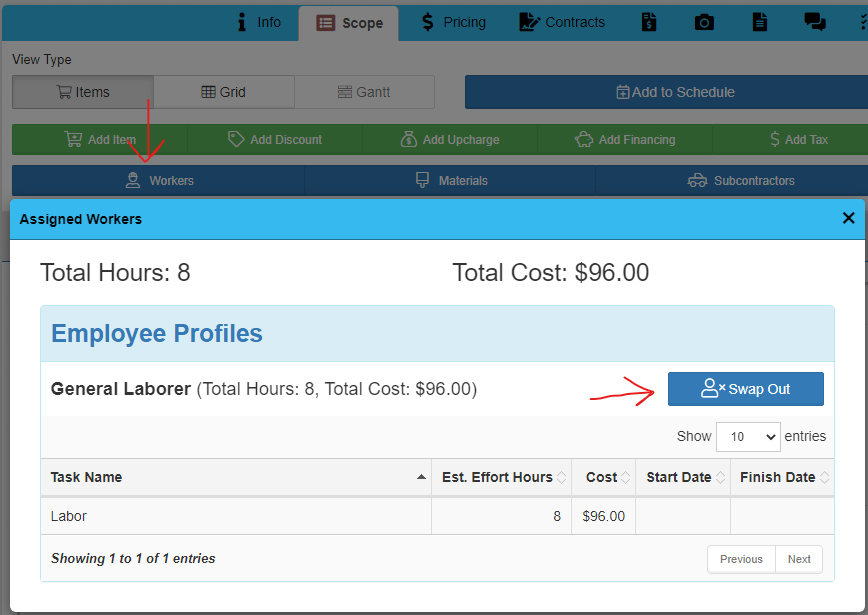
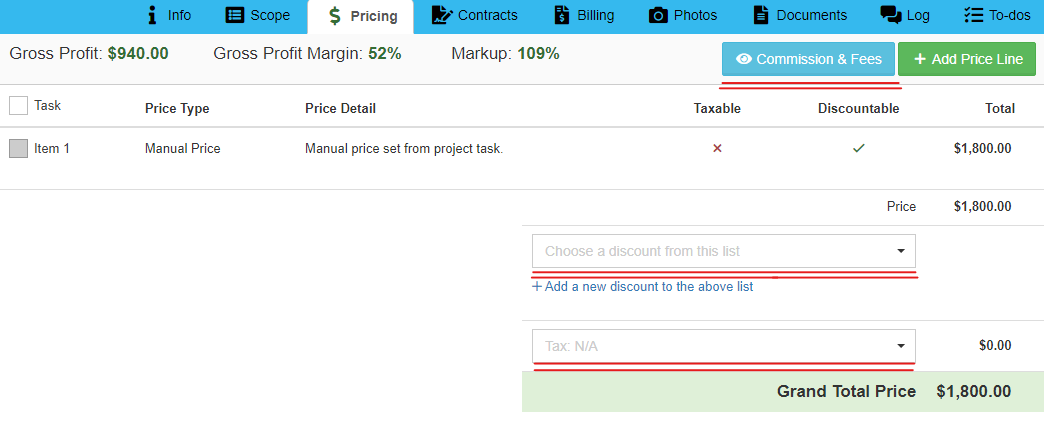
11. This page also allows additional items, discounts, upcharges, financing, and tax information to be added.  Click the Pricing tab to review the price, add commission & fees, discounts, and tax information if needed or if not done in the previous step.
12. Next, generate the proposal and be sure to use the Price Book Contract Template. This adjusts the formatting to include the Price Book images and organizes the information appropriate to the Price Book. 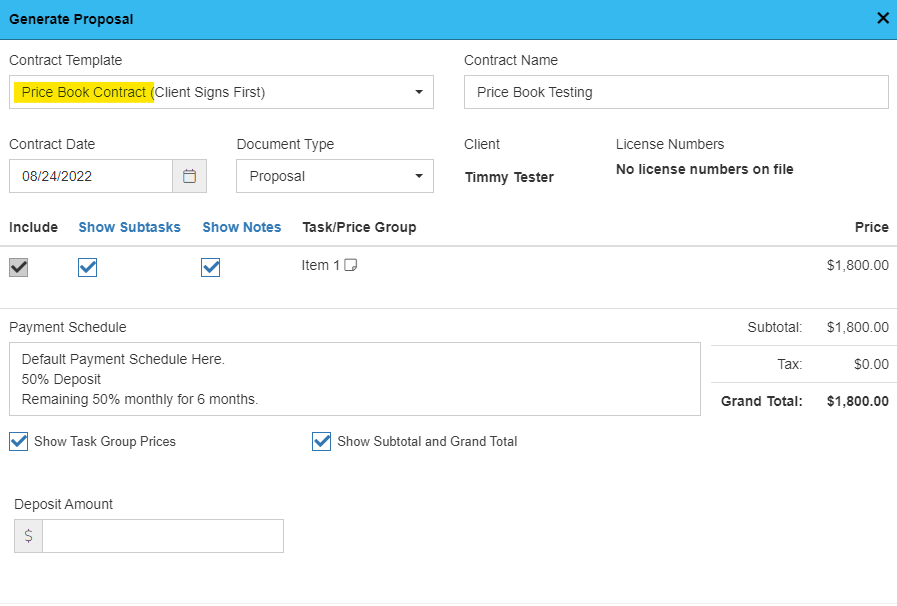
13. Once the contract has been generated, this can be sent for eSignature and invoiced per the previous method. 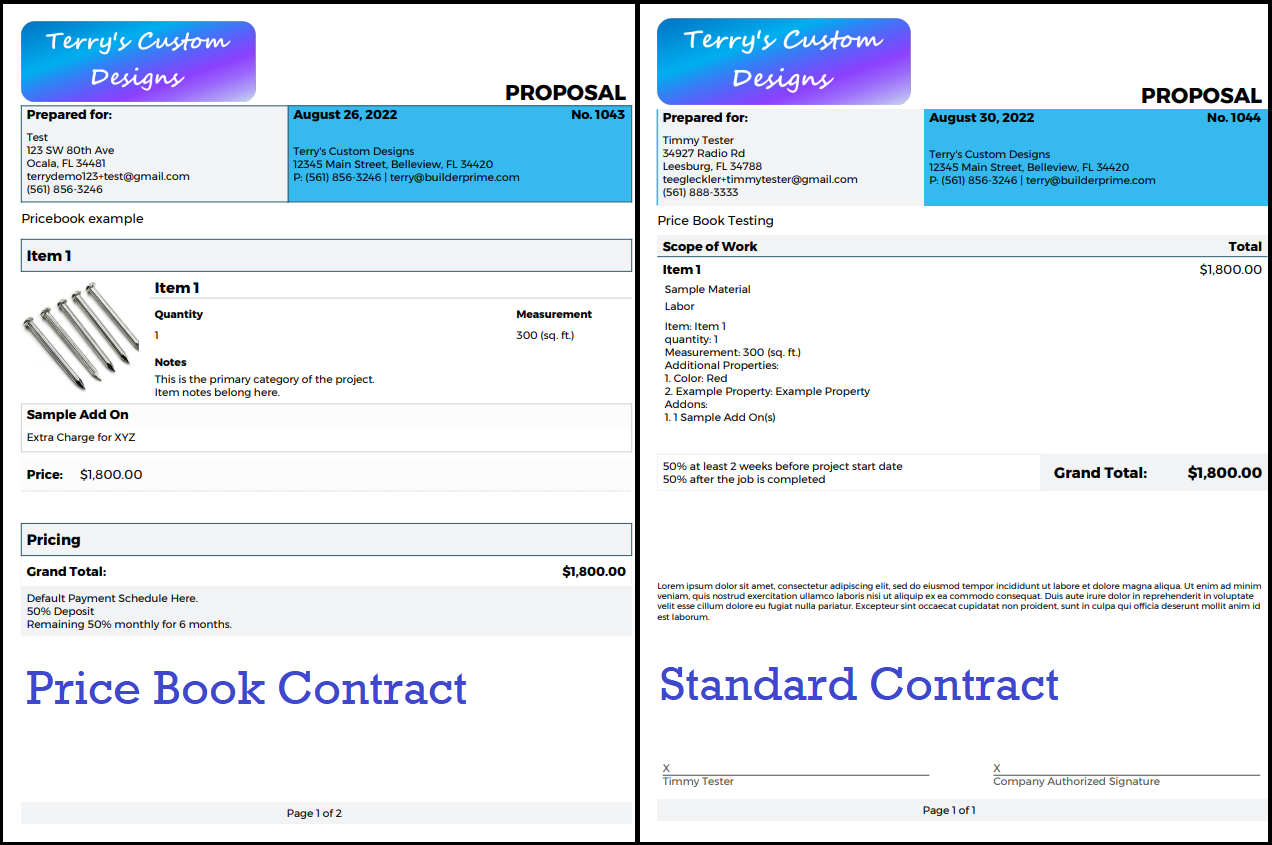
Price Book is available starting with the Growth plan. If you're interested in upgrading your current subscription, click HERE to learn how to upgrade your account.
-1.png?width=100&height=75&name=original-tar-ruler%20(1)-1.png)