Completing Bulk Actions
With the ability to complete bulk actions, you can perform any of the following tasks on multiple clients or projects at one time. Both Clients and Projects have their own set of actions, which are listed in the table below.
Client Bulk Actions Project Bulk Actions
| Client Bulk Actions | Project Bulk Actions |
|
Delete |
Delete Project |
| Update Lead Source | Update Project Type |
| Update Lead Status | Update Sales Person |
| Update Sales Person | Update Project Manager |
| Update Interested in | Update Foreman |
| Update Lead Setter | Update Class |
| Update Class | Send SMS |
| Send Email | Send Email |
| Send SMS | Add to Call Queue |
| Add to Call Queue | Create To-Do |
Follow the steps outlined below to perform a bulk action.
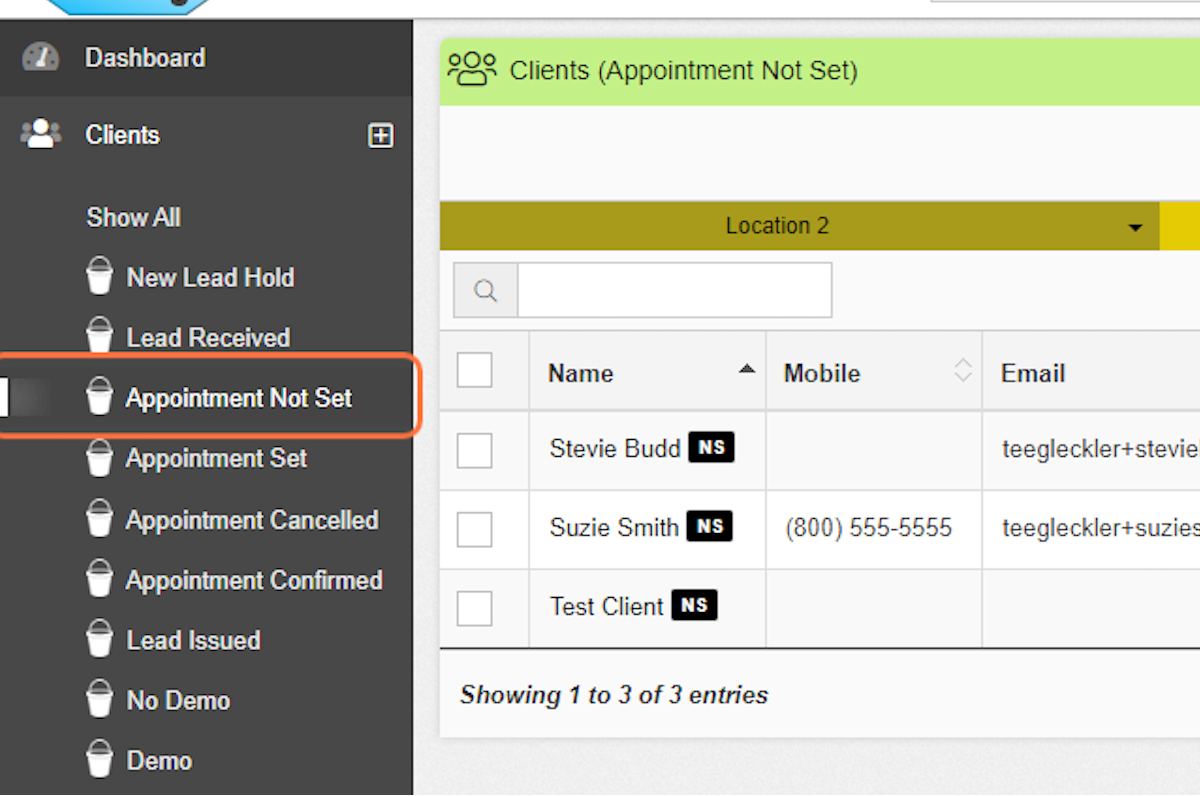
1. Choose your Client Bucket
Before performing a bulk action, you can filter the clients by choosing a specific Lead Status, or showing all clients and using the search box.
Example: I need to reassign the salesperson for Leads who were previously assigned to John Smith. As long as the salesperson displays in the clients table (this can be changed under Admin > Display Preferences), I can search for John Smith in the search box to reassign those Leads.
Example: I want to send an email to all Leads currently in the "Appointment Not Set" status. This can be accomplished by selecting the "Appointment Not Set" bucket from the Clients menu.

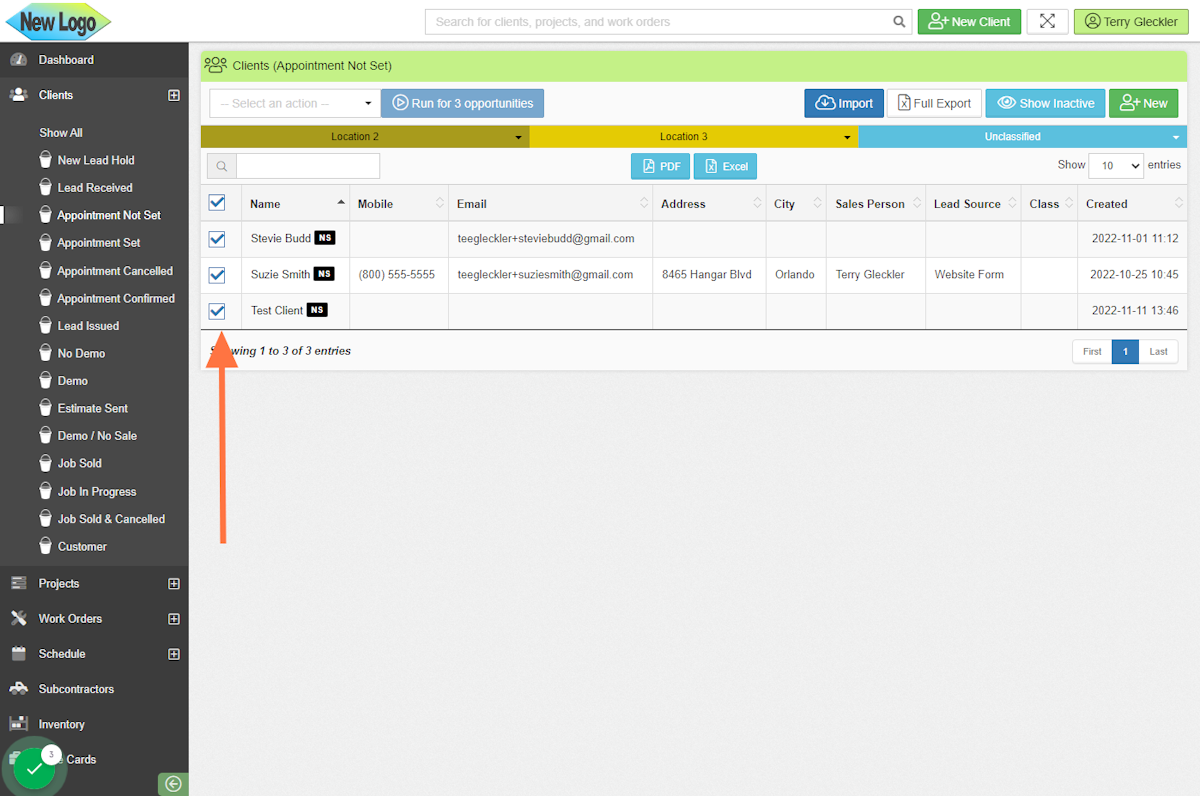
2. Check the Boxes
Use the top check to check all of the boxes, or manually check the box next to specific clients you want to complete the bulk action for. To show more clients on the page, you can change how many are visible by using the dropdown on the right corner of the table that says "Show 10 entries."

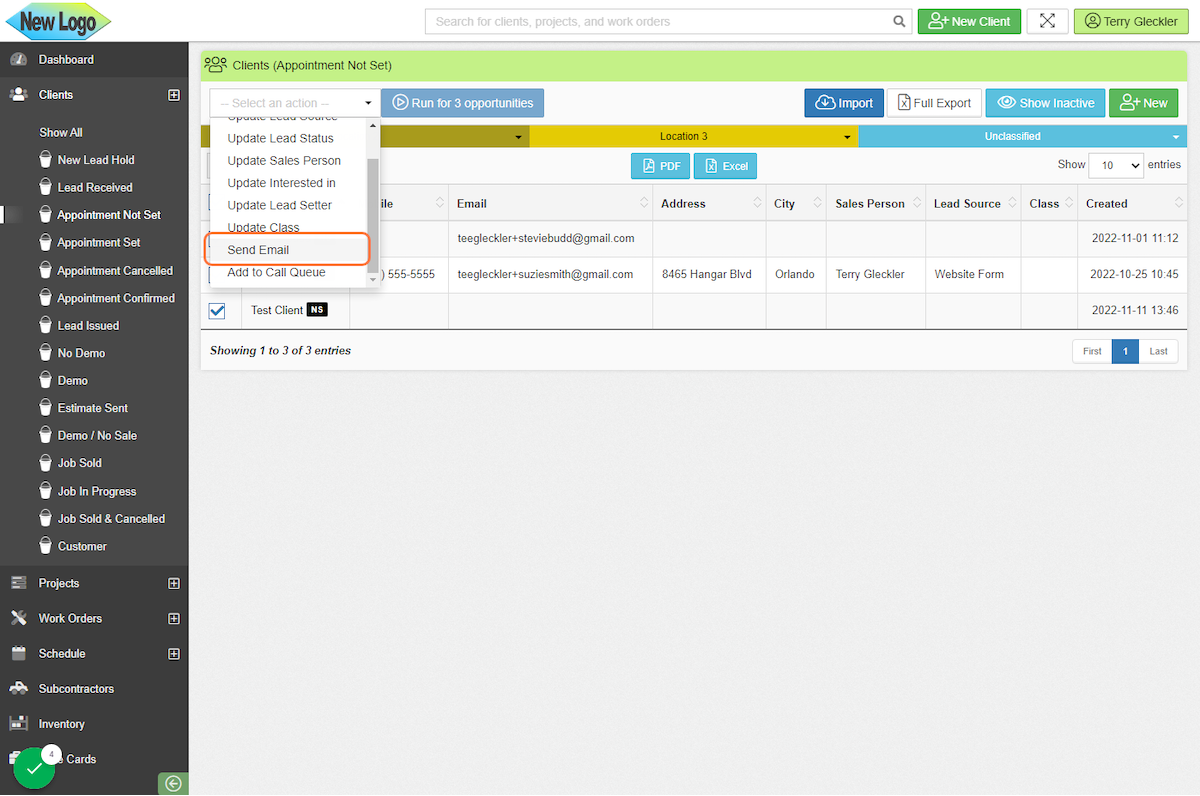
3. Choose the Bulk Action
Select the bulk action being completed from the dropdown menu above the table and click run.
Important: Bulk emails can only be sent if a Gmail account is integrated.

4. Run the Opportunity
This will open up an additional window to make specific selections. If sending a bulk email, you can choose a template or write the email from scratch. If you are updating the status, you will be prompted to choose the new status. If updating the salesperson, you will be prompted to choose the new salesperson.

5. Click on Run
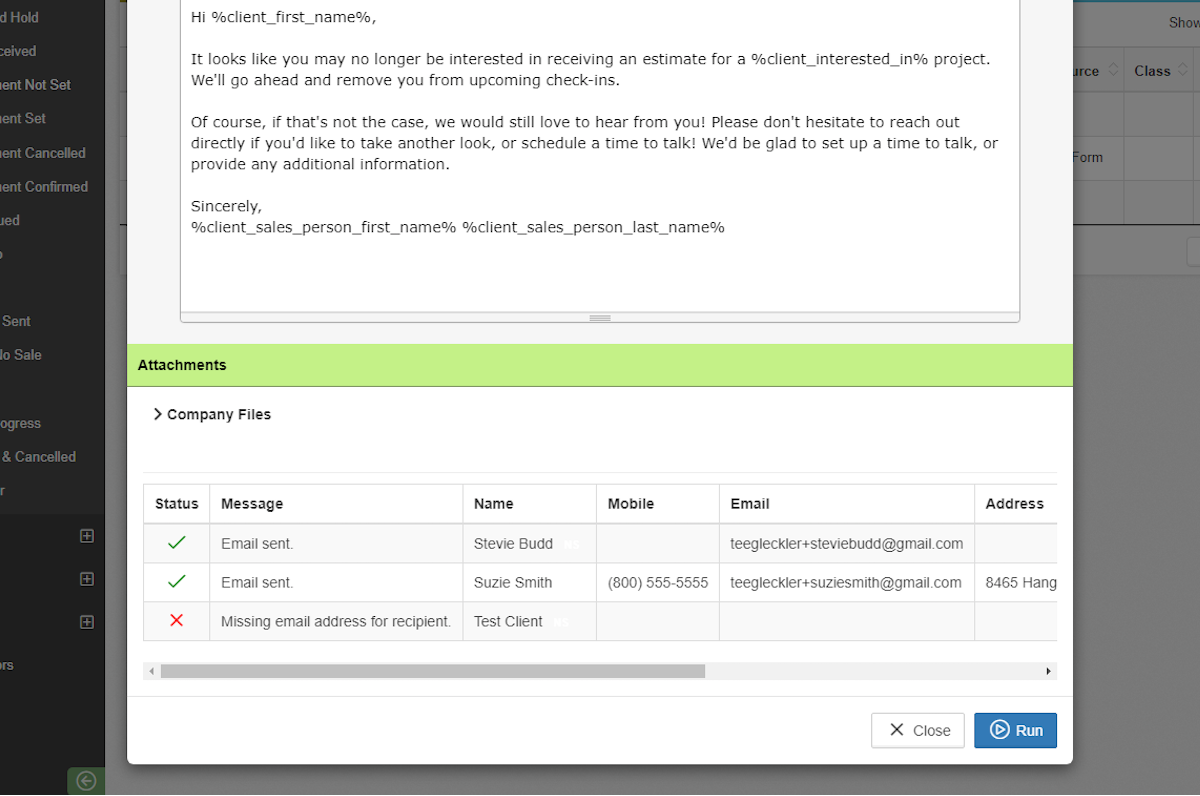
6. Review the Status
If any of the opportunities were unsuccessful, this is noted with a red "X" and the reason it was unsuccessful.

-1.png?width=100&height=75&name=original-tar-ruler%20(1)-1.png)