Automations for Lead Statuses in Builder Prime
We are very excited to announce that we have developed a few new Lead Status automations - streamlining your workflow to the next level. You'll now have more control over the platform with these new options made available in the Builder Prime CRM
As you already know, Lead Statuses can change depending on triggers occurring in the platform. To manage your leads even better, we have allowed for new automations based on appointment types, appointment confirmations, and appointment cancellations.
Here are the 4 new triggers you can now utilize in automations on your Lead Statuses, which we will talk more about later:
- An appointment has been marked as confirmed for a client
- An appointment has been marked cancelled for a client
- An appointment has been set for the client with a meeting type that is considered a Sales Meeting
- An appointment has been set for the client with your chosen meeting type
Newly Added Triggers:
You now have a total of 8 triggers available for lead status customization. Click on the drop-down to add more triggers as necessary.
New Trigger 1: An appointment has been marked as confirmed for a client:
Now you can use this trigger to update a lead status after a meeting has been confirmed. This helps you gain more clarity as to where your lead is in your sales funnel before it advances to the next bucket or status.
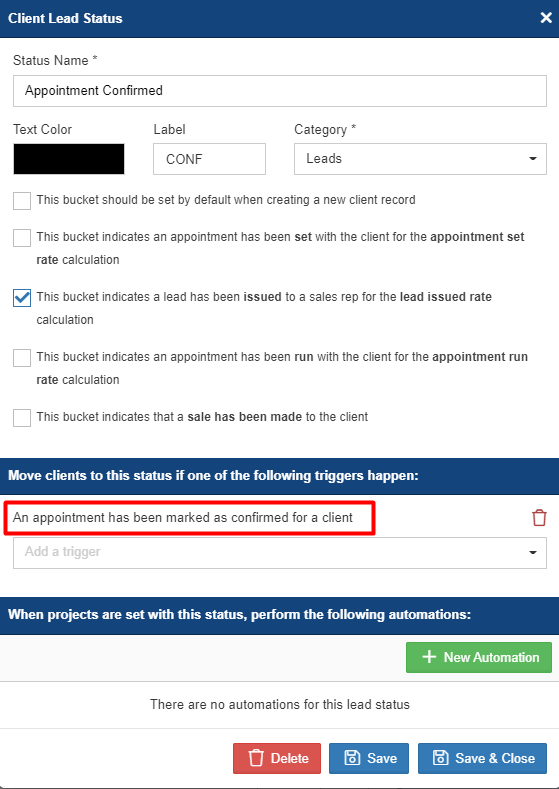
If you would like to add a new Lead Status for when a client confirms a sales appointment, head to Admin > Configure to get started. Under the Lead Status section, click on “New Lead Status” button. Choose a name for the new status (e.g. Appointment Confirmed), choose a text color, label, and category where you want to apply your new automation (we recommend "Prospects").
Check the boxes that appropriately apply to the status. In this example, we want to indicate that a lead has been issued to a sales rep for the lead issued rate calculation. Once finished, click on “Save & Close”.
Notice the trigger we've selected. This means that a client's Status will now automatically advance to our Appointment Confirmed status when an appointment has been marked confirmed.
Real World Example:
To see how this new status works, let’s create a new meeting by navigating to Clients > Lead Received. Create a new meeting as usual under the Meetings & Reminders widget.
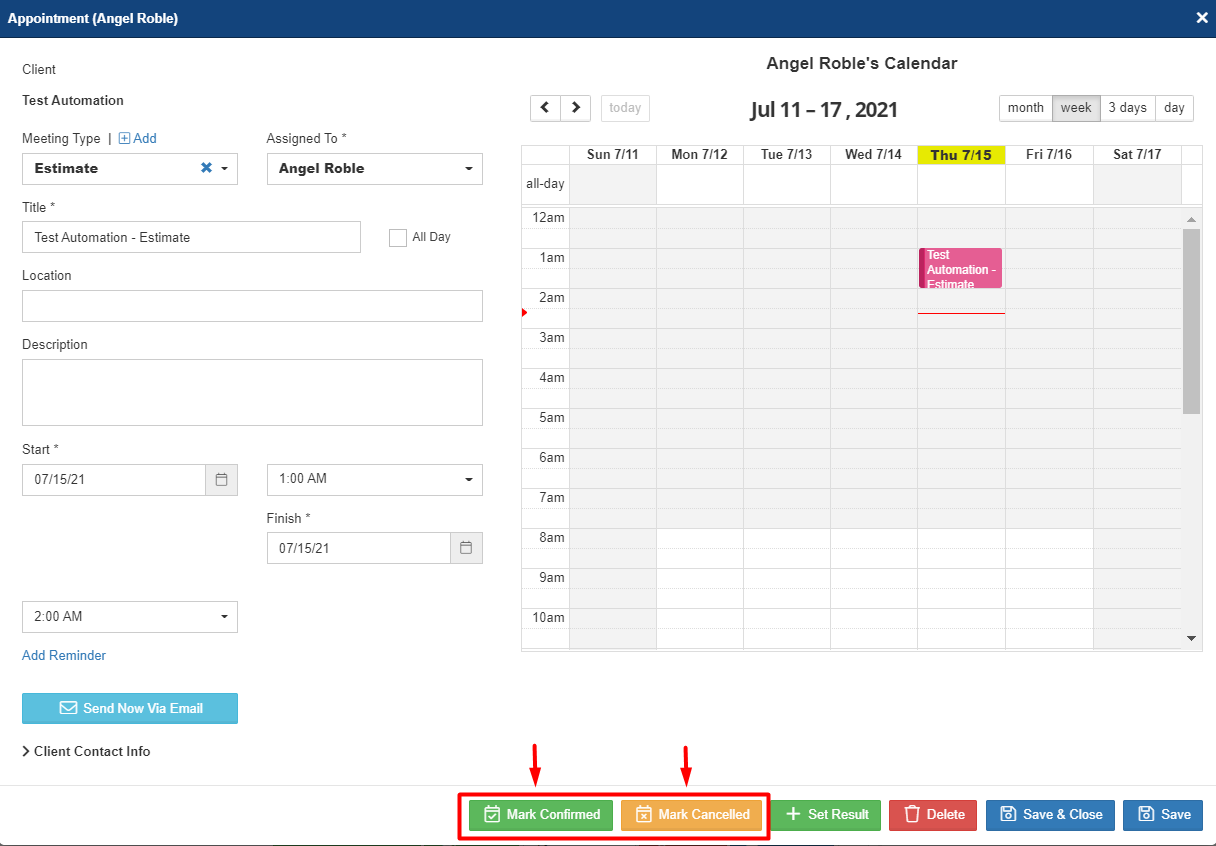
Once you’ve saved a meeting, you'll notice two new actions, Mark Confirmed and Mark Cancelled. Click “Mark Confirmed” to confirm the meeting. You'll notice the banner at the top of the appointment record noting that the meeting has been confirmed. If this was a mistake, you can click “Mark Unconfirmed” at the top right to undo the confirmation.
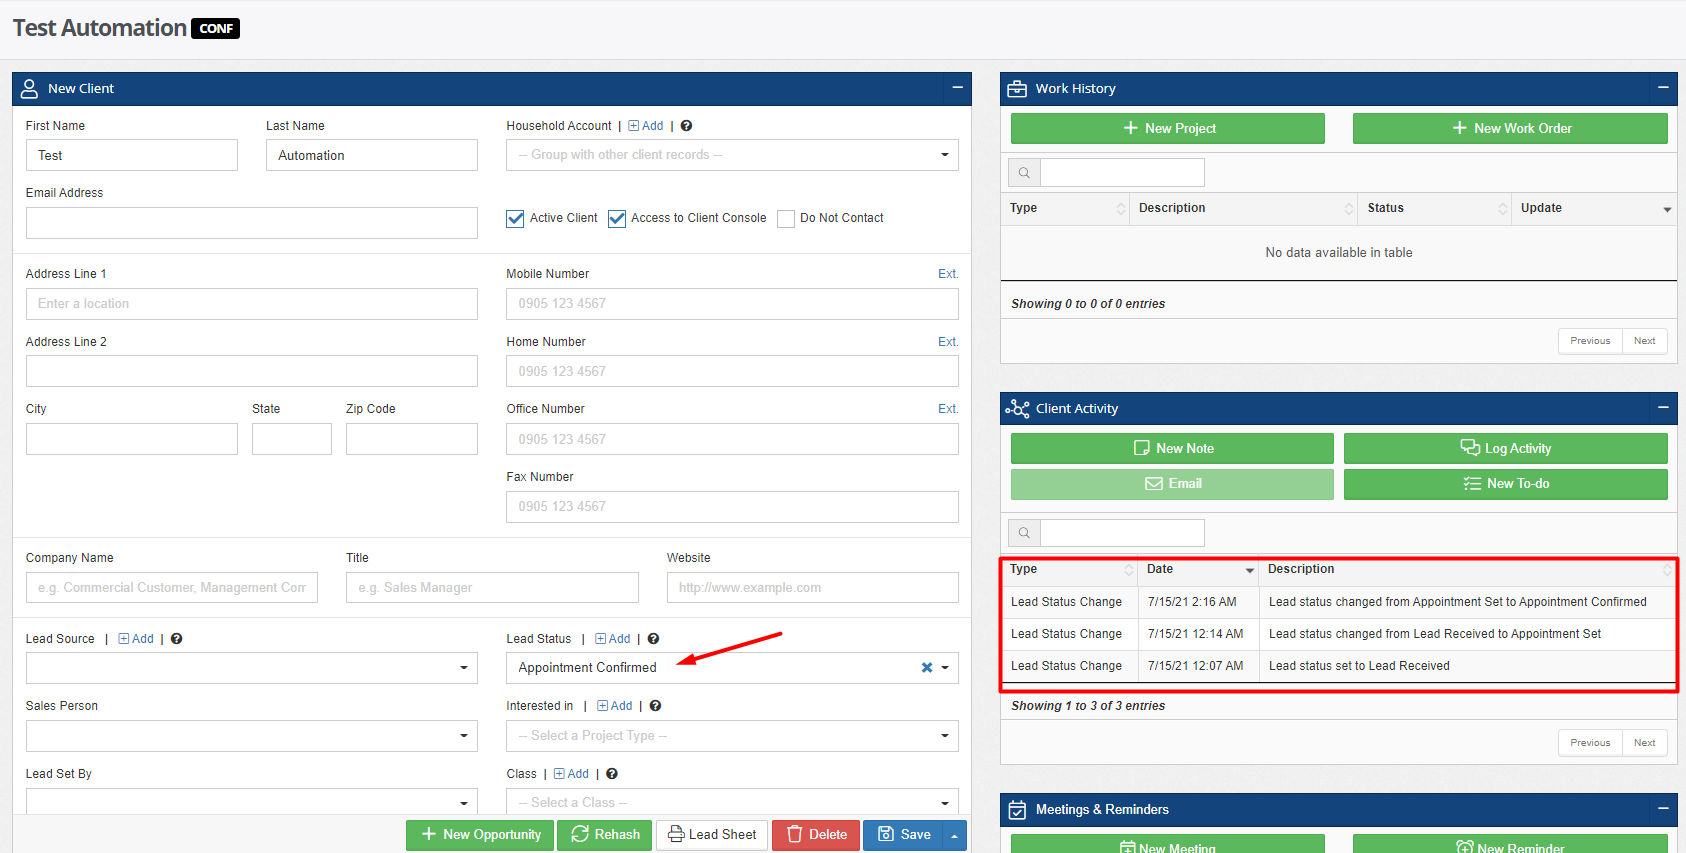
Return to the Client's Record. As shown, the lead status advanced to “Appointment Confirmed” with the Client Activity automatically updated.
New Trigger 2: An appointment has been marked cancelled for a client
When you mark an appointment as Cancelled, it can move the Lead record to the “Appointment Cancelled” status. Now you can cancel an appointment instead of deleting it and the record of it existing. This allows you to have a more complete audit trail of everything that has happened with your clients. Remember, to add this automation, you'll need to select this trigger on the Appointment Cancelled lead status in Admin > Configure.
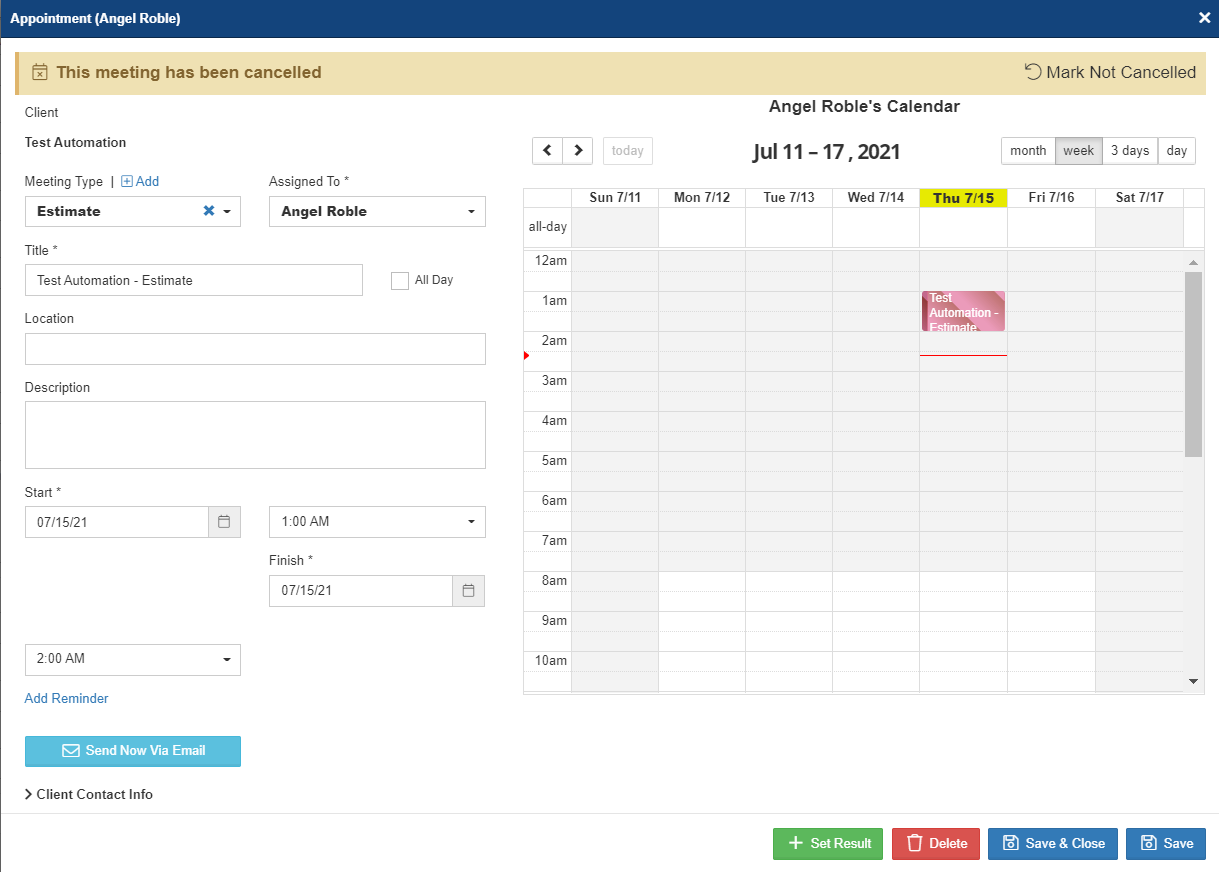
Above, you can see this example meeting has been marked cancelled.
New Trigger 3: An appointment has been set for the client with a meeting type that is considered a Sales Meeting
This trigger is specifically created for a meeting type that is considered a “Sales Meeting”. You can manage any number of Meeting Types. Some can be considered "Sales Types" that can be resulted.
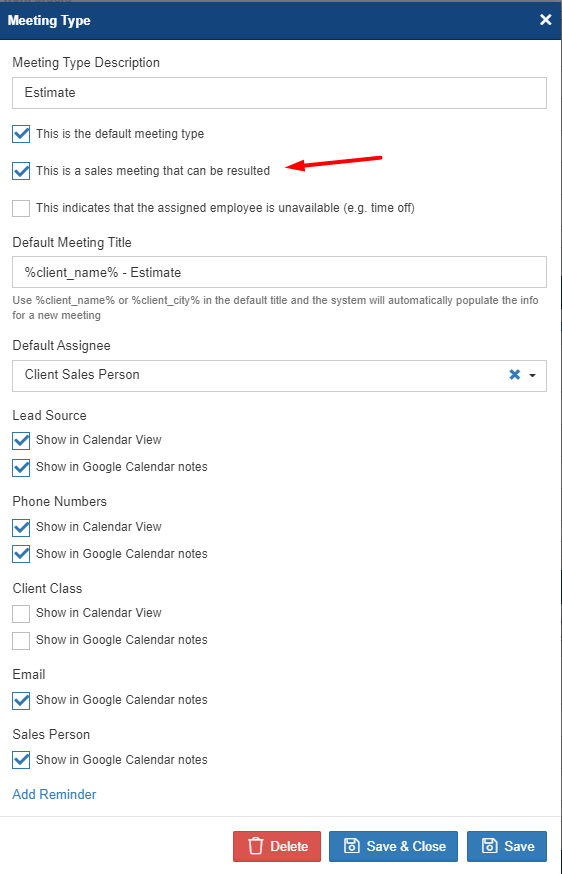
I
n Admin > Configure > Meeting Types, choose a meeting type (e.g. Estimate) to identify it whether as a sales meeting or not. Check or uncheck the “This is a sales meeting that can be resulted”.
New Trigger 4: An appointment has been set for the client with meeting type: X
Now you can select a trigger to update a lead status based on the type of meeting. You'll see your meeting types in the drop down. Here, you can define to update a lead status if one type of meeting is scheduled with the client.
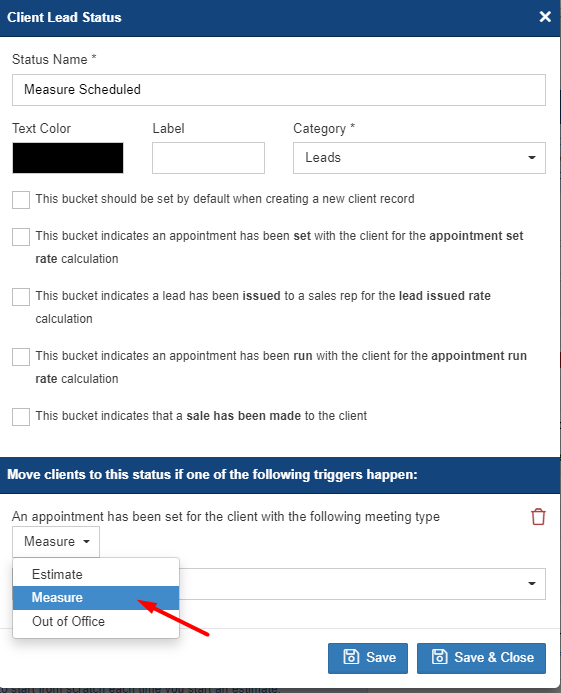 In this example,
we created a Lead Status called “Measure Scheduled”, and then used the trigger 'An appointment has been set for the client with the following meeting type' “Measure”.
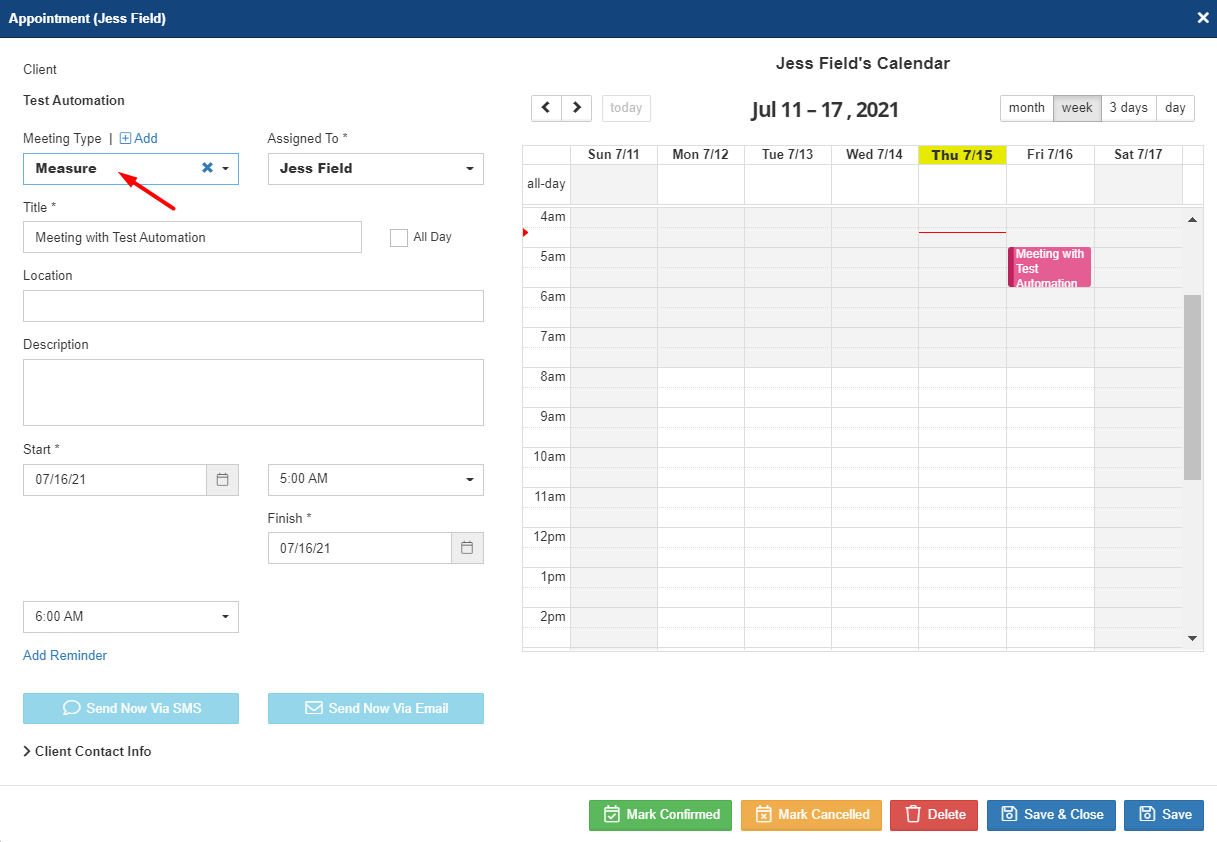
Create a new appointment from your Client Record under Meetings & Reminders Section. Choose “Measure” as the Meeting Type, and fill in the necessary information.
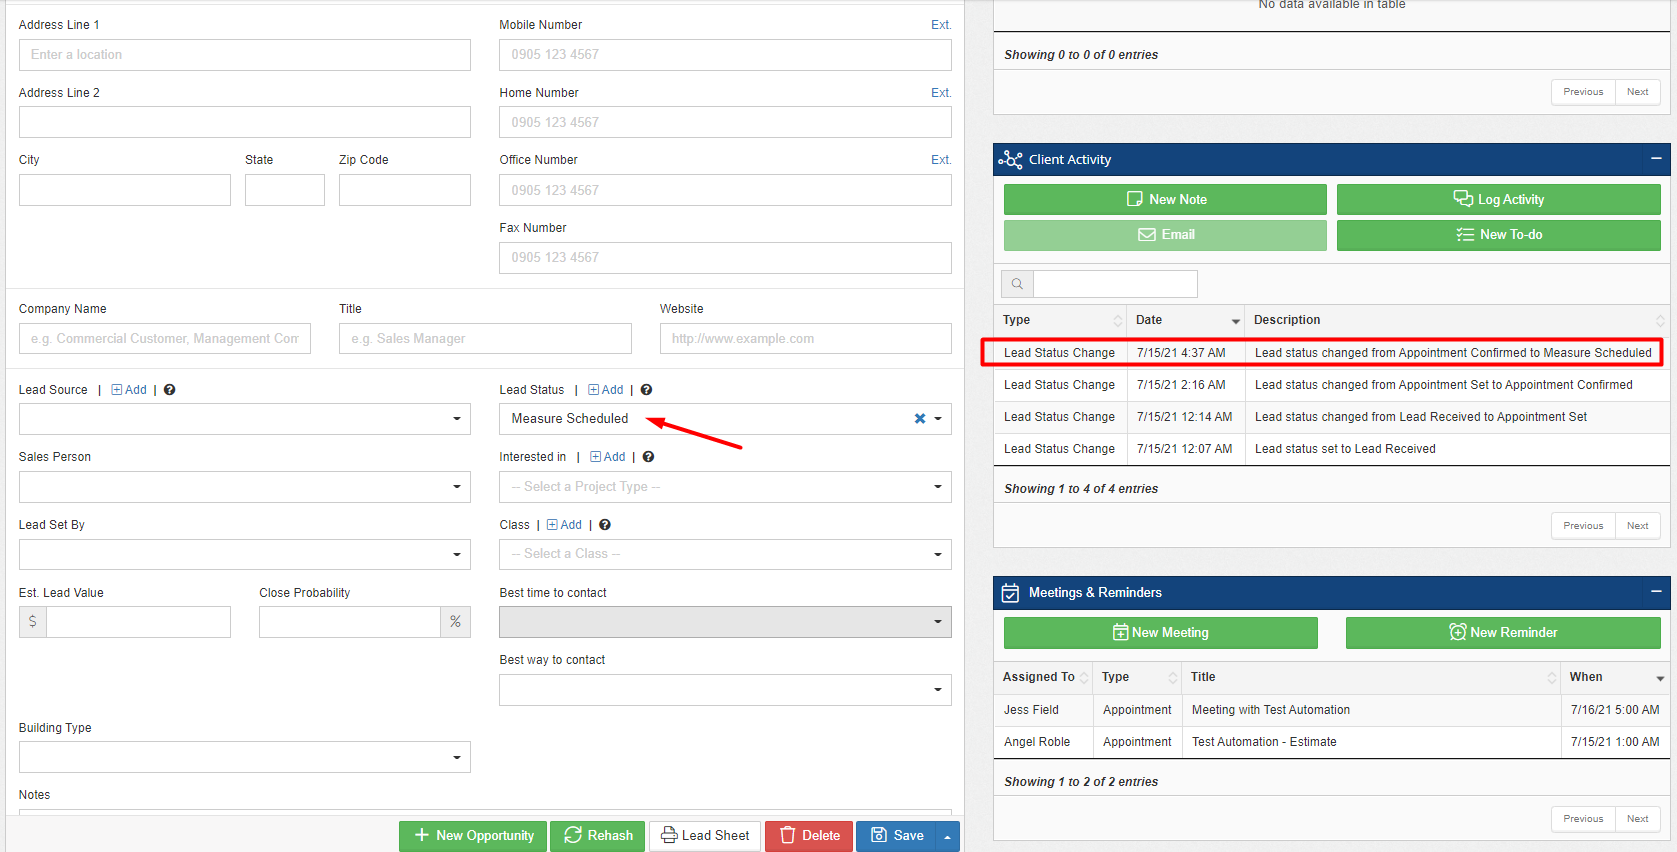
As soon as you click on “Save & Close”, the appointment will advance to “Measure Scheduled" status.
Note: You can use these new triggers in any way that could help you handle your operations better. Feel free to customize your Lead Statuses to achieve the organization that is suitable for your workflow.
Custom automations are available starting with the Essentials plan. If you're interested in upgrading your current subscription, click HERE to learn how to upgrade your account.
-1.png?width=100&height=75&name=original-tar-ruler%20(1)-1.png)