Adding Users to Builder Prime
Follow this article to learn how to add users to your Builder Prime account
The video below will walk you through how to add your team to Builder Prime. Keep scrolling down for additional instructions and information.
To understand how billing works for additional users, check out this article HERE.
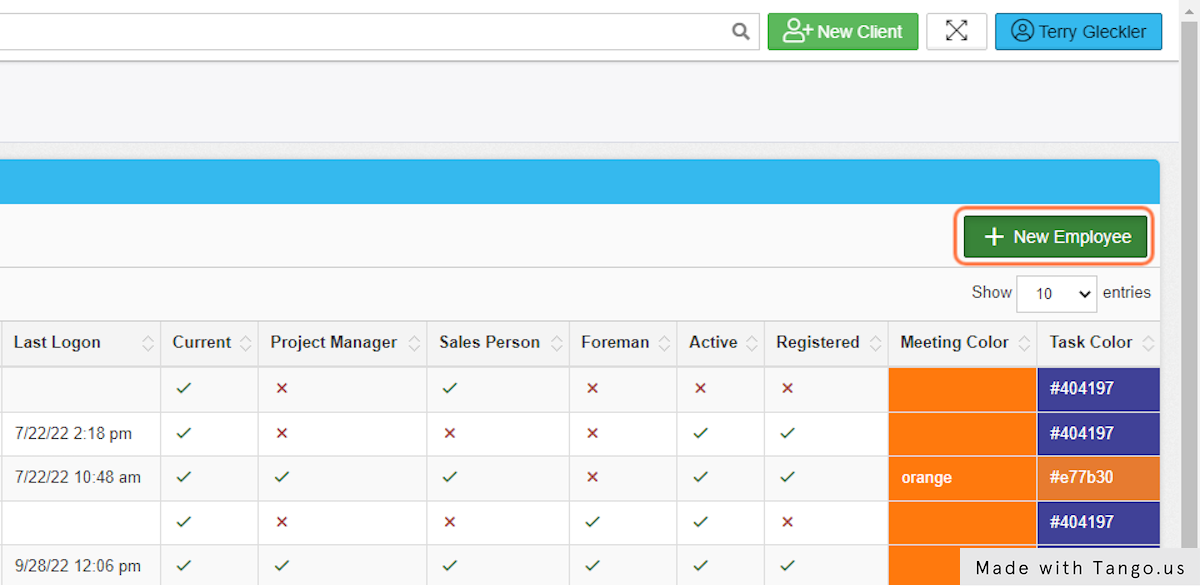
1. In the main menu, click Admin > Employees > then select + New Employee
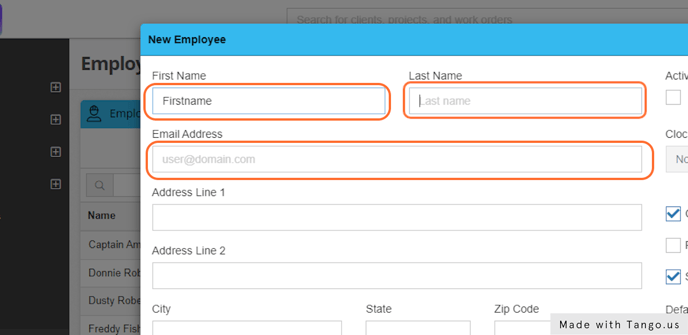
2. Add the new user's contact information.
The first and last name are required fields. The email address is also required for the user to log in and register. If there are any automations built to send emails to employees, this is the email they will go to. Adding a phone number will allow the employee to receive any SMS automations, such as meeting reminders.

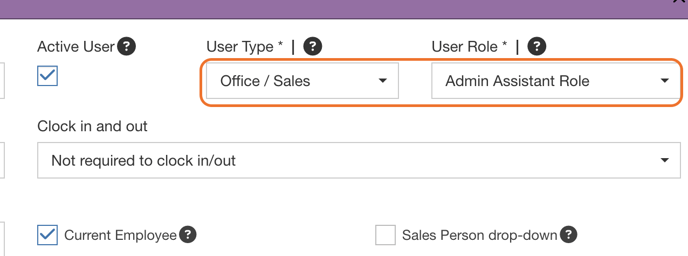
3. Mark as an Active User
Marking as Active will allow you to designate the user type and role to the employee. This will also allow the user to log into Builder Prime. If for any reason you need to revoke an employee's access to Builder Prime, you can mark them as inactive by unchecking this box.
Once you check the Active User checkbox, you will see the two dropdowns appear to the right where you will select the User Type and the User Role.
User Type will determine the type of user for billing purposes when it comes to your subscription to the Builder Prime software.
- Office/Sales: Broad, but customizable access to Builder Prime, including the ability to create Leads, proposals, and use built-in communication tools.
- Field User: Very limited access. They will have the ability to clock in and out based on their GPS location, view the schedule of tasks they are assigned to perform, upload job photos, update the project log, and update their time sheets.
User Role determines the user's permissions. The roles and permissions can be managed by navigating to Admin > Roles in the main menu navigation. There are built-in User Roles, but each role's permissions can be updated for custom access to the system. You can also create new User Roles to suit the needs of your company depending on your level of subscription to Builder Prime.

4. Set up time tracking and additional settings.
- Use the "Clock in and out" dropdown to set up time tracking for the employee.
- Marking an inactive employee as "Current Employee" will add the employee to various dropdowns for scheduling and assigning to jobs.
- The checkboxes below this will determine which dropdowns the employee will be show up as an option. You can also determine if this user will be shown by default within the sales calendar.
- Finally, choose calendar colors. The Meeting color will show on the sales calendar, and the production color will show on the production calendar.

5. Add commission or hourly cost to the record.
When calculating labor costs in a project, this number is used to determine the cost of each employee's labor. The default commission is the percentage of the sale which goes to a sales employee. This is applied in the Pricing section of a project under the Commissions and Fees menu.

6. Optional: Add a personal touch with an employee photo and/or bio.
There are email variables to include both the photo and/or bio in templates. The use case would be the introduction to the sales rep within an appointment reminder email. The template can include an image and bio of the sales employee for a warm intro and personal touch.

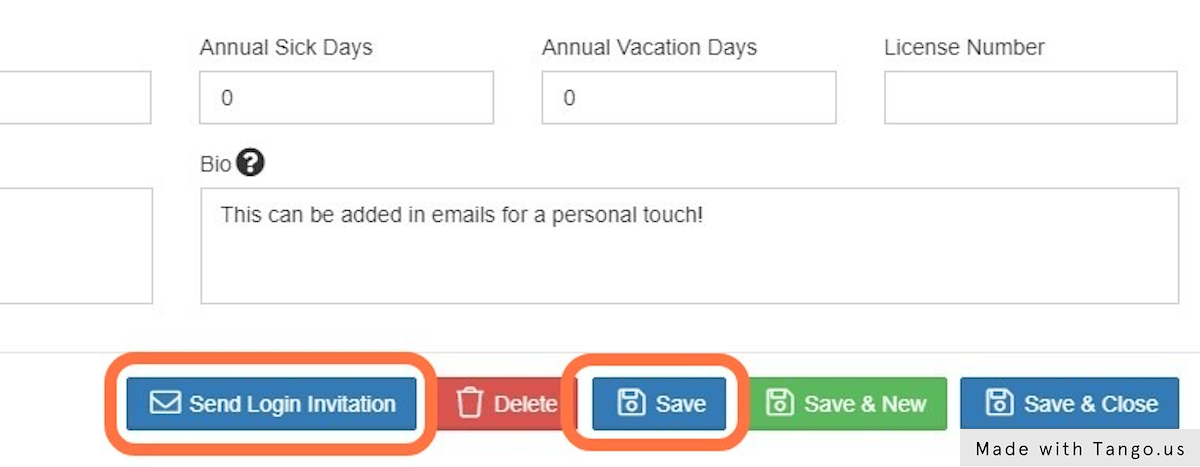
7. Save and Send Login Information
Saving only will allow you to assign the employee on projects. They will only be able to use the system themselves when the login invitation is sent to their email address and they complete the registration process. You will only be billed for the user once they have logged in and if they are marked as active.


-1.png?width=100&height=75&name=original-tar-ruler%20(1)-1.png)