Adding Automations to Project Statuses
Project Status Automations ensure that all project members stay informed without manual tracking of project details.
Add automations to Project Statuses to streamline your workflow. Watch the video below or review the step-by-step instructions below to understand the process.
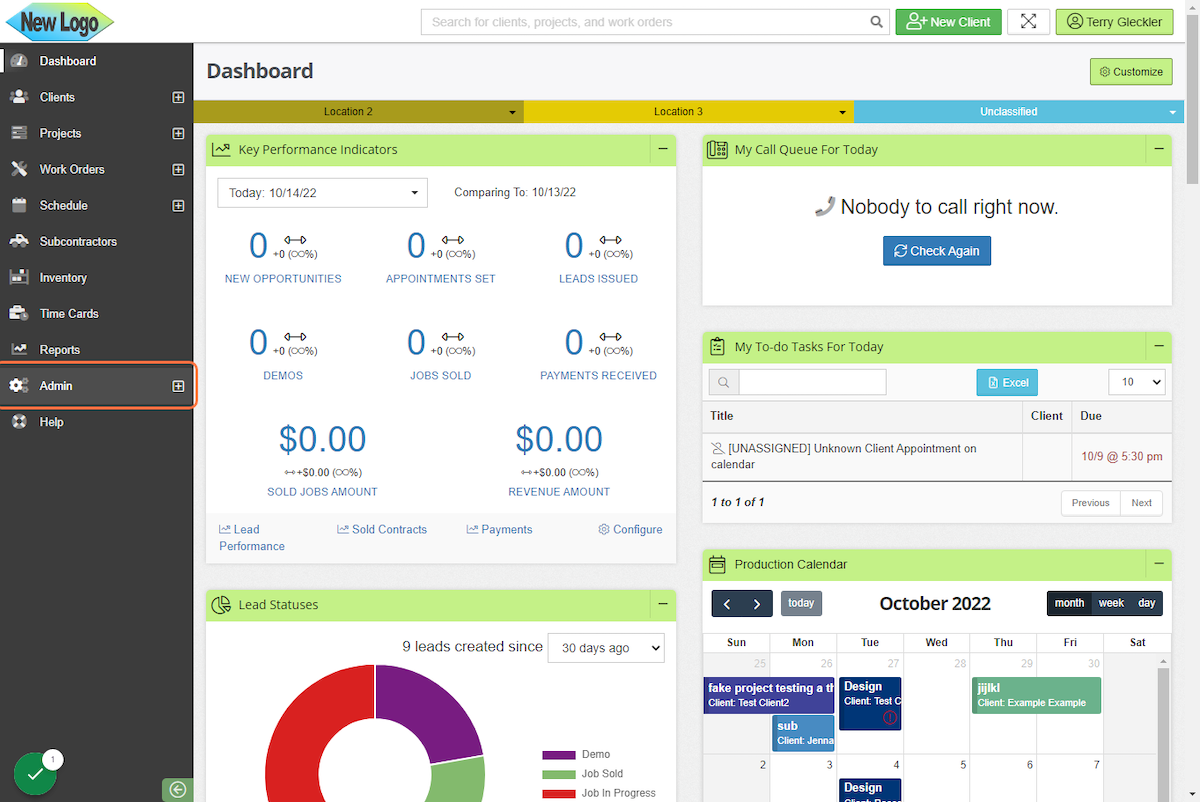
1. Click on Admin
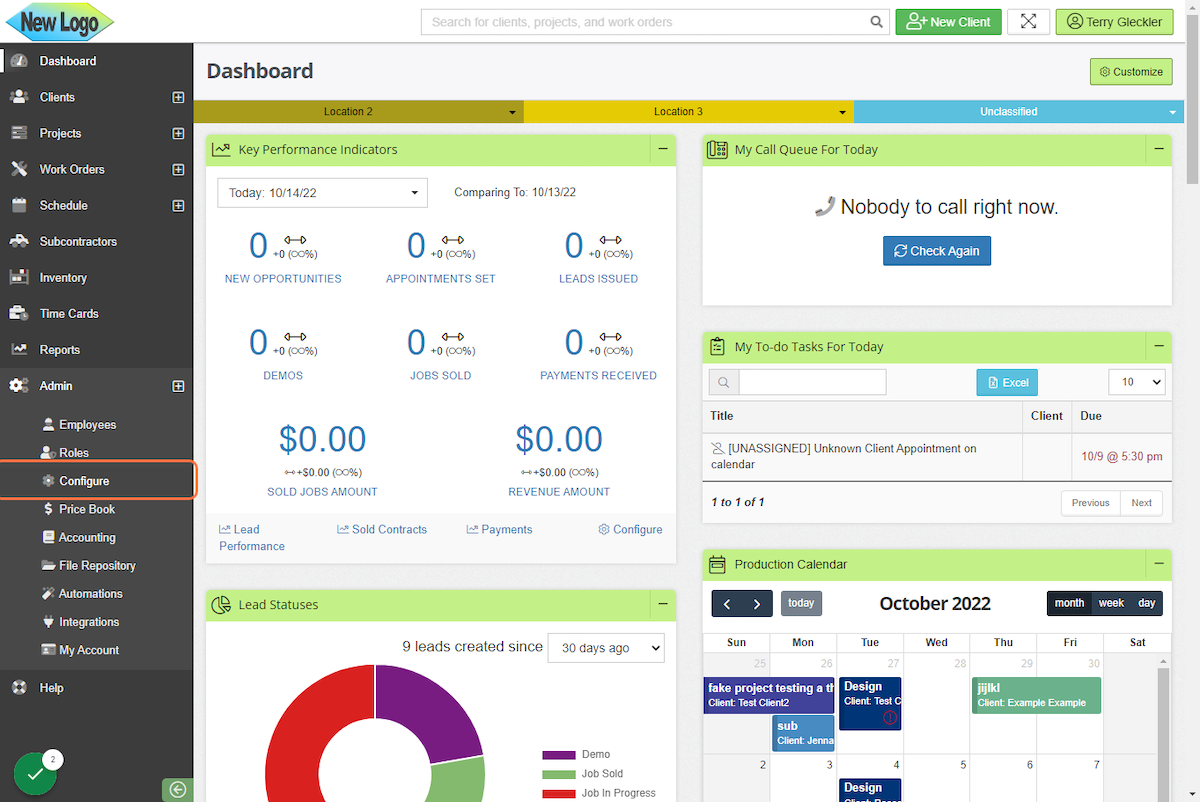
2. Click on Configure
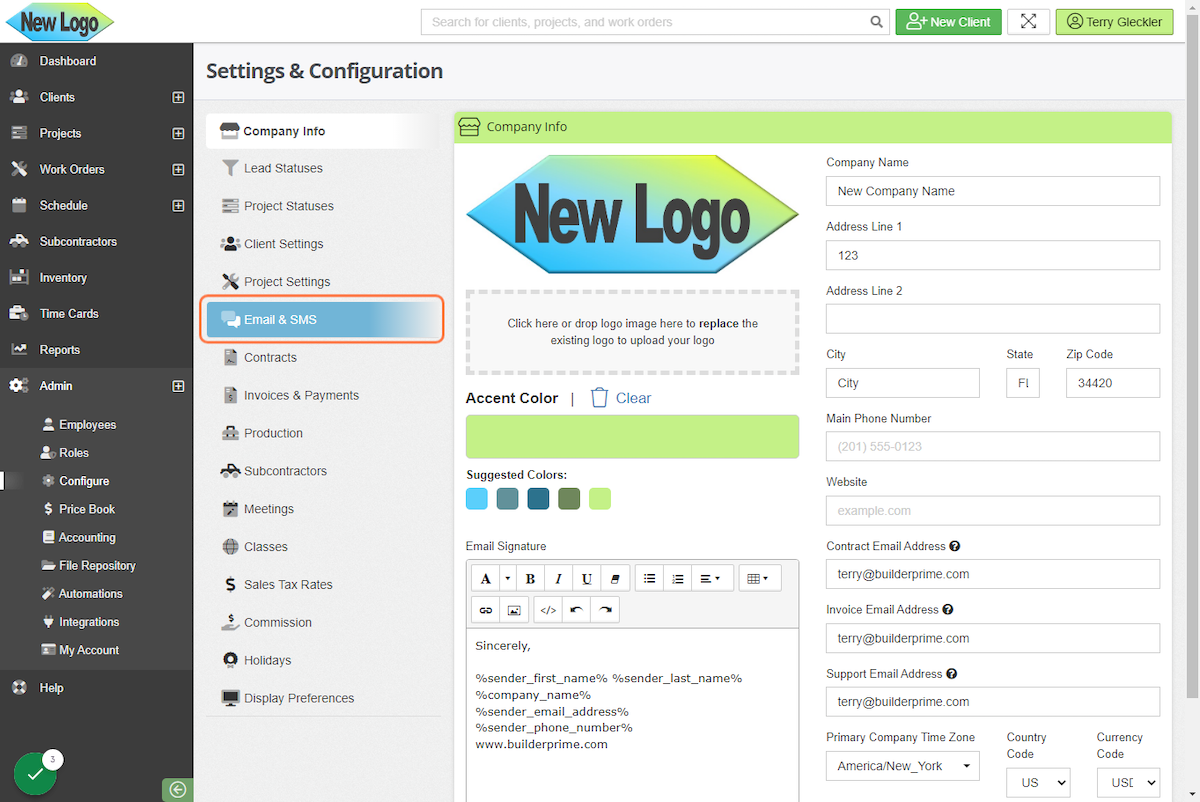
3. Click on Email & SMS
One option for adding Email & SMS automations is to create this in the Email & SMS section. Once the emails are created, they can be selected from a dropdown of available templates when configuring the automation itself.
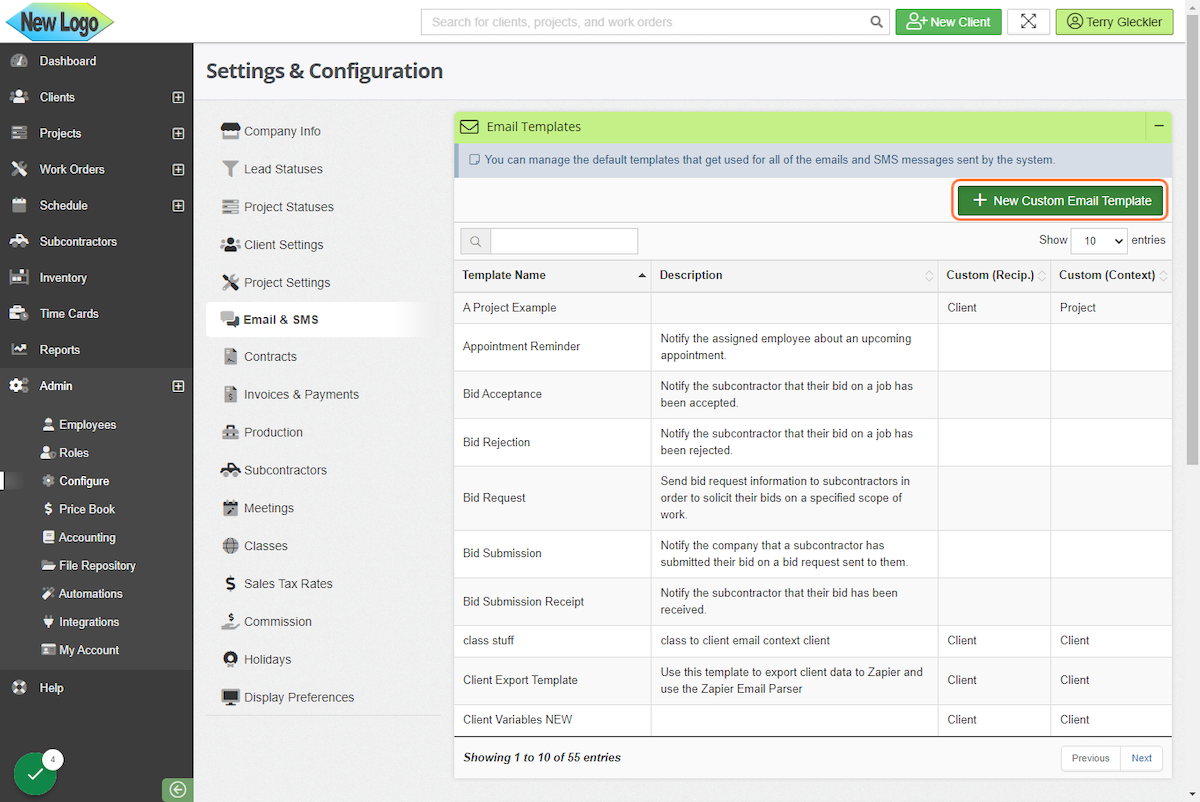
4. Click on New Custom Email Template
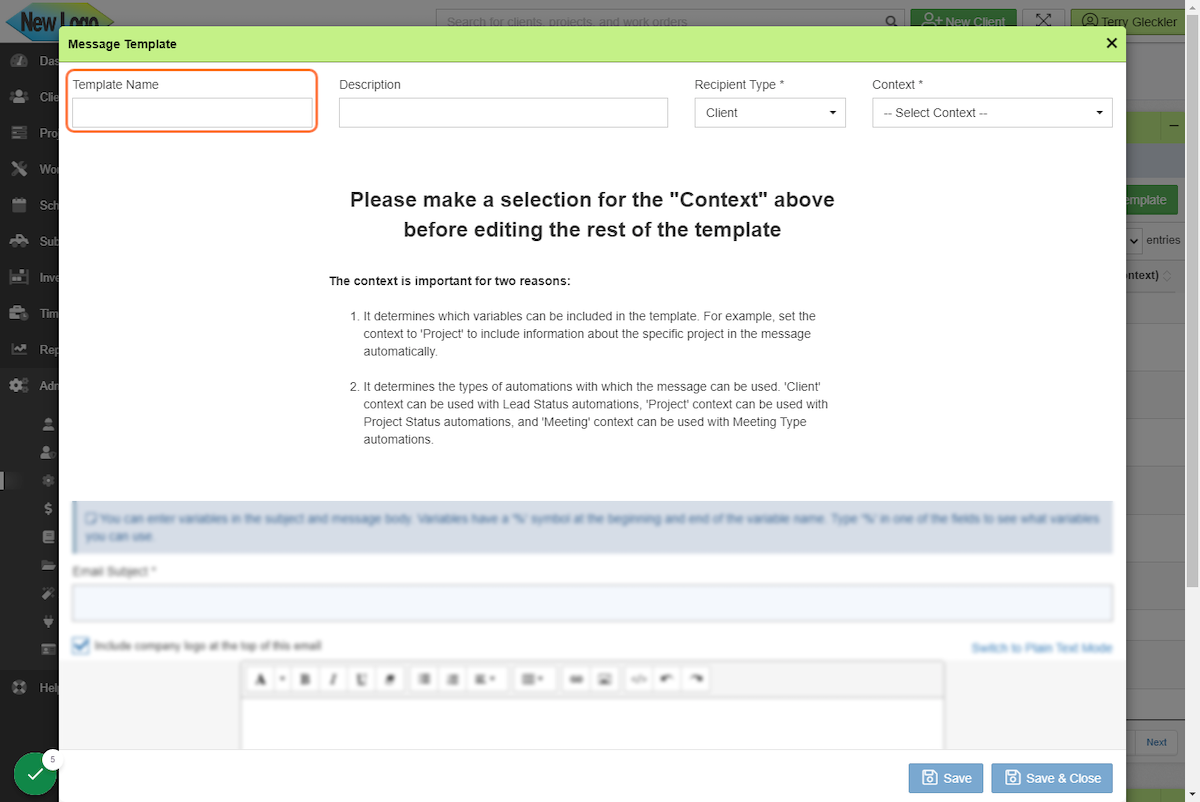
5. Name the Template
It's helpful to include the purpose of the template in either the name or the description. That way if edits need to be made, it'll be easy to find the template. If you are building a drip campaign, the best recommendation is to include a number so you know where the template falls in the sequence.
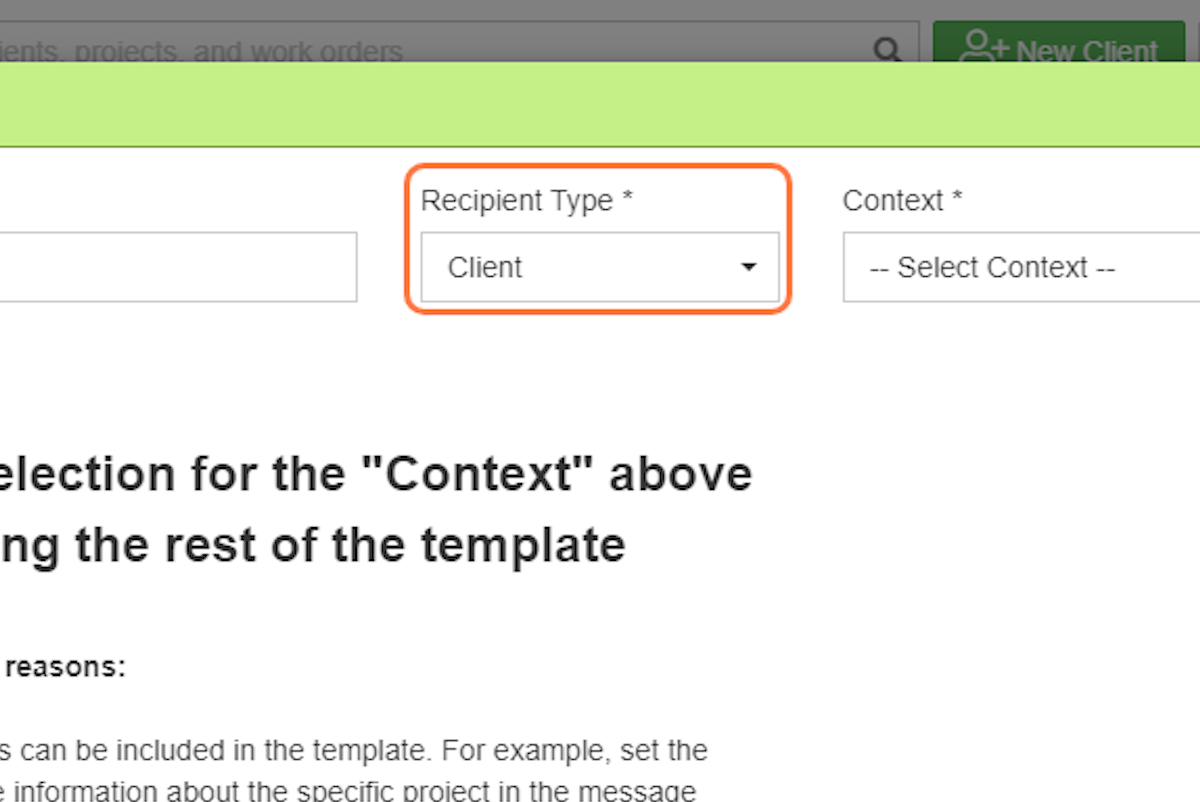
6. Choose a Recipient
Select who the email is intended for. The options are Client or an Employee.
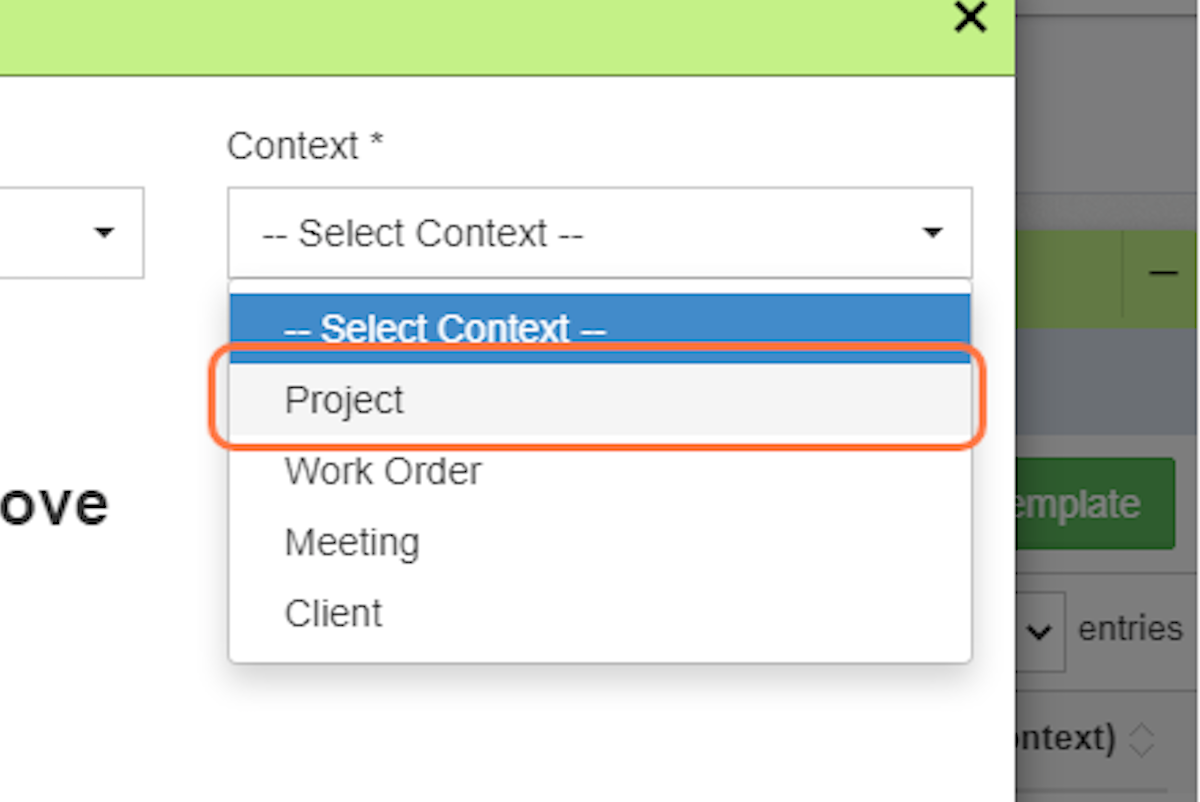
7. Select "Project" as the Context
Project will need to be chosen as the context if this is going to be added to a project status.
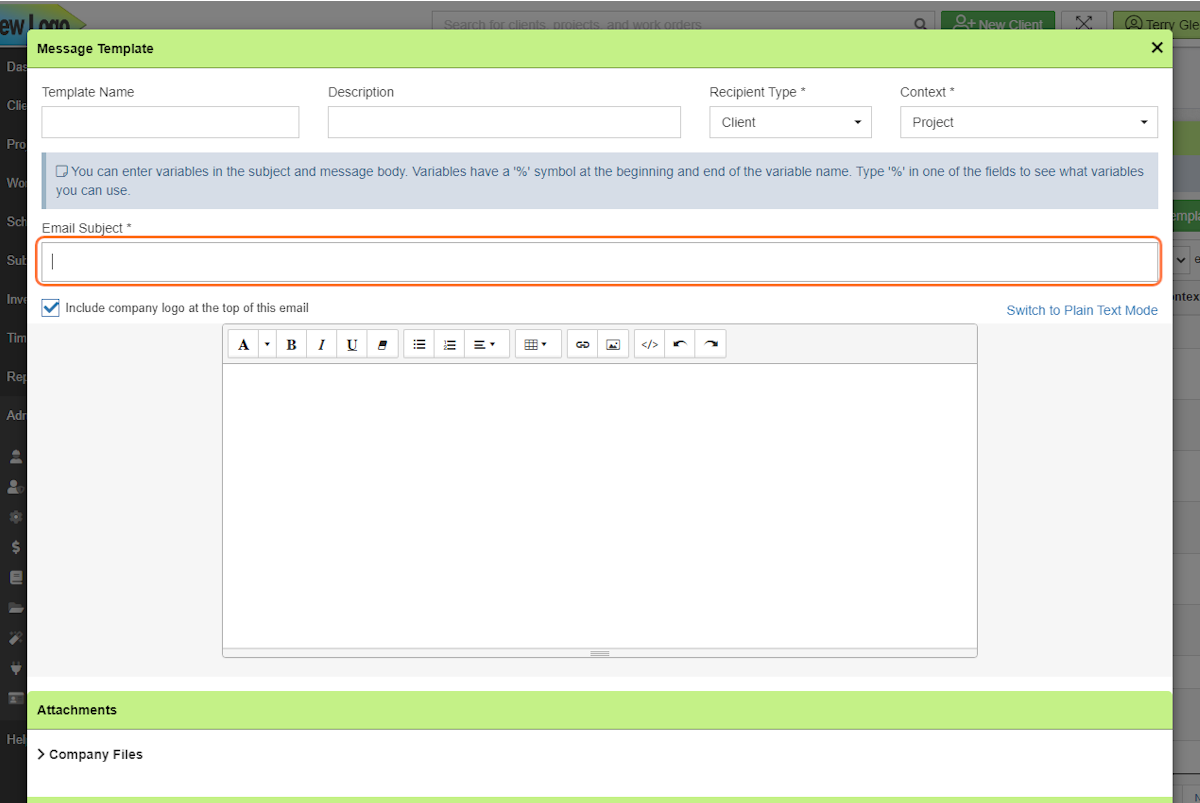
8. Add a Subject Line
You can include variables in the subject line, including the company name, client name, etc. To see the available variables, input a percentage sign (%) and scroll through the dropdown menu of available options.
9. Add Your Message
Fill in the text box with the email message and use the available formatting tools. You can also add images or attachments.
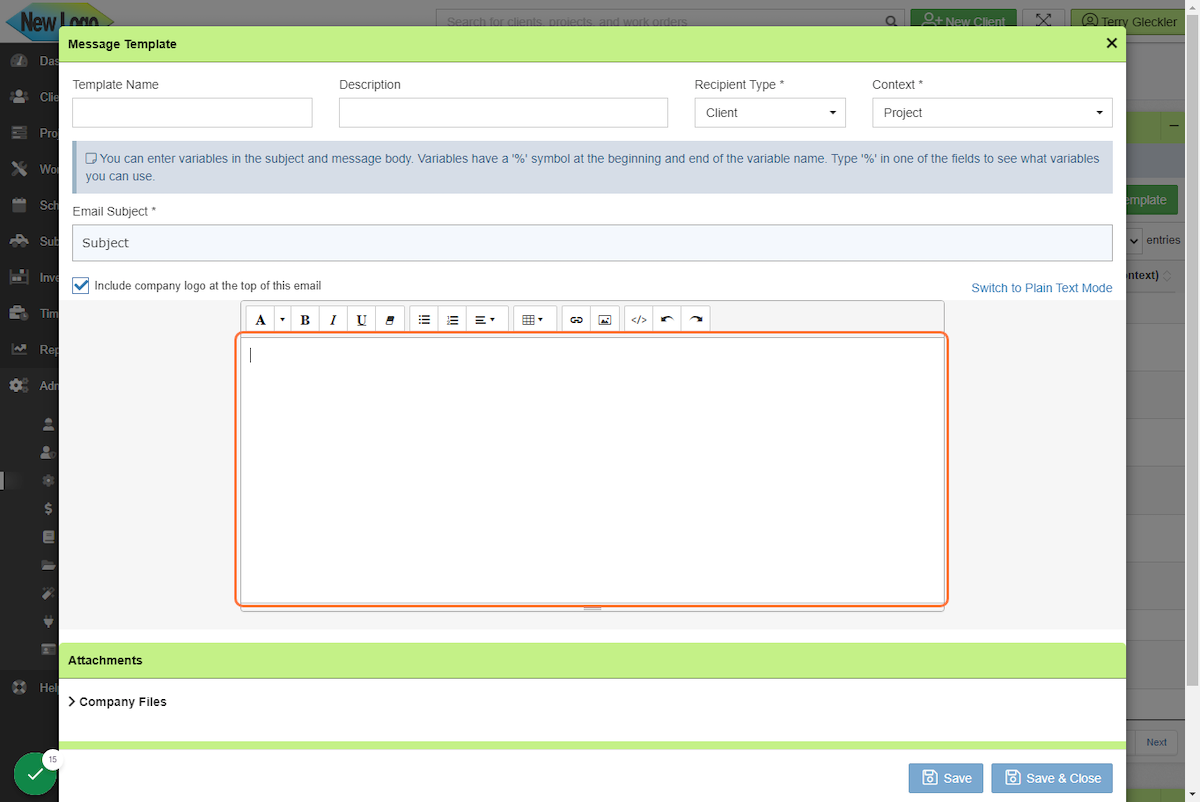
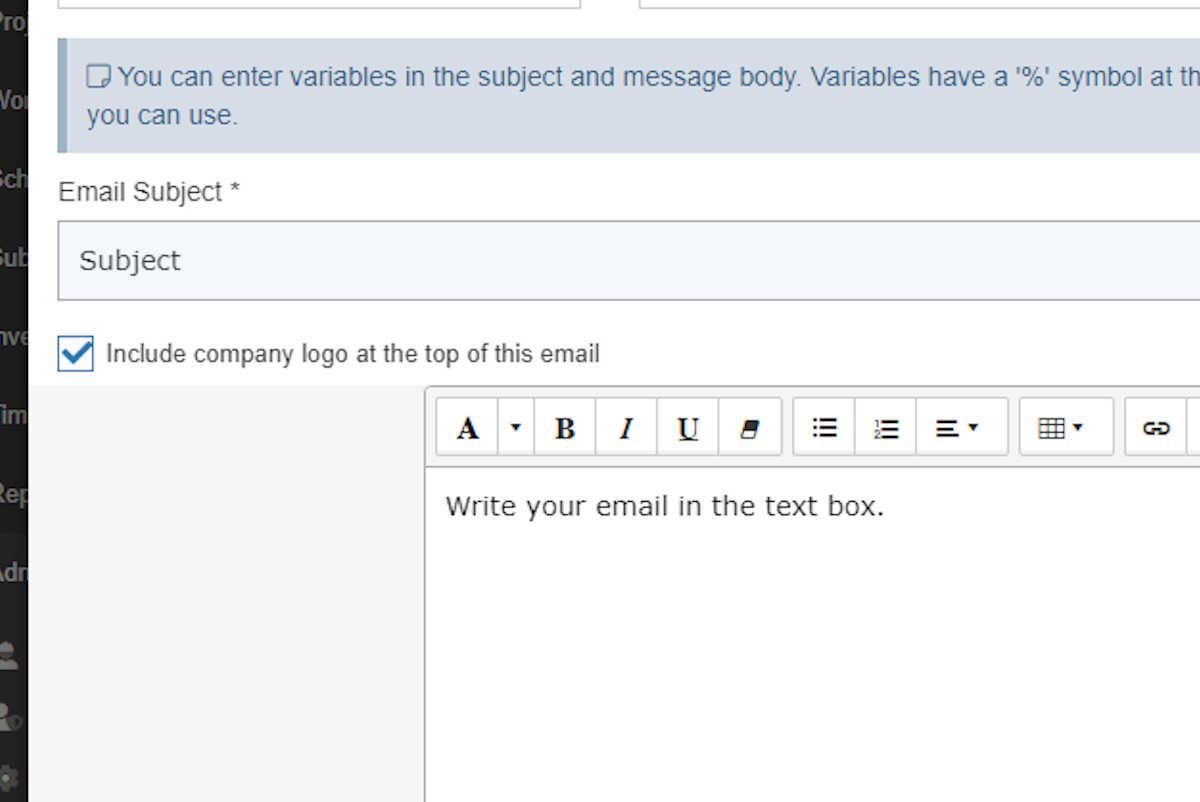
10. Check or Uncheck Include company logo at the top of this email
The company logo is optional to include in outgoing emails.
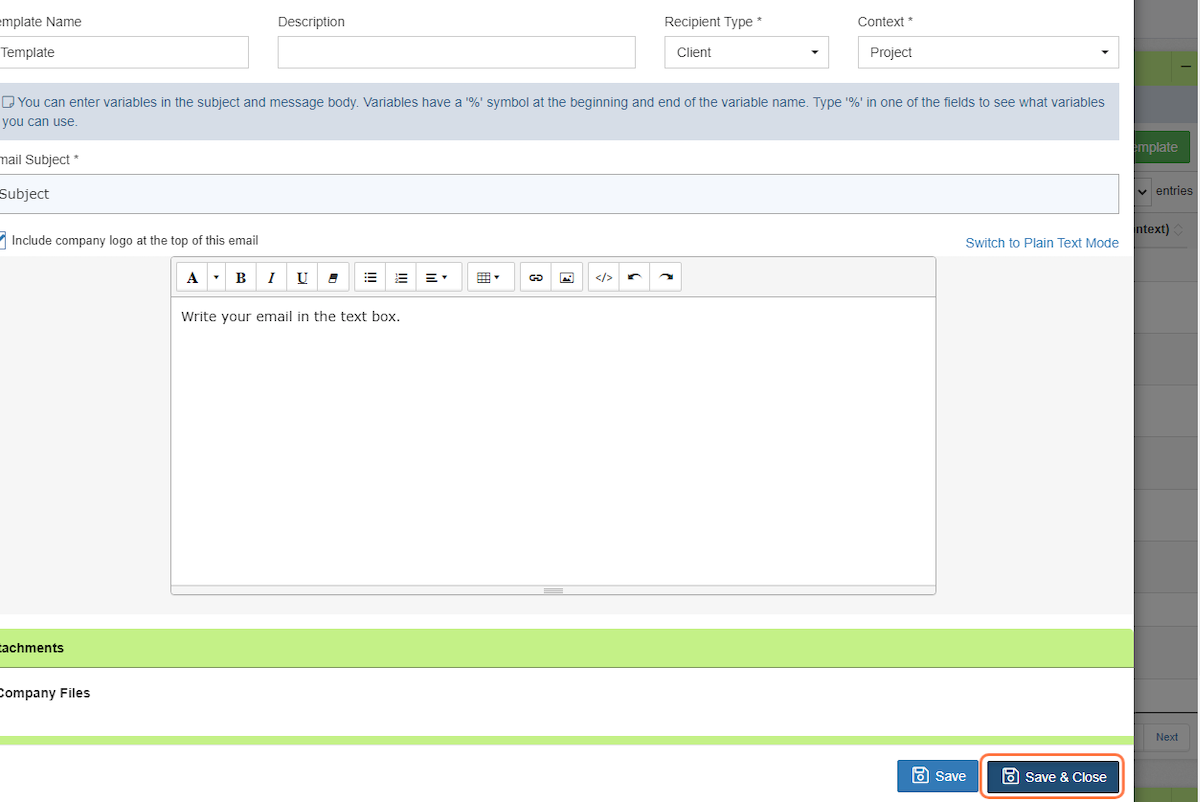
11. Click on Save & Close
Once you're happy with how the email or SMS looks, you can save it.
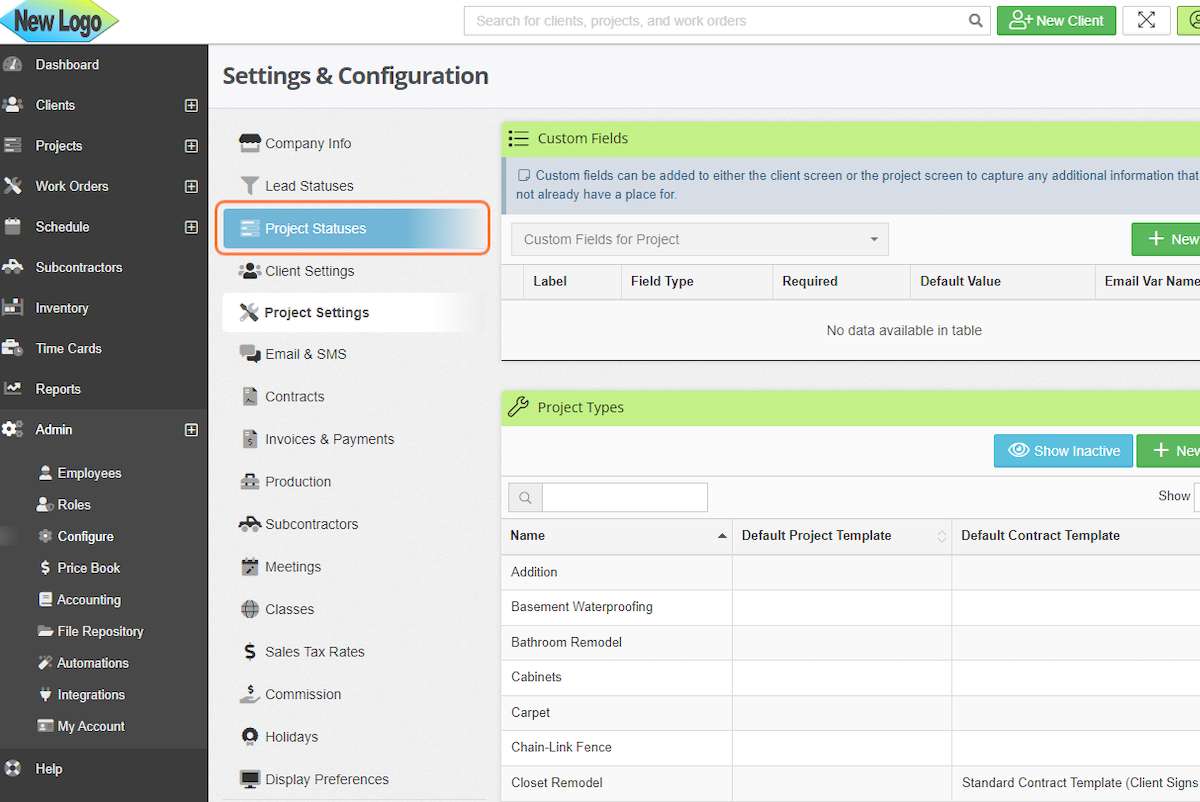
12. Navigate to Project Statuses
13. Select Status
Choose the status to add the automation to.
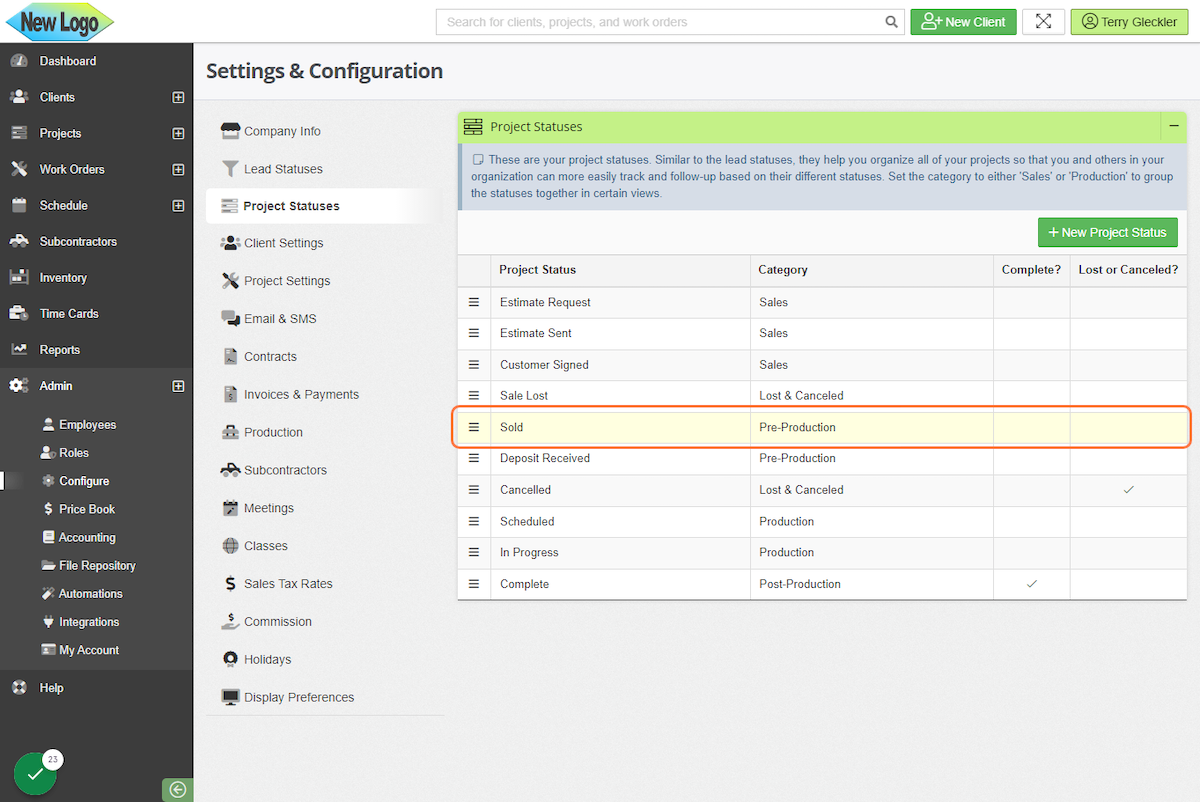
14. Click on + New Automation
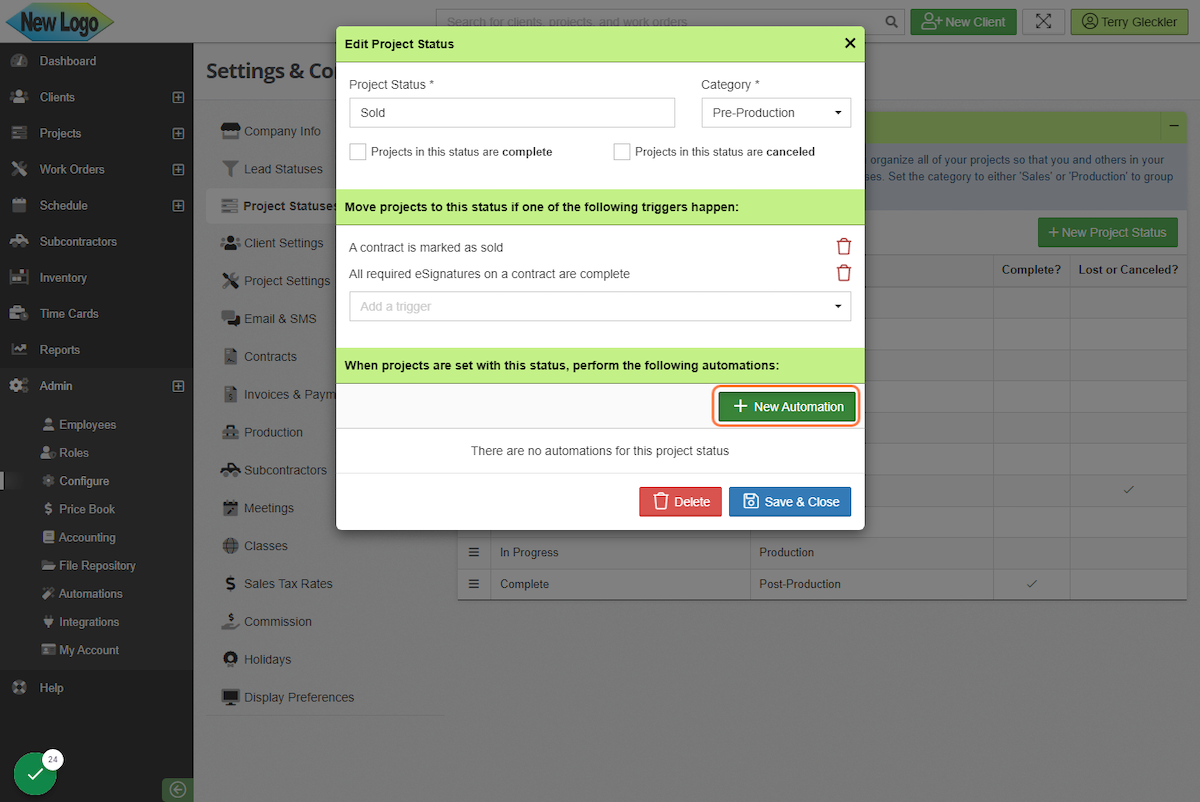
15. Select Action Type
Available options include:
-
Send Email
-
Send SMS
-
Add to Call Queue
-
Create To-Do
-
Send Webhook
-
Update Project Status
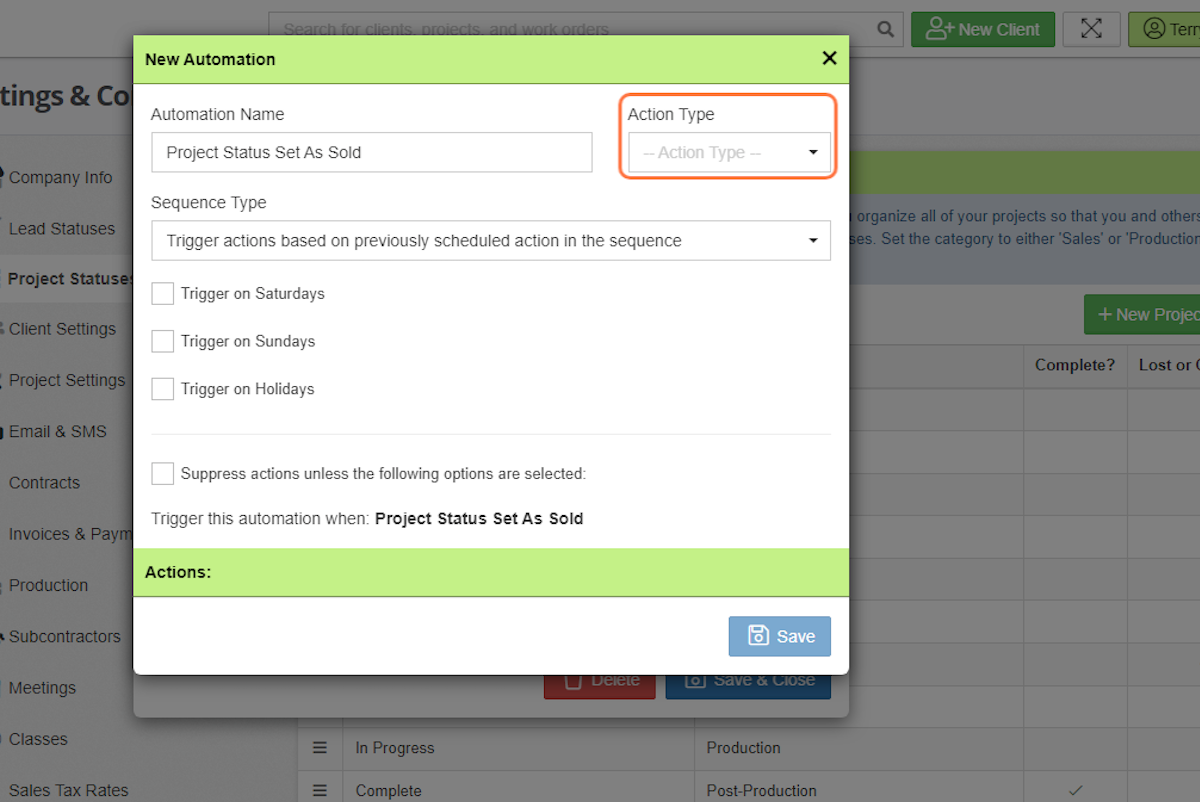
16. Set Sequence Type
There are 2 options for sequence type.
-
Option 1: Trigger actions based on previously scheduled action in the sequence
-
The timing is dependent on when the previous action occurs. For example, you can set one email to send after 1 day, and you can set a second email to send after 1 day. The second email will send 1 day after the first email has been sent.
-
-
Option 2: Trigger all actions based on sequence start time
-
Sequence start time is when the project has moved into the status. For example, you can set an email to send 1 day after the status change followed by an email set to send after 3 days the status changed.
-
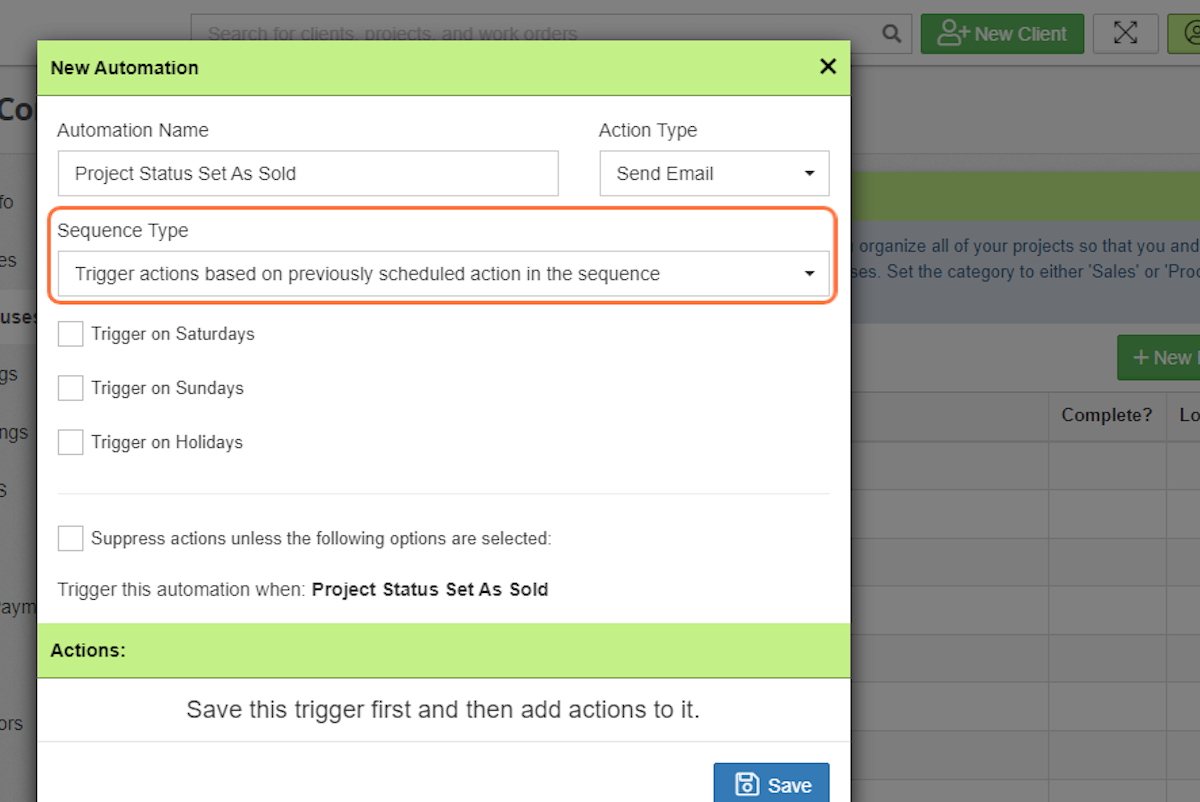
17. Select remaining preferences.
Determine if you want to send automations on weekends or holidays. If not triggered, the automation will send on the next business day.
Suppressing actions allows you to isolate automations to specific classes and project types.
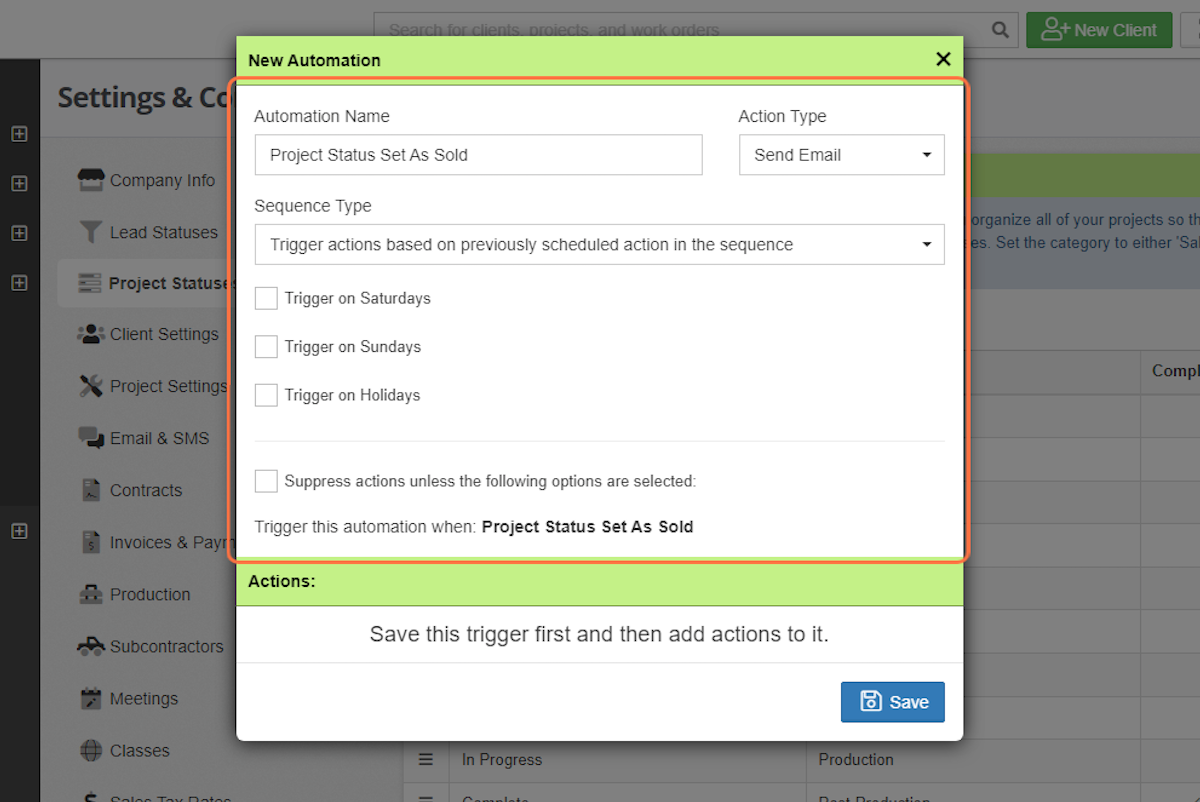
18. Click on Save
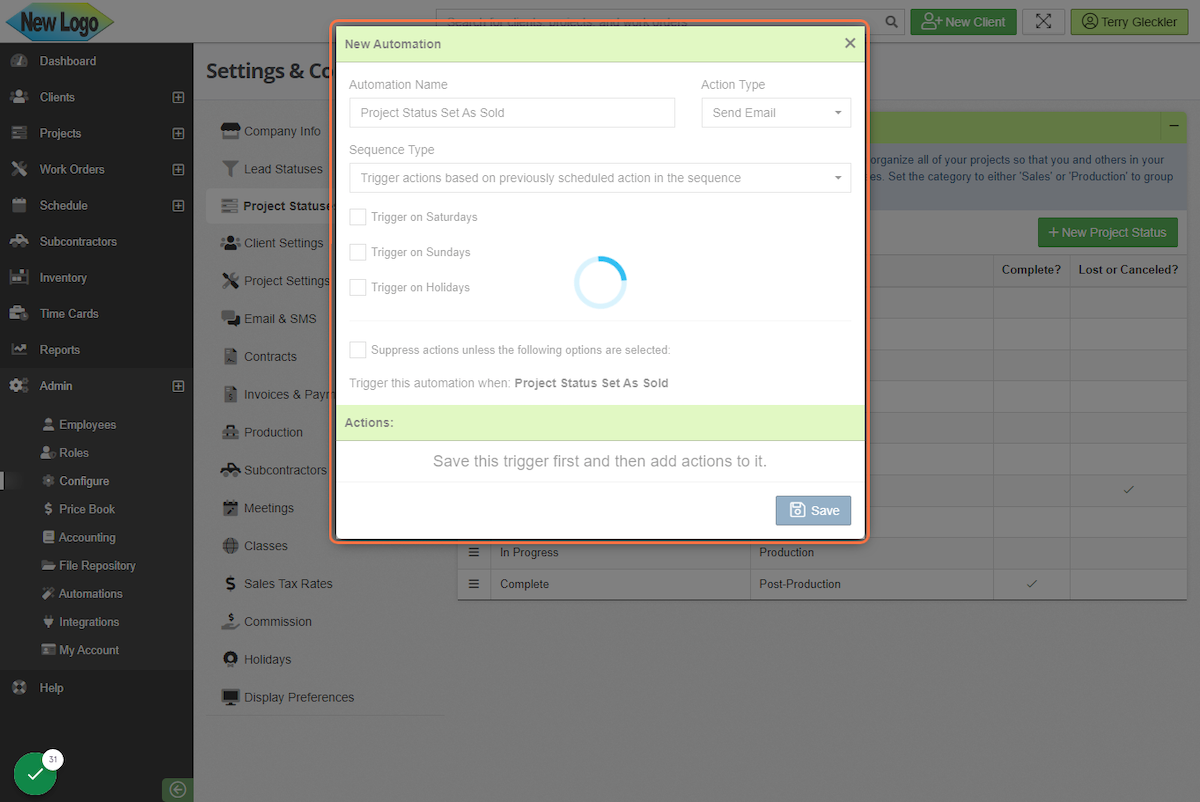
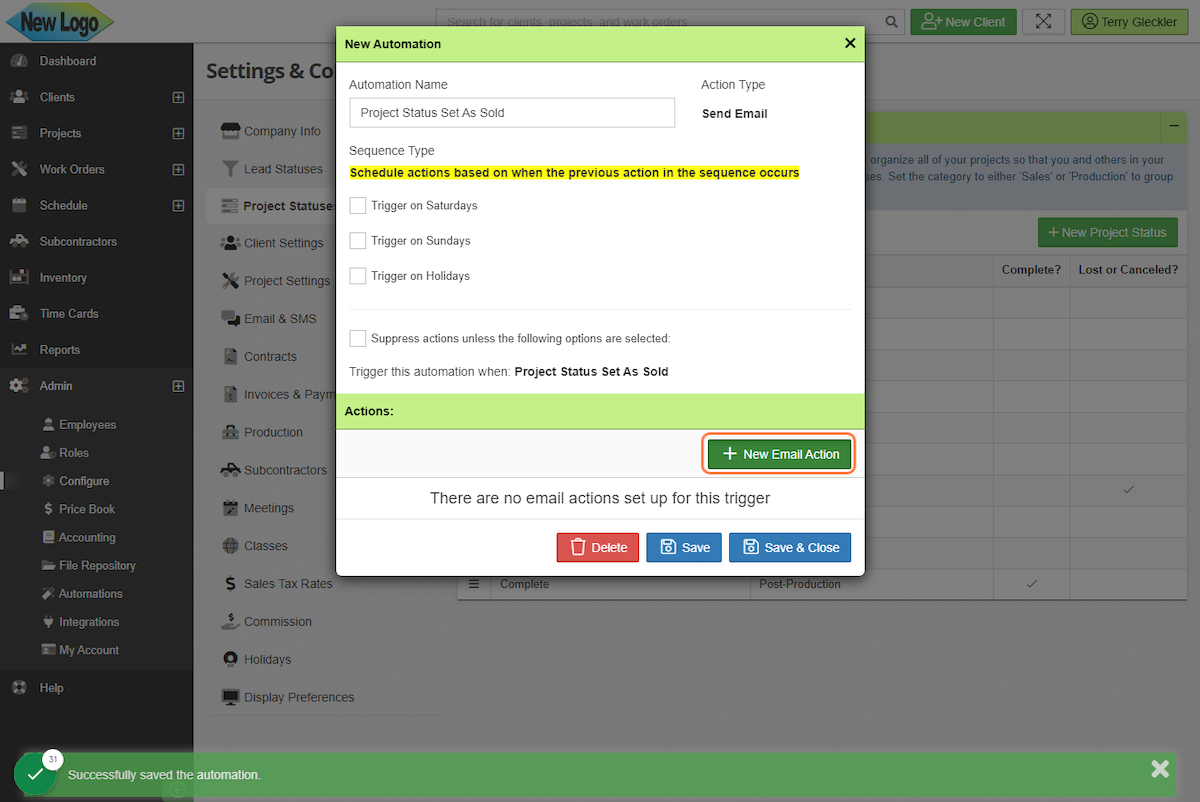
19. Click on + New Email Action
Now that the initial preferences are set for the automation, you can add the email template.
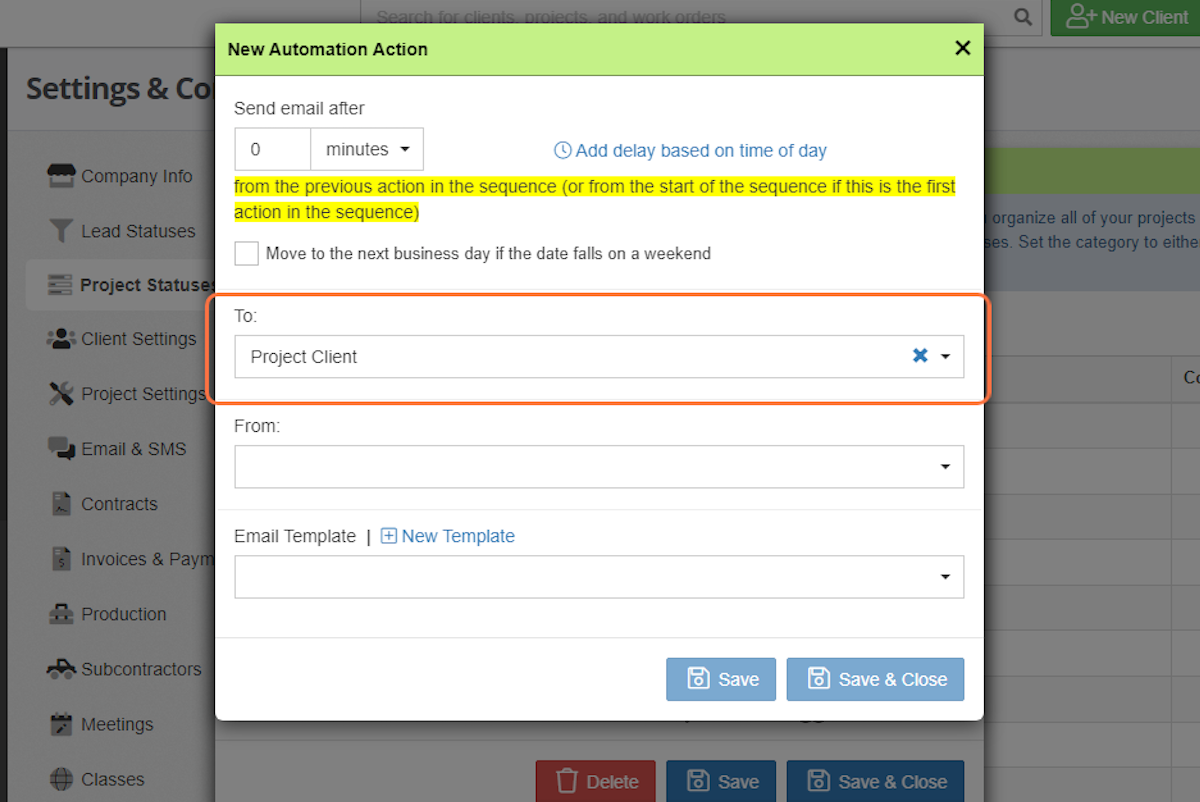
20. Select Recipient and Sender
Choose who should receive the email and who the email should come from.
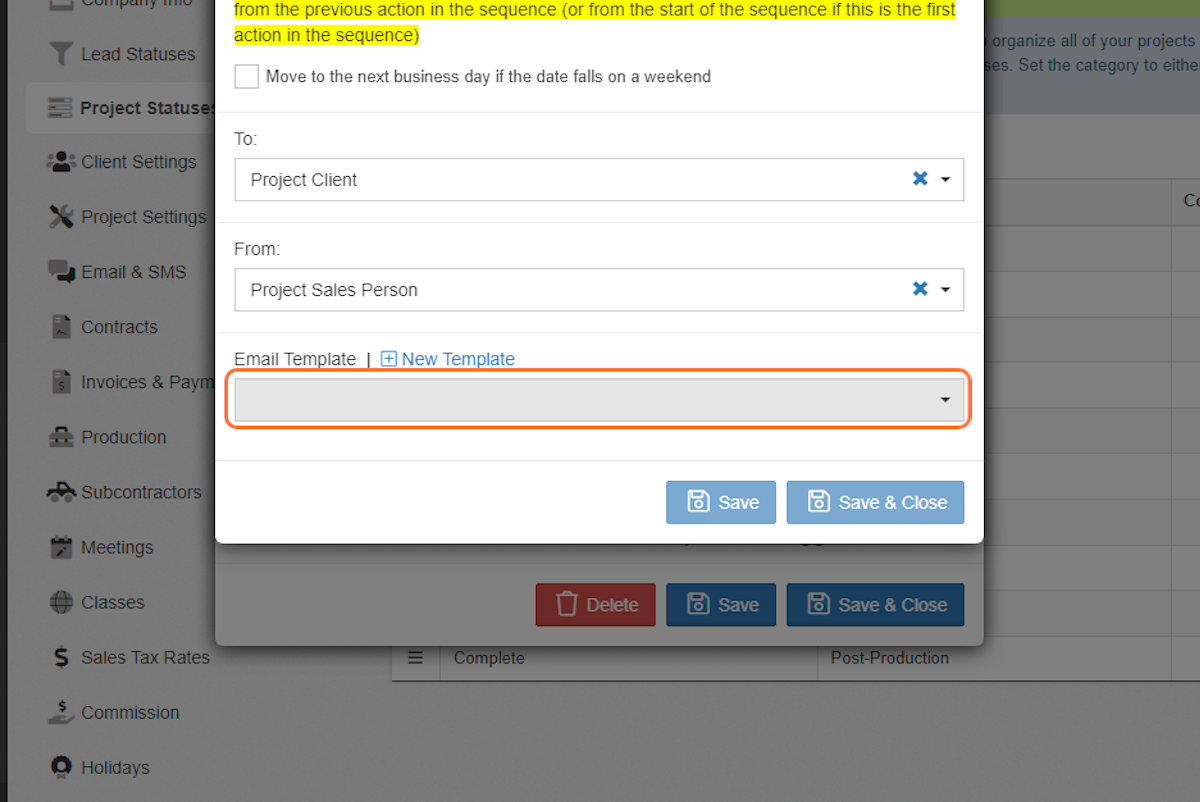
21. Choose the Template
Select the desired template from the dropdown menu or create a new template.
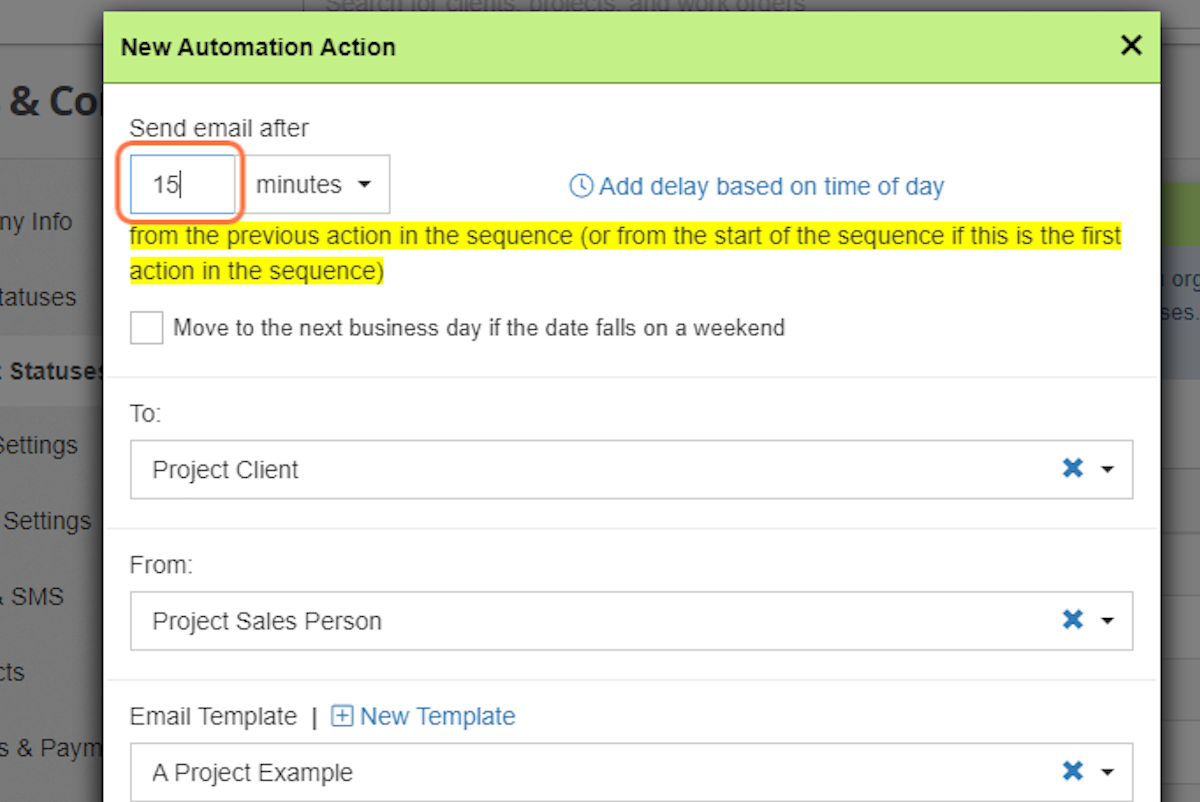
22. Choose when to send the email
Depending on your setting, which will be highlighted in yellow, the timing can be either after the project changes to the status or after the previous action in the sequence.
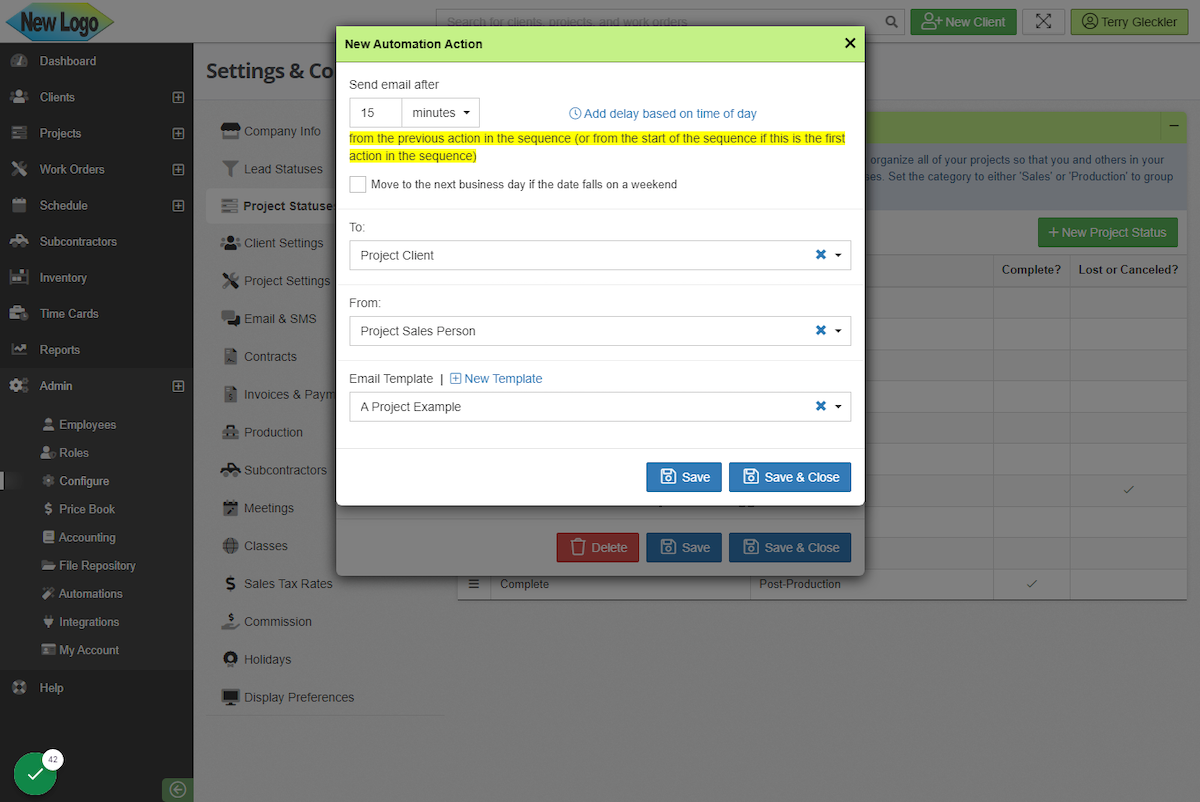
23. Click Save & Close
Save and close each window until you return to the project status page.
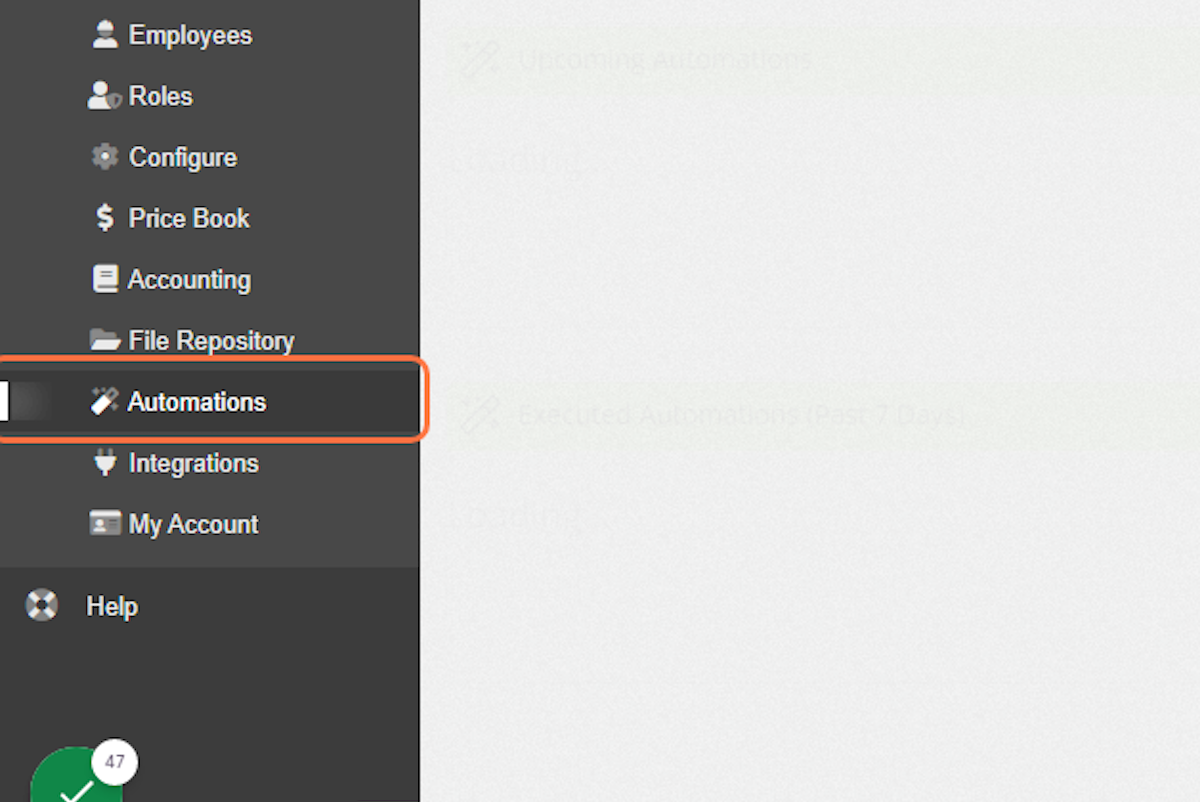
24. Click on Automations
If you want to review your existing automations or verify they are working, you can always navigate to Admin > Automations.
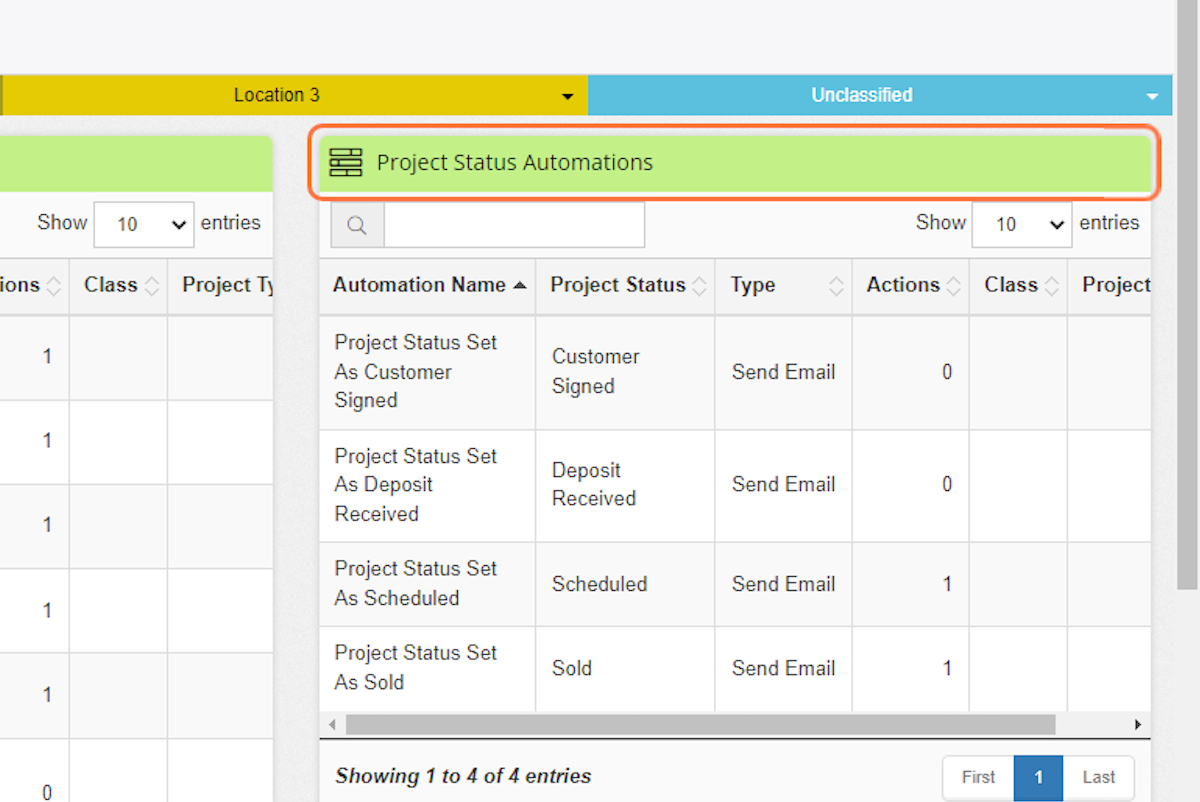
25. Review Project Status Automations
From here, you can see which automations are set up as well as the project status they are attached to.
26. Cancel an Automation
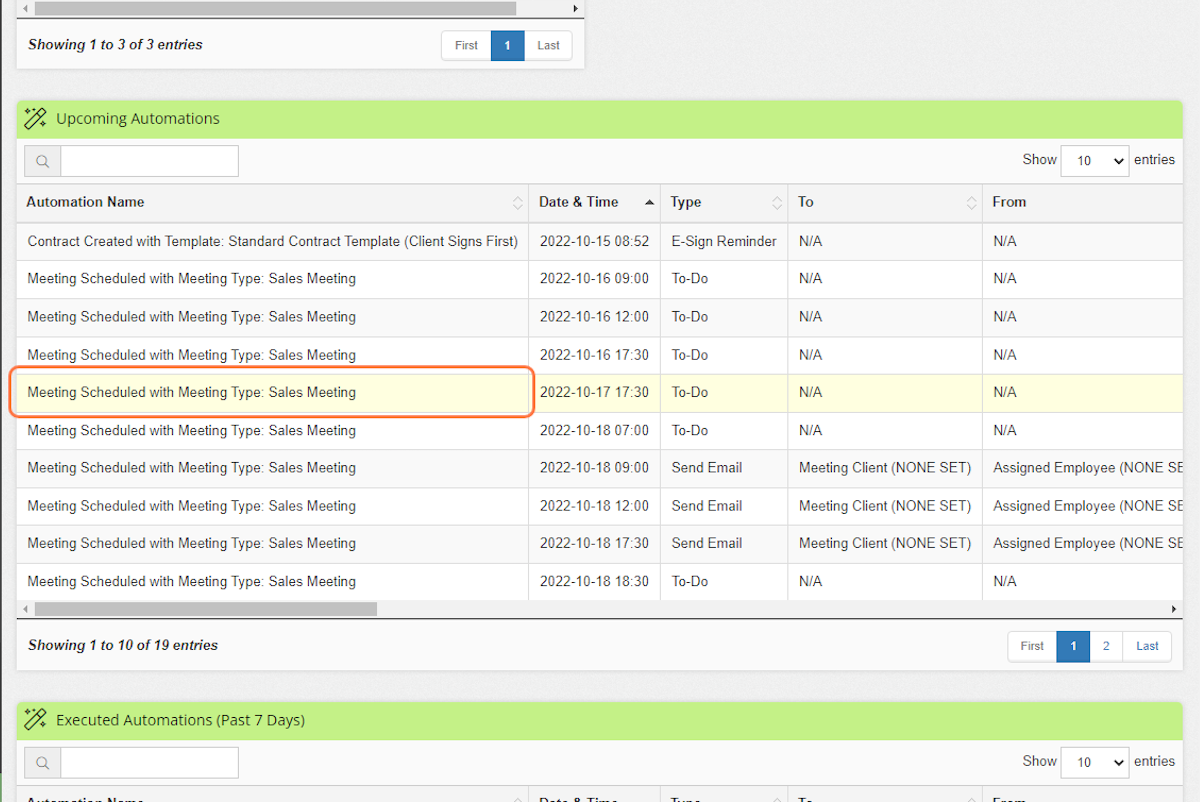
If you want to prevent an automation from sending to a specific client, you can review Upcoming Automations. Search for the client in the search box and click to open the automation window.
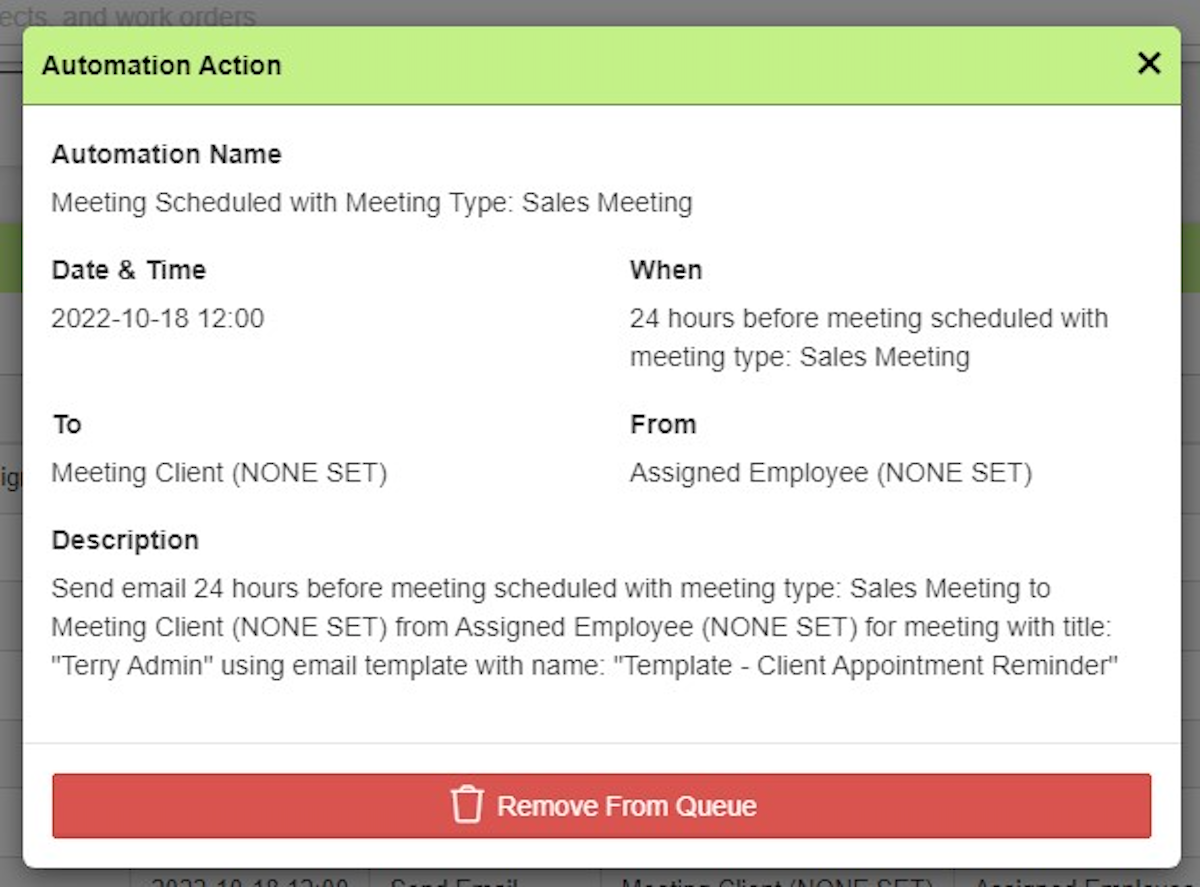
27. Click on Remove From Queue
This will prevent the automation from sending.
Custom Automations are available starting with the Essentials plan. If you're interested in upgrading your current subscription, click HERE to learn how to upgrade your account.
-1.png?width=100&height=75&name=original-tar-ruler%20(1)-1.png)